
Introduction to Pierogi and Kielbasa Skillet
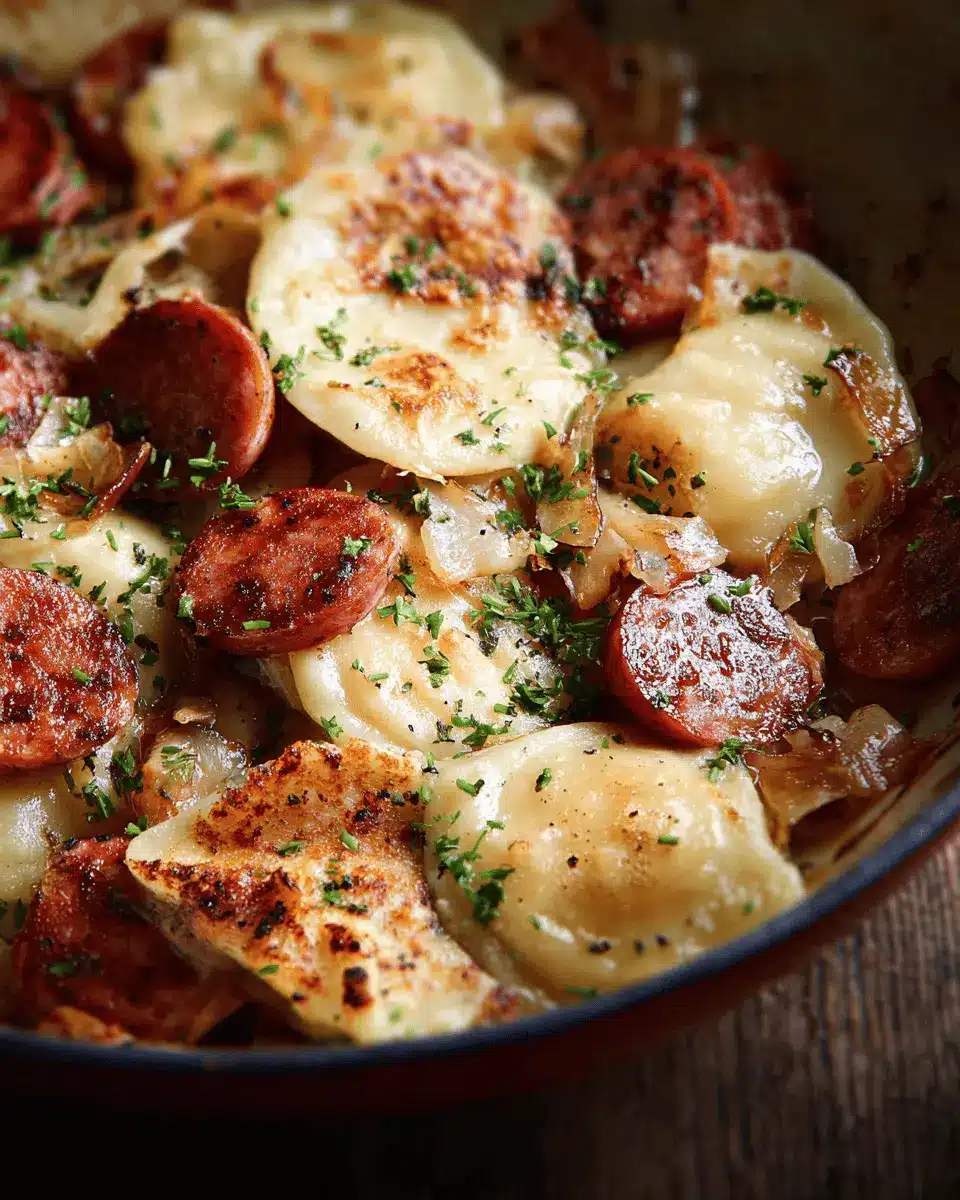
If you haven't tried a Pierogi and Kielbasa Skillet, you're truly missing out! This dish tantalizes your taste buds with a delightful blend of flavors and textures. Imagine perfectly boiled pierogi filled with creamy cheese and potatoes, sizzling alongside robust kielbasa and sweet, caramelized onions. It’s a comfort-food experience that brings a unique Polish twist to your dinner table.
What makes Pierogi and Kielbasa Skillet a must-try dish? First, it’s incredibly easy to whip up after a long day at work, making it a go-to for busy young professionals like yourself. Plus, it's a meal that's completely satisfying, combining protein, savory carbohydrates, and healthy fats in one pan. You won’t even need to break out multiple pots and pans, which means less cleanup—bonus!
The versatility of this dish is another advantage. Whether you're catering to picky eaters or impressing guests, the pierogi and kielbasa skillet can easily be adapted. Add your favorite vegetables for extra nutrition or top with freshly chopped chives for a burst of freshness. Want to dive deeper into Polish cuisine? Check out articles on the origins of pierogi or the importance of kielbasa in Polish culture at reputable sources like PolishCulture.gov or The Spruce Eats.
Get ready to savor an unforgettable culinary journey right at home!

Ingredients for Pierogi and Kielbasa Skillet
Essential ingredients for a hearty meal
Creating a delicious pierogi and kielbasa skillet starts with a few key ingredients that come together beautifully. Here’s what you’ll need:
- 2 pounds pierogi: Opt for cheese and potato filling for that classic flavor.
- 3 tablespoon unsalted butter: This will help achieve that golden hue and add richness.
- 1 tablespoon olive oil: Perfect for sautéing without a greasy residue.
- 1.8 pounds kielbasa: Look for quality sausages for that authentic taste.
- 2 medium onions: Thinly sliced to bring out their sweetness as they caramelize.
- 2 tablespoon chopped chives: These will add a fresh brightness to your dish.
- Freshly ground black pepper: Essential for seasoning.
Optional ingredients to customize your skillet
Want to add your personal touch? Consider these optional ingredients:
- Bell peppers: Sautéed with onions for a colorful crunch.
- Mushrooms: For an earthy flavor, they pair wonderfully with the other ingredients.
- Spinach: A handful added at the end can provide a nice nutritional boost.
Feel free to explore variations that suit your taste preferences, enhancing your pierogi and kielbasa skillet with ingredients you love!
Step-by-step Preparation of Pierogi and Kielbasa Skillet
Cooking can be both an art and a wonderful way to unwind after a long day, particularly when it involves delicious comfort food like pierogi and kielbasa skillet. Let's dive into the steps to create this satisfying dish.
Boiling the pierogi
Start by bringing a large pot filled with salted water to a rolling boil. The salt not only flavors the pierogi but also enhances their texture. Once boiling, gently add your pierogi—you’ll want about 2 pounds of those delightful dough pockets filled with cheese and potatoes. Let them cook for about 3 minutes, or until they float to the surface, indicating they're done. Afterward, drain them well and give them a quick rinse under cold water to stop the cooking process. This simple step helps keep them from getting too sticky later on.
Preparing the kielbasa and onions
While the pierogi are boiling, take a moment to prepare your kielbasa and onions. Slice about 1.8 pounds of your favorite kielbasa into bite-sized pieces. If you’re looking for more flavor, check out this guide on sausage basics to choose the best variety for your palate. Next, thinly slice two medium onions. Trust me: these caramelized goodies will elevate your dish to a whole new level of deliciousness!
Cooking the ingredients together
Heat a large skillet over medium-high heat and add 1 tablespoon of olive oil along with 1 tablespoon of unsalted butter. Once the butter has melted and starts to bubble, add the sliced kielbasa to the skillet. Sauté for around 5-7 minutes, or until the pieces are golden brown and crisp. This is where the magic begins! Remove the kielbasa from the skillet and set it aside.
Bringing it all together in the skillet
In the same skillet, add the remaining tablespoon of butter and reduce the heat to medium. Toss in your sliced onions and sauté them until they're soft and translucent, about 3 minutes. Now, it’s time to bring everything together! Add the boiled pierogi into the skillet and cook for another 2 minutes, stirring gently. Finally, stir in your golden kielbasa—combine all the flavors to create a heavenly dish!
Final touches and plating
To finish, sprinkle some freshly chopped chives over your pierogi and kielbasa skillet for a burst of color and flavor. A touch of freshly ground black pepper can really elevate the taste, so don't hold back! Serve hot, and watch your friends and family dig into this comforting meal with delight.
The joy of cooking, especially comfort food like this, lies not only in the delicious result but in the moments of togetherness it inspires. Enjoy every flavorful bite!

Variations on Pierogi and Kielbasa Skillet
Vegetarian Versions with Plant-Based Sausages
For a delightful twist on the pierogi and kielbasa skillet, consider swapping traditional kielbasa for plant-based sausages. These alternatives maintain the savory flavor while catering to vegetarian diets. Brands like Beyond Meat or Field Roast offer great choices that grill up beautifully and are high in protein. Don’t hesitate to mix in sautéed mushrooms or fresh spinach for extra nutrients!
Creative Toppings and Seasonings for Added Flair
Elevate your pierogi and kielbasa skillet with some creative toppings! A dollop of sour cream or a sprinkle of feta cheese can add creaminess. If you're feeling adventurous, try incorporating a drizzle of balsamic reduction or a sprinkle of smoked paprika. Fresh herbs like dill or parsley can brighten the dish and enhance its flavor profile. Experimenting with toppings can turn a classic meal into your new favorite comfort food!
For more recipe ideas, check out BBC Good Food or Serious Eats for inspiration!
Cooking Tips and Notes for Pierogi and Kielbasa Skillet
How to ensure perfect texture
To achieve that delightful texture in your pierogi and kielbasa skillet, start by cooking your pierogi in well-salted water; this enhances their flavor. Be careful not to overcook them—just three minutes should suffice. When sautéing, seek a balance between golden-brown kielbasa and tender yet slightly crispy pierogi.
Tips for meal prep and storage
Meal prepping makes life easier! You can cook the pierogi ahead of time, then store them in the fridge for up to three days. For longer storage, freeze them uncooked. Just make sure to layer them between parchment paper to avoid sticking. When you want a quick meal, just toss them directly into your skillet from the freezer! For more tips, check out resources like Serious Eats for nuanced cooking advice.
Serving Suggestions for Pierogi and Kielbasa Skillet
Accompaniments that enhance the dish
To elevate your pierogi and kielbasa skillet, consider serving it with a side of tangy sauerkraut or a light cucumber salad. These fresh options provide a delightful contrast to the rich flavors of the dish. You might also enjoy a dollop of sour cream or a sprinkle of fresh dill for an extra layer of zest. For a hearty twist, pair it with roasted vegetables or a crisp coleslaw to balance the meal.
Ideal serving size and presentation ideas
This delightful skillet serves about 4–6 people, making it perfect for a cozy dinner or casual gathering. For an eye-catching presentation, serve the pierogi and kielbasa skillet in a large cast-iron pan, allowing guests to serve themselves family-style. Garnish with chopped chives and a side of fresh lemon wedges, inviting everyone to customize their portion while enjoying this comforting dish. Want to impress? Add a sprinkle of paprika for extra color!
For more serving inspiration, check out the everything about pierogi guide, where you'll find tips and serving ideas to complement this delicious dish.
Time Breakdown for Pierogi and Kielbasa Skillet
Preparation Time
Getting everything ready takes about 10 minutes. This includes slicing the kielbasa, chopping onions, and gathering your ingredients. It’s a breeze and a great chance to enjoy some music or catch up on a podcast!
Cooking Time
The cooking process will take around 15 minutes. You'll have those delightful pierogi simmering and the kielbasa sizzling before you know it, making your kitchen smell amazing.
Total Time
In less than 25 minutes, you’ll have a delicious pierogi and kielbasa skillet ready to serve! Perfect for a quick weeknight meal or a cozy weekend dinner with friends.
When you whip up this dish, remember that meal prep can often turn into an enjoyable culinary adventure. For tips on quick meal prep, check out The Kitchn or Serious Eats. Happy cooking!
Nutritional Facts for Pierogi and Kielbasa Skillet
When whipping up a delicious pierogi and kielbasa skillet, it’s important to know what you’re putting on your plate. Here’s a quick breakdown of the nutritional facts:
Calories
This hearty dish packs in approximately 772 calories per serving, making it a satisfying option for a filling dinner.
Protein
You'll find this meal is rich in 29 grams of protein, thanks to the kielbasa and pierogi, helping to fuel your active lifestyle.
Sodium
Keep in mind, however, that the sodium content is on the higher side, clocking in at 1789 mg. For those managing sodium intake, consider reducing added salt while cooking.
For more insights on healthy eating, check out sources like the USDA FoodData Central to explore further nutritional information. Enjoy your cooking and dining experience with this tasty skillet!
FAQs about Pierogi and Kielbasa Skillet
Can I make this dish ahead of time?
Absolutely! Preparing your pierogi and kielbasa skillet in advance can save you time during busy weekdays. Cook the dish as directed, then let it cool completely before storing it in an airtight container in the refrigerator. It should be good for up to 3 days. For the best flavor, consider sautéing the ingredients just before serving.
What's the best way to reheat leftovers?
To reheat your leftovers, a skillet is your best friend. Just add a splash of water and gently warm it on low heat until heated through. This method helps maintain the textures of the pierogi and kielbasa. Alternatively, a microwave works too; just cover the dish to retain moisture.
Are there healthy alternatives to the ingredients?
If you're looking to lighten up your pierogi and kielbasa skillet, consider using chicken kielbasa instead of traditional varieties. You can also swap regular butter for a healthier olive oil or avocado oil. For a plant-based twist, try chickpea pierogi filled with vegetables for a delightful alternative.
Conclusion on Pierogi and Kielbasa Skillet
The pierogi and kielbasa skillet is not just a dish; it's a heartwarming meal that brings people together. With its rich flavors and comforting textures, it's perfect for any occasion. Give it a try, and you're sure to create a new family favorite. Enjoy every delicious bite!

Pierogi and Kielbasa Skillet
Equipment
- Large pot
- Large skillet
Ingredients
- 2 pounds pierogi - cheese and potato filling
- 3 tablespoon unsalted butter - divided
- 1 tablespoon olive oil
- 1.8 pounds kielbasa
- 2 medium onions - sliced
- 2 tablespoon chopped chives - for topping
- freshly ground black pepper - for topping
- salt - to boil pierogi
Instructions
- Bring a large pot filled with salted water to a boil.
- In the meantime, get your prep done. Slice the kielbasa sausages. Slice the onions and chop the chives.
- Add pierogi to the pot with boiling water, cook for 3 minutes. When ready, drain and run briefly under cold water.
- Heat oil and 1 tablespoon butter over medium high in a large skillet, add kielbasa and cook until golden brown. Remove from skillet.
- Add the remaining butter and reduce heat to medium. Add onions and sauté for 3 minutes, or until soft and translucent.
- Add pierogi, cook for 2 minutes. Finally, stir in kielbasa.
- Top with chives and freshly ground black pepper.


Leave a Reply