
Introduction to Onigiri Japanese Rice Balls
Why Onigiri? The Perfect Solution for Homemade Meals
Have you ever found yourself craving a quick yet satisfying meal that packs a punch of flavor? Enter Onigiri Japanese Rice Balls! These delightful morsels are not just a snack; they represent a portable and nutritious meal option that can be customized to fit your taste buds.
Onigiri is traditionally made with Japanese short-grain rice, which has a unique sticky texture that holds its shape beautifully. Whether you're in need of a healthy lunch, a picnic treat, or a simple dinner idea, these rice balls are incredibly versatile. You can fill them with a variety of ingredients like salmon, tuna, or even vegetables, making them suitable for any palate.
One of the best parts? You can prepare several onigiri in advance and store them for later. They are perfect for meal prep! With the option to wrap them in crispy nori seaweed or coat them in furikake (a tasty rice seasoning), each bite is a little explosion of flavors and textures. For more about the versatility of onigiri, check out this detailed guide from Just One Cookbook.
So why not give onigiri a try? You’ll not only impress your friends but also have a fun, hands-on cooking experience!
Ingredients for Onigiri Japanese Rice Balls
Essential Base Ingredients
To create delicious Onigiri Japanese Rice Balls, start with the essential ingredients:
- Japanese short-grain white rice: This rice is crucial for achieving that perfect sticky texture that holds the onigiri together. You’ll need about 2¼ cups uncooked rice.
- Water: To cook the rice, 2½ cups of water will do the trick.
Cooking the rice to perfection is key! Rinse it thoroughly to remove excess starch, which helps create a better texture.
Filling Options: A Flavorful Adventure
The real fun begins with the fillings! Here are some delightful options to mix and match:
- Japanese Salted Salmon: A quick option that’s both savory and satisfying.
- Okaka: Made with katsuobushi (dried bonito flakes) and soy sauce for a umami kick.
- Tuna Mayo: A creamy blend using albacore tuna and Japanese Kewpie mayonnaise, perfect for those who love a rich taste.
- Explore other fillings like umeboshi (pickled plum) or mentaiko (spicy cod roe) to embark on a flavorful adventure.
Wrapping and Seasoning Essentials
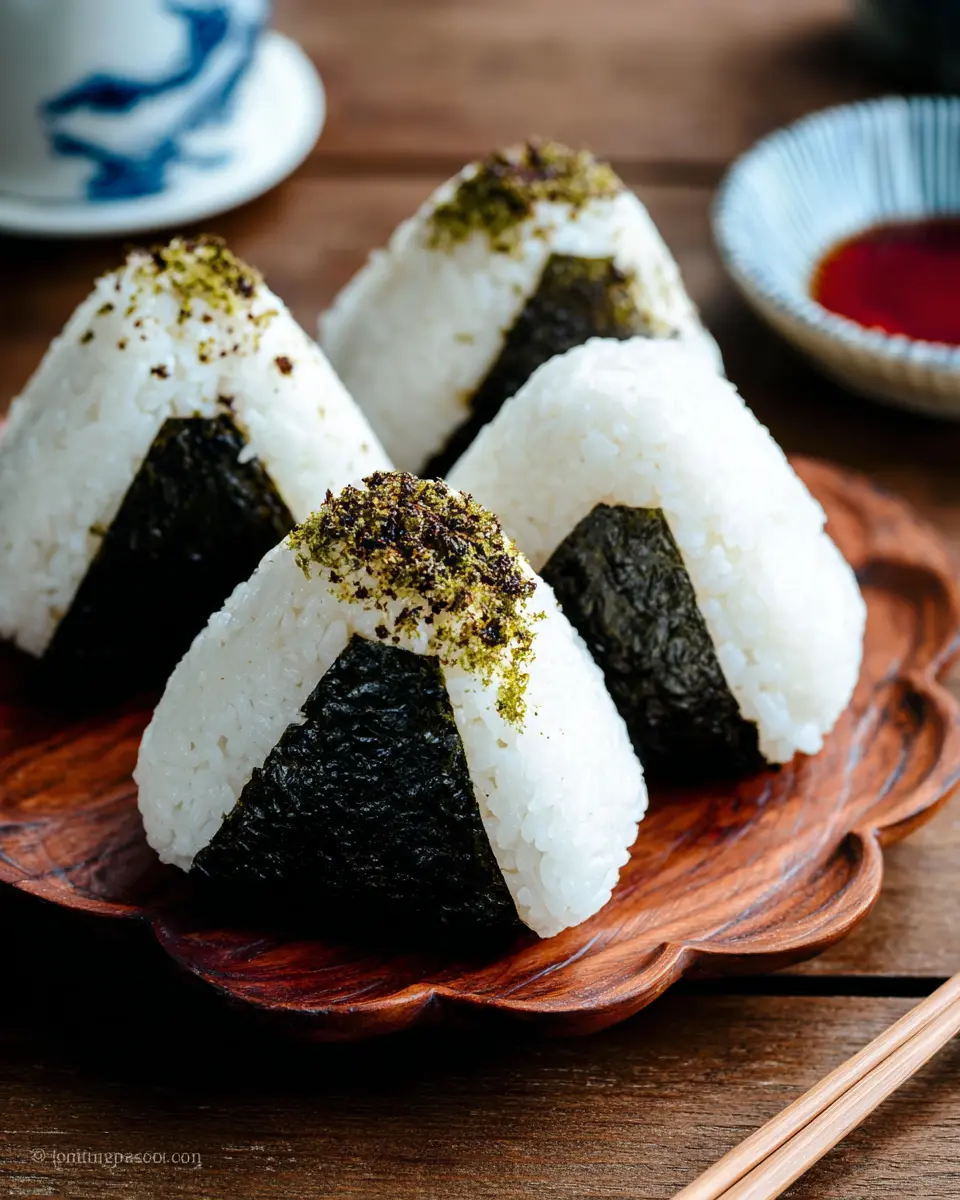
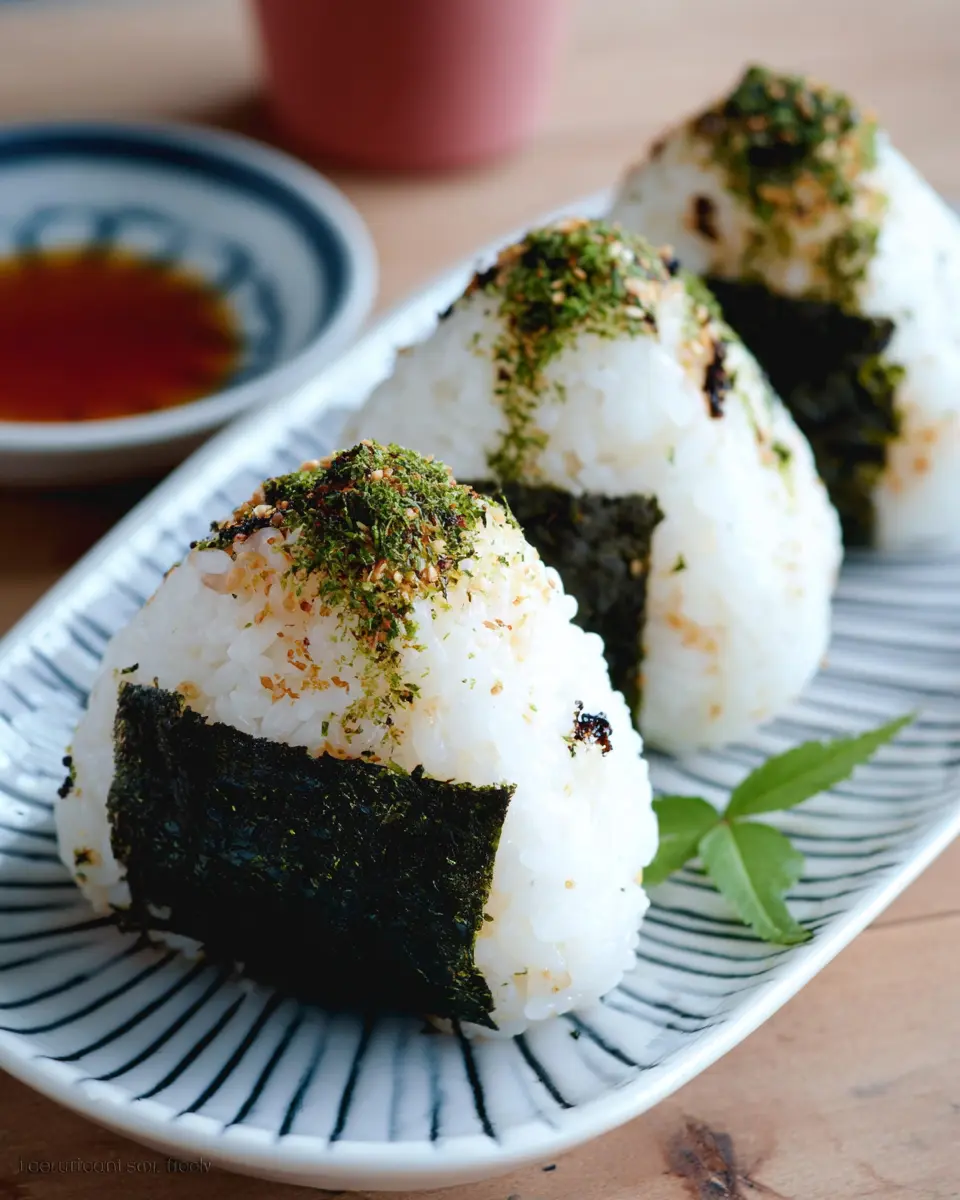
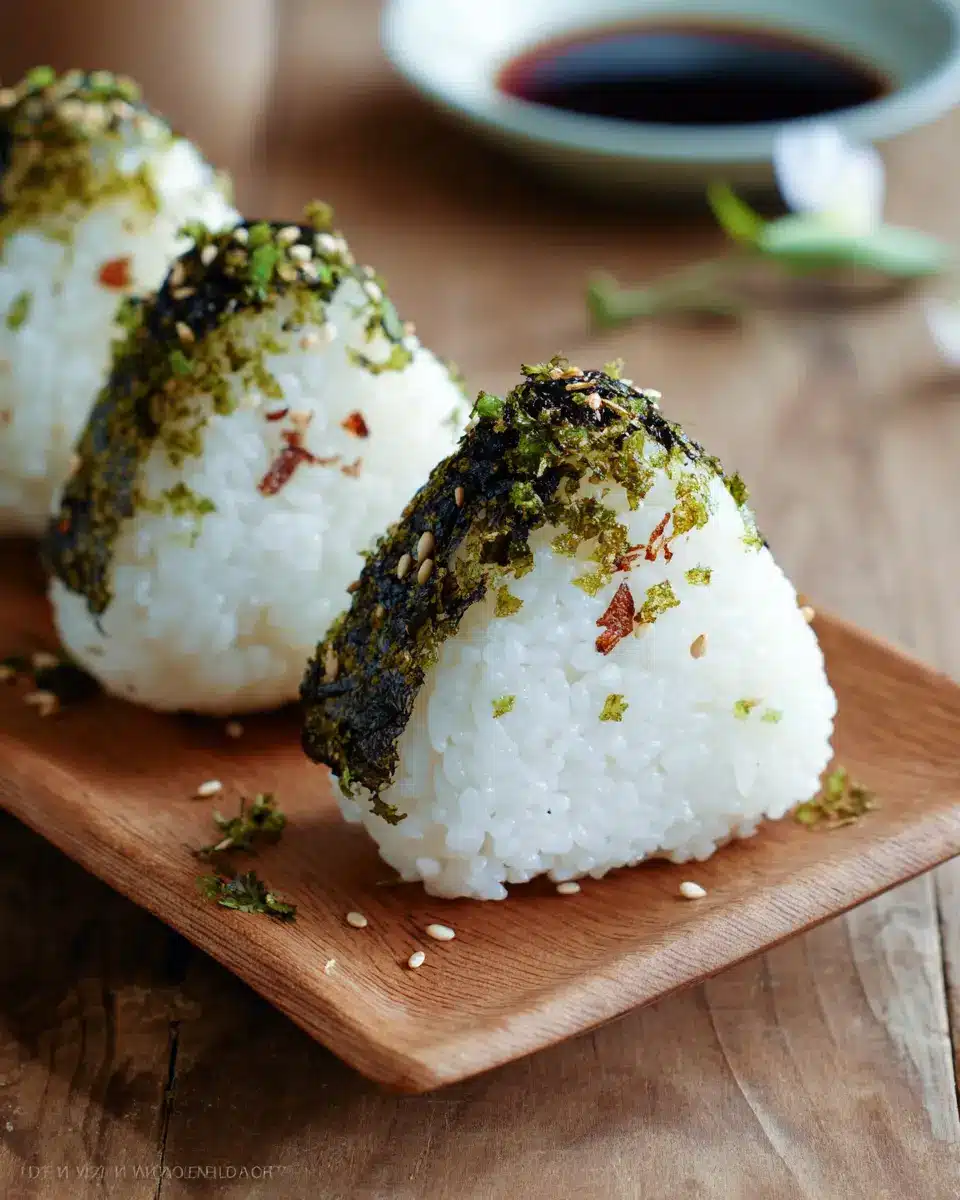
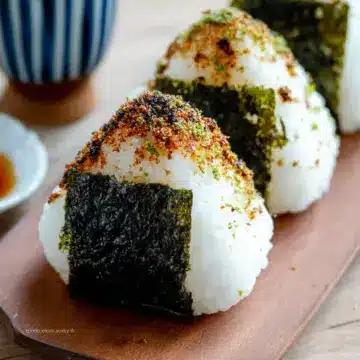
Don’t forget the finishing touches! Adding a salt sprinkle on the exterior enhances flavor, while wrapping with nori (dried seaweed) provides a delightful contrast in texture. For that special touch, consider using furikake (rice seasoning) to season the exterior, making your onigiri not just tasty but visually appealing as well.
These ingredients and seasonings work together to elevate your Onigiri Japanese Rice Balls, making them a delightful treat suitable for any occasion! For more details on each ingredient, feel free to visit Just One Cookbook for in-depth explanations and tips. Happy cooking!
Step-by-step Preparation of Onigiri Japanese Rice Balls
Creating Onigiri Japanese rice balls is not only a delicious endeavor but also a rewarding one. Follow these simple steps, and you'll be enjoying these flavorful rice balls in no time!
Cook the Perfect Sushi Rice
To achieve the ideal texture for your onigiri, start with the right rice. Japanese short-grain white rice is your best bet. Begin by measuring 2¼ cups of uncooked rice, rinsing it under cold water until the water runs clear. This process removes excess starch that can make your rice too sticky. Then, let it soak for 20-30 minutes in 2½ cups water. Cooking can be done in a rice cooker or on the stove – just ensure you follow a 1:1.1 or 1:1.2 rice-to-water ratio. Once cooked, allow the rice to cool slightly until it’s warm but easy to handle.
Prepare Your Delicious Fillings
While your rice is cooking, it's time to prepare your fillings. Here are a few popular options:
- Japanese Salted Salmon: Sprinkle salt over fillets and bake or broil until flaky.
- Okaka (Bonito Flakes): Mix katsuobushi with soy sauce for umami goodness.
- Tuna Mayo: Combine canned tuna, Japanese Kewpie mayonnaise, and soy sauce for a creamy treat.
- Classic Umeboshi: The tangy bite of pickled plum adds a delightful surprise.
These savory fillings can elevate your onigiri, turning a simple rice ball into a flavor-packed meal.
Shape the Onigiri like a Pro
Once you’re ready to shape, gather your fillings and some water for your hands. Wet your hands to prevent sticking and sprinkle some salt on them for seasoning. Take about ⅓ cup of rice and create a small well in the center. Fill it with your chosen ingredient, then cover it completely with more rice. Try to mold the rice into a shape that’s easy to handle – a triangle works beautifully!
Mastering Various Shaping Methods
Whether you're using your hands or an onigiri mold, the shaping is crucial.
- Using Your Hands: Wet hands make it easier! Squeeze gently but firmly, using your dominant hand to shape the corners while your other hand supports the sides. Rotate as you shape for that perfect triangular look.
- Using a Mold: If you're looking for precision, start with a moistened mold. Fill it halfway with rice, add your filling, and then top with more rice. Press down firmly and let the mold do the work!
Enhance with Furikake and Nori
Furikake adds a delightful punch of flavor. Just sprinkle some on the outside of your onigiri. For an extra layer of taste and texture, wrap your rice balls in roasted nori. To keep it crispy, only do this right before you eat them. An aesthetic touch is to place a tiny bit of each filling on top to indicate what's inside, making it easy to grab the flavor you love.
With these steps, your onigiri will come out perfectly every time. Enjoy them warm or at room temperature for a delightful snack or meal.
Variations on Onigiri Japanese Rice Balls
Vegan Onigiri Options
If you're exploring vegan onigiri, you have plenty of delicious options! Consider using fillings like avocado and sesame seeds or a mixture of seasoned shio kombu (kelp) for a savory bite. You can also opt for furikake, a Japanese rice seasoning that adds flavor without any animal products. Lastly, pickled vegetables can give a nice tangy contrast to the seasoned rice.
Unique Flavor Combinations to Explore
Ready to elevate your onigiri? Try unexpected fillings like spicy kimchi for a kick or a sweet layer of anko (sweet red bean paste) for a delightful twist. You can even combine ingredients, creating a savory-sweet experience with grilled eggplant and miso or mushroom stir-fry. The possibilities are endless, so don't hesitate to experiment and find your perfect flavor pairing!
These variations on onigiri Japanese rice balls not only cater to different dietary preferences but also showcase the versatility of this beloved Japanese snack. Happy rolling!
Cooking Tips and Notes for Onigiri Japanese Rice Balls
Making Onigiri Japanese rice balls is a delightful experience. Here are some essential tips to ensure your rice balls are a hit:
-
Use the Right Rice: Japanese short-grain rice is your best bet. It’s stickier, making it easier to shape. If you're unsure, check out this guide on selecting rice.
-
Soak the Rice: Letting your rice soak for 20–30 minutes before cooking helps achieve that perfect, fluffy texture.
-
Work with Warm Rice: When shaping the onigiri, keep the rice warm. Cold rice can be hard to mold and won’t hold its shape.
-
Experiment with Fillings: Get creative and try different fillings like tuna, umeboshi, or even spicy salted mentaiko. The possibilities are endless!
With these tips, you'll master the art of creating delicious and visually appealing onigiri. Enjoy the flavorful journey!
Serving Suggestions for Onigiri Japanese Rice Balls
Onigiri as a Meal Prep Hero
Onigiri Japanese rice balls are not only delicious but also incredibly versatile for meal prep. Make a batch on the weekend, and you have ready-to-go lunches or snacks throughout the week. Just remember to keep them cool and consume within six hours for optimal freshness. For longer storage, wrap each rice ball in plastic wrap and tuck them in your lunch bag with a cold pack to stay fresh and tasty.
Pairing Ideas for Optimal Enjoyment
Enhance your onigiri experience by pairing these rice balls with an array of sides:
- Miso Soup: A comforting warm drink to complement the rice.
- Pickled Vegetables: Tiny bursts of flavor that balance the rice's richness.
- Fresh Green Salad: Adds refreshing crunch and nutrients.
- Fruit Slices: Think apples or oranges for a sweet finish.
These combinations make your meal both satisfying and varied, allowing you to enjoy your onigiri Japanese rice balls like never before! For more ideas, check out the Japan Centre for tasty side dish recommendations.
Time Breakdown for Making Onigiri Japanese Rice Balls
Preparation Time
To kick off your Onigiri Japanese Rice Balls journey, set aside about 30 minutes for preparation. This includes rinsing and soaking your rice, as well as prepping your chosen fillings, such as Japanese salted salmon or tuna mayo.
Cooking Time
While the rice cooks, which takes approximately 45 minutes, you’ll have plenty of time to relax. If you're using a rice cooker, simply set it and forget it!
Shaping and Serving Time
After the rice is cooked, shaping your onigiri should only take about 15-20 minutes. You'll be enjoying your delightful rice balls in no time!
This well-timed approach ensures you spend just about 1.5 hours from start to finish—just perfect for a cozy weekend meal or a quick lunch. Let’s dive into the detailed recipe!
Nutritional Facts for Onigiri Japanese Rice Balls
Calories per serving
Onigiri Japanese rice balls pack a delightful nutrition punch, with approximately 174 calories per serving. This makes them a great snack or light meal option for those mindful of their caloric intake.
Protein and carbohydrate content
Each serving offers 7 grams of protein and 29 grams of carbohydrates, providing a balanced energy source. The combination of protein and carbs supports sustained energy levels, perfect for a busy day ahead!
Sodium level overview
With a sodium content of around 341 mg, Onigiri Japanese rice balls are moderate in salt. This makes them a flavorful choice without being overly salty. Just be mindful if you're watching your sodium intake, and consider opting for low-sodium fillers!
For further reading on nutrition, check out these articles from the USDA and Healthline.
FAQ about Onigiri Japanese Rice Balls
Can I use leftover rice for Onigiri?
Absolutely! Using leftover rice is an excellent way to create delicious onigiri, as long as it's stored properly. The rice should be freshly made, warm, and sticky enough to shape into balls. If your leftover rice has cooled and hardened in the fridge, you can microwave it for a short time to soften it before shaping.
What’s the best way to pack Onigiri for lunch?
The key to packing onigiri Japanese rice balls for lunch is to keep them fresh. Wrap each rice ball in plastic wrap to maintain moisture and prevent it from drying out. You can also use a small bento box to add variety with different fillings. Just remember, it's best to eat them within six hours for optimal flavor.
How do I keep my Onigiri fresh?
To ensure your onigiri stays fresh, store it at room temperature and consume it within a day if possible. Refrigeration can make the rice hard. If you're not consuming it right away, try wrapping it in a clean kitchen towel for insulation. You can also grill any leftover onigiri to create a tasty yaki onigiri with a crunchy texture.
Conclusion on Onigiri Japanese Rice Balls
Onigiri Japanese rice balls are a delightful fusion of convenience, flavor, and tradition. Perfect for a quick snack or lunch, these versatile rice balls offer endless filling possibilities. Experiment with your favorite ingredients, and savor a little taste of Japan wherever you are. Enjoy crafting your own!
Onigiri (Japanese Rice Balls)
Equipment
- Rice Cooker
- baking sheet
- Onigiri Mold
Ingredients
For the Steamed Rice
- 2¼ cups uncooked Japanese short-grain white rice 3 rice cooker cups; 540 ml
- 2½ cups water 600 ml
For the Onigiri
- Diamond Crystal kosher salt
- 3 sheets nori (dried laver seaweed)
For the Japanese Salted Salmon Filling (quick version)
- 1–2 fillet salmon
- Diamond Crystal kosher salt
For the Okaka Filling
- 1 packet katsuobushi (dried bonito flakes) one packet is typically 3 g or 5 g
- 1 tablespoon soy sauce
For the Tuna Mayo Filling
- 1 can (5-ounce) albacore tuna (preferably packed in olive oil)
- 2 tablespoon Japanese Kewpie mayonnaise
- ½ tablespoon soy sauce
For the Other Fillings
- 2 umeboshi (Japanese pickled plum)
- 2 sacs spicy salted pollock roe or cod roe (karashi mentaiko)
- shio kombu prepared
- furikake (rice seasoning)
Instructions
To Prepare the Steamed Rice
- Measure 2¼ cups uncooked Japanese short-grain white rice, put the rice in a large bowl, rinse, and cook with a rice cooker or pot.
- Add 2½ cups water to the drained rice and let it soak for 20–30 minutes before cooking.
To Prepare the Onigiri Fillings
- While the rice is cooking, prepare the fillings. For the salmon filling, broil or bake 1–2 fillet salmon at 425ºF until well done, then flake.
- Mix katsuobushi with soy sauce for the Okaka filling.
- Combine drained albacore tuna with Kewpie mayonnaise and soy sauce for the Tuna Mayo filling.
- Prepare umeboshi by removing the seed and placing the flesh on a plate.
- Squeeze out the roe from mentaiko sacs for the Mentaiko filling.
- Place shio kombu in a bowl for easy access.
To Shape the Onigiri
- Shape the onigiri by gathering cooked rice and forming shapes with an onigiri mold or hands.
- Gently press the rice to avoid falling apart but keep it airy.
- Use plastic wrap to shape if preferred, ensuring to sprinkle salt.
To Coat with the Furikake
- Dip fingers before touching onigiri to prevent sticking, then coat with furikake.
To Wrap with the Nori and Serve
- Toast nori over an open flame and cut into thirds. Wrap onigiri with nori strips and serve warm or at room temperature.
- For crispy nori, wrap only before serving and store nori in an airtight container.
To Store
- Consume onigiri within 6 hours for best texture. Store wrapped in kitchen towels if refrigerating.
- Grill dried onigiri in a frying pan and baste with soy sauce for Yaki Onigiri.


Leave a Reply