
Introduction to Roasted Garlic
Roasted garlic is one of those culinary delights that can truly transform your dish, adding a rich, sweet flavor that elevates everything from sauces to spreads. But why should roasted garlic deserve a spot in your kitchen? First off, it’s incredibly versatile. You can use it in pasta, mix it into vegetables, or simply spread it on your favorite warm bread. Imagine the aroma wafting through your kitchen as it bakes—it's a game-changer!
Not only does it taste amazing, but it’s also packed with health benefits. Garlic contains antioxidants and has anti-inflammatory properties, making it a win-win for your taste buds and your health. As a garlic lover, I can attest to how easy it is to roast a whole head of garlic and unleash its complex flavors. A simple recipe with just a few ingredients can turn any mundane meal into something special.
For those curious about the process, roasting garlic can be an entertaining cooking project. Who doesn’t enjoy a little kitchen experiment? Plus, it’s perfect for meal prep; roasted garlic can be stored in the fridge and used throughout the week. So grab those heads of garlic and prepare to make your dishes sing! For more tips on incorporating this wonderful ingredient into your meals, check out this guide to garlic’s health benefits.
Ingredients for Roasted Garlic
What you'll need to get started
To make roasted garlic, you only need a couple of core ingredients:
- 1 or more whole heads of garlic: Fresh garlic is key here; look for bulbs that are firm and have dry, papery skin.
- Extra virgin olive oil: A good quality olive oil enhances the flavors and helps achieve that delightful caramelization.
These basic ingredients are easy to find, making this recipe a fantastic option for anyone looking to elevate their meals at home.
Optional additions for flavor enhancement
Want to take your roasted garlic to the next level? Consider these optional flavor boosters:
- Fresh herbs: A sprinkle of rosemary, thyme, or even sage can add a lovely aromatic touch.
- Salt and pepper: A pinch of coarse sea salt and a dash of freshly cracked pepper can elevate the taste beautifully.
- Balsamic vinegar: Drizzling a bit before roasting adds a sweet tang that pairs wonderfully with the richness of the garlic.
These small additions can transform your roasted garlic into something truly special, making it an irresistible treat for your next gathering or cozy dinner at home. Want to learn more about the benefits of roasted garlic? Check out this article for insights and tips!
Step-by-step Preparation of Roasted Garlic
Roasted garlic is a culinary delight that transforms any dish into a flavor-packed masterpiece. If you’ve never roasted garlic before, you’re in for a treat! It’s surprisingly simple and incredibly rewarding. Let’s dive into the preparation process.
Preheat your oven
Before you get your hands busy, start by preheating your oven to 400°F (205°C). This temperature is perfect for achieving that golden-brown, caramelized goodness in your garlic. If you have a toaster oven, feel free to use it! It works just as well for this task and is a great space-saver.
Prepare the garlic heads
Next, take your whole heads of garlic and peel away the outer papery layers. When preparing your garlic, be sure to leave the individual cloves intact. This is crucial for allowing them to roast properly while still holding onto their skins, ensuring they retain their delicious flavor.
Pro Tip: Did you know that garlic has been praised for its health benefits, ranging from boosting immunity to heart health? Check out this extensive guide on garlic if you want to dive deeper into its benefits.
Arrange garlic in the baking pan
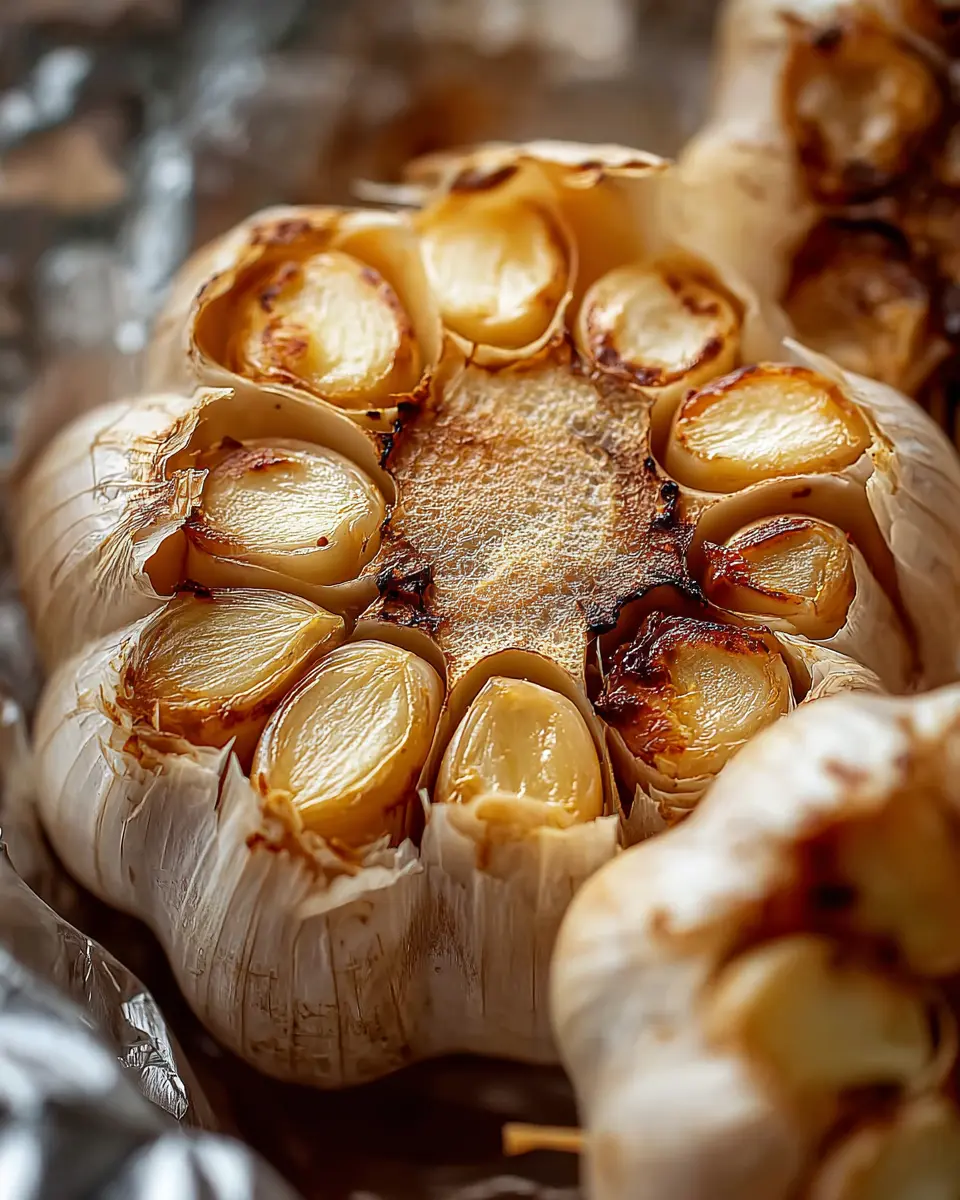
Now that your garlic is prepped, it’s time to arrange the garlic heads in a baking pan or muffin tin. Placing them cut side up offers the best exposure to the heat, allowing that sweet and savory flavor to blossom. Plus, using a muffin pan will help keep the garlic bulbs stable—no more rolling around!
Drizzle with olive oil
Time to bring the flavor! Drizzle a couple of teaspoons of extra virgin olive oil over each exposed head of garlic. This little step makes a world of difference in the flavor profile. Take your fingers and rub the oil over the cuts, making sure every clove is nicely coated. This added moisture will enhance the roasting process, resulting in that mouthwatering dish you’re aiming for.
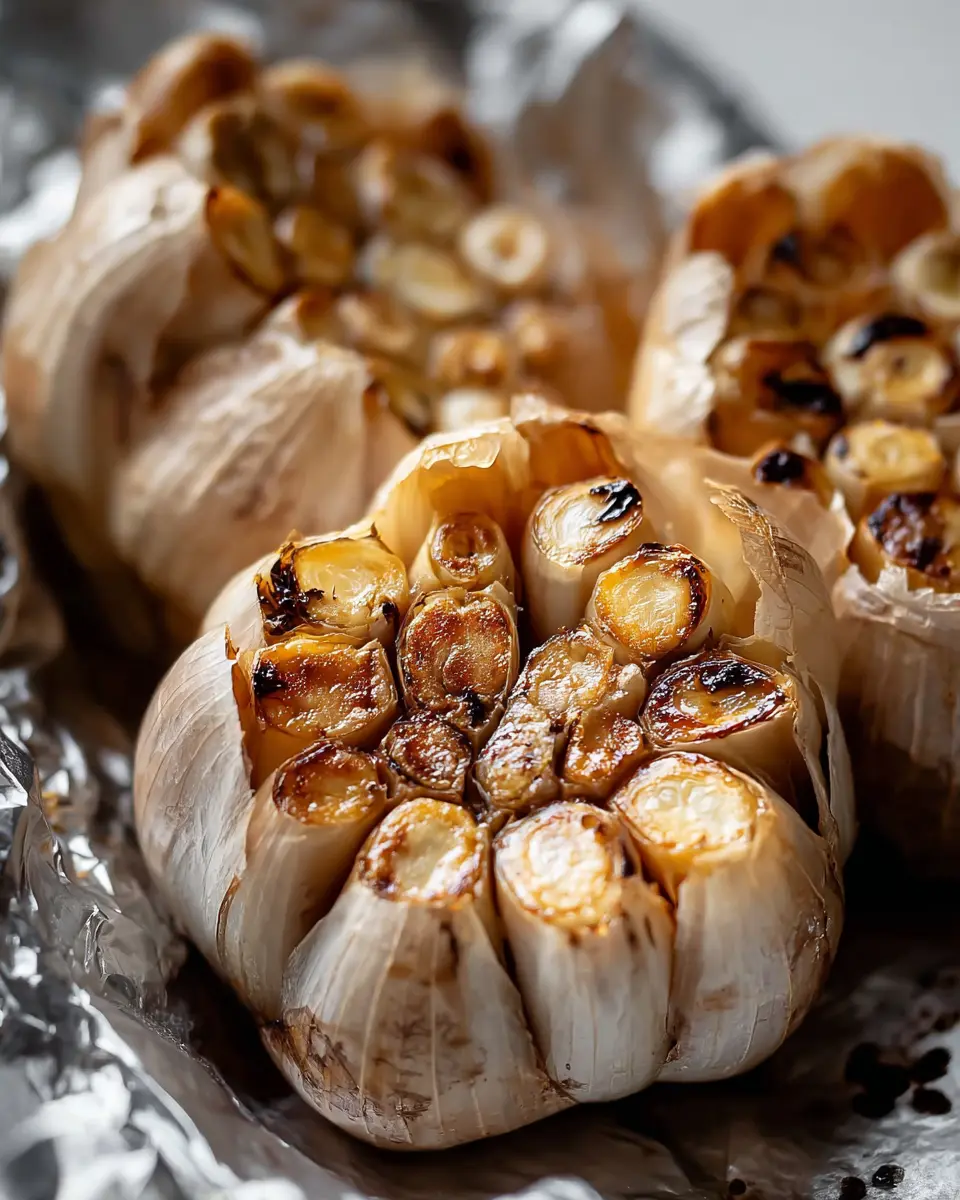
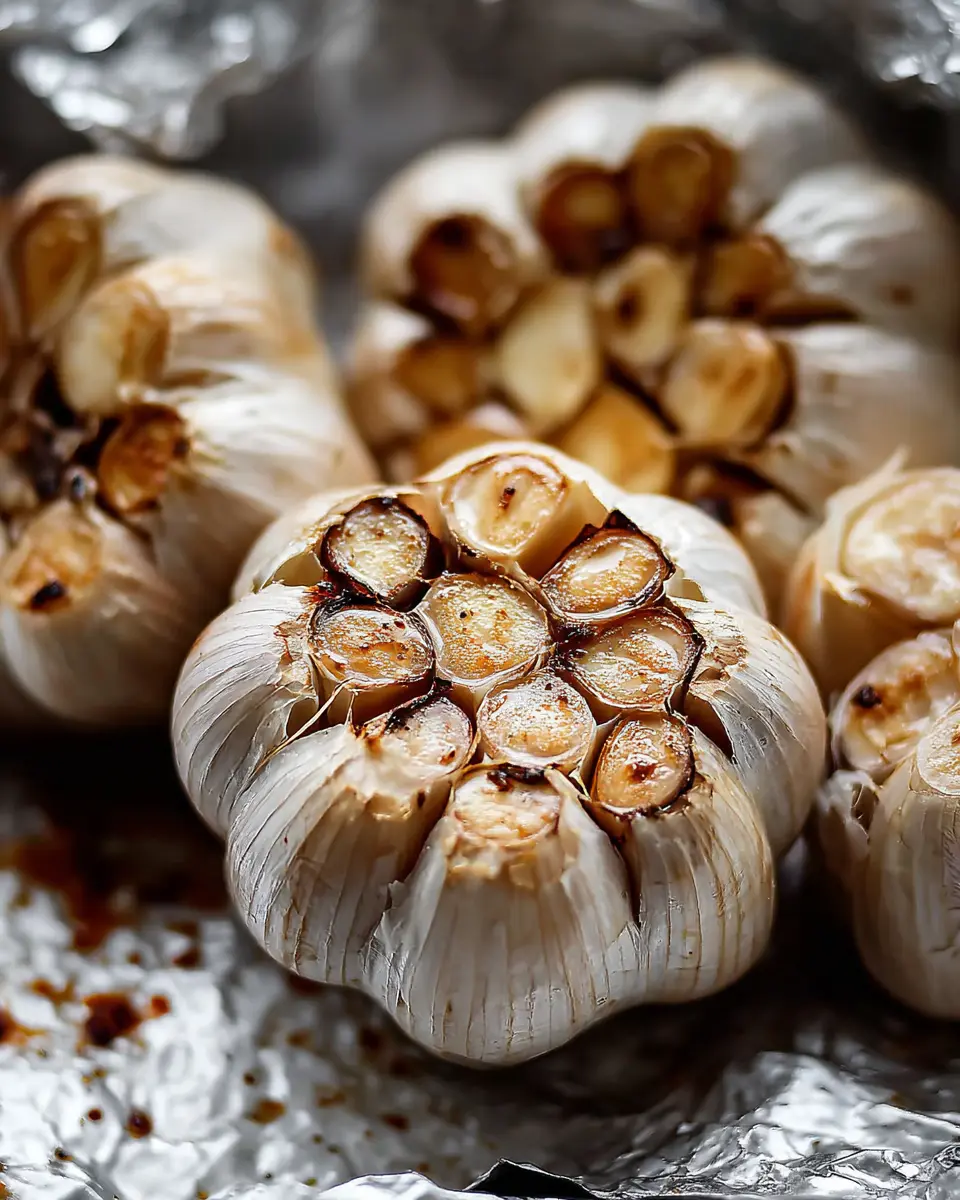
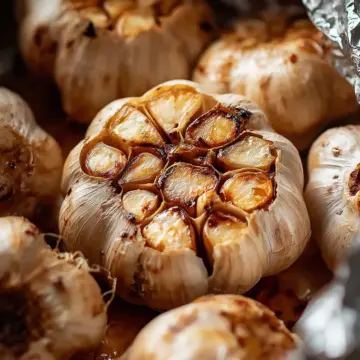
Cover and bake
Cover the entire garlic bulb with aluminum foil. This helps trap steam and encourages a soft, creamy texture as the garlic roasts. Now, pop your garlicky goodness into the oven and bake for 30-40 minutes. Keep an eye on them—when they’re lightly browned and feel soft when pressed, they’re ready to shine!
Cool and extract cloves
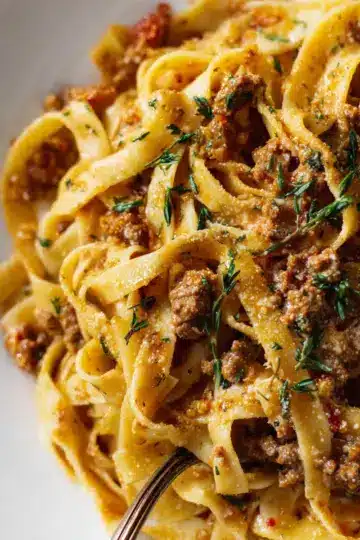
Once your roasted garlic is done, allow it to cool just enough to touch without burning yourself. To extract the cloves, use a sharp knife to cut a small slit in the skin of each clove. Then, use a cocktail fork or your fingers to gently squeeze or pull each clove from its skin. You can enjoy your roasted garlic as is, mash it into a paste for dressings, or mix it into warm pasta for a heavenly meal.
Roasted garlic is a game-changer, elevating everything from sour cream dips to spreads on warm French bread. Enjoy experimenting with this delightful ingredient in your favorite dishes!
Variations of Roasted Garlic
Roasted Garlic with Herbs
Elevating your roasted garlic experience can be as simple as adding fresh herbs. Before you drizzle with olive oil, sprinkle in chopped rosemary, thyme, or oregano for an aromatic twist. The warmth of the roasting process infuses these herbs into the garlic, enhancing both flavor and health benefits. Just imagine spreading this herby delight on warm toast or adding it to roasted vegetables! Don’t forget to check out these herb tips for more inspiration from experts at EatingWell.
Roasted Garlic Infused Oils
Another delicious way to enjoy roasted garlic is through infused oils. After roasting the garlic, you can blend the cloves with olive oil to create a rich, flavorful oil perfect for drizzling over salads, pasta, or grilled meats. This infusion not only heightens the garlic taste but also keeps well in the fridge. Try experimenting with different oils—like avocado or nut oils—to add a unique flair to your culinary creations. Check out this guide on infusing oils for variations that will keep your taste buds happy!
Cooking Tips and Notes for Roasted Garlic
How to choose the best garlic
When selecting garlic, look for firm, unblemished bulbs. Avoid any that feel soft or have sprouted green shoots—these are signs of age. Fresh garlic will have tight skin and a strong aroma, giving you the best flavor for your roasted garlic. You can explore more about choosing garlic here.
Common mistakes to avoid
One common mistake is overcooking. Keep an eye on your garlic as it roasts; you want it golden and soft, not burnt. Also, be sure to cover the bulbs with foil properly to retain moisture. Lastly, don't skip the olive oil drizzle—this enhances richness and prevents dryness in your roasted garlic.
Serving Suggestions for Roasted Garlic
How to Enjoy Roasted Garlic in Meals
Roasted garlic transforms ordinary dishes into culinary delights with its rich, buttery flavor. Spread it over warm French bread for a simple yet indulgent appetizer or mash it into mashed potatoes for a creamy twist. You can even mix it into a savory dip, blending it with cream cheese or yogurt, making it a crowd-pleaser at your next gathering.
Pairing Ideas with Roasted Garlic
When it comes to pairing, the possibilities are endless! Combine roasted garlic with turkey bacon in a pasta dish or toss it into roasted vegetables for added depth. For a flavorful protein boost, consider using it with grilled chicken ham or beef. Drizzle some balsamic glaze over your roasted garlic-infused meals for a tangy finish. Looking for more ideas? Check out Serious Eats for inspiration!
Time Breakdown for Roasted Garlic
Preparation time
Getting ready to make your roasted garlic is a breeze! You’ll only need about 10 minutes to prep. This includes peeling and cutting the garlic, giving you plenty of time to daydream about delicious dishes to add it to.
Cooking time
Once your garlic is prepped, pop it in the oven for 30 to 40 minutes. During this time, your kitchen will fill with an irresistible aroma, making the wait pleasantly exciting.
Total time
In just under an hour, you can enjoy homemade roasted garlic. With a total time of about 40 to 50 minutes, it’s the perfect addition to your cooking routine. Plus, it stores well in the fridge, making it a savvy meal prep choice!
Curious to learn more about the benefits of incorporating more garlic into your meals? Check out Healthline for a deep dive into its health perks!
Nutritional Facts for Roasted Garlic
Calories
Roasted garlic is not only delicious but also low in calories. A single clove contains roughly 4 calories, making it an excellent flavor enhancer that won't break your calorie bank. This makes it an ideal addition to various dishes, from pasta to spreads, especially if you're watching your intake.
Health Benefits of Garlic
Garlic, especially when roasted, is a powerhouse of health benefits. It’s packed with antioxidants and has anti-inflammatory properties, promoting heart health and potentially lowering cholesterol levels. Studies have shown that garlic can enhance the immune system, helping to ward off colds and other illnesses. Plus, its unique compounds, such as allicin, are thought to provide numerous health benefits.
For those looking to make healthier cooking choices, incorporating roasted garlic can elevate flavors naturally without relying on additional fats or sugars. Looking for more information? Check out this detailed guide on the health benefits of garlic from Healthline.
So next time you roast a batch of garlic, remember it’s not just about flavor; it's a wholesome addition to your meals!
FAQs about Roasted Garlic
How long does roasted garlic last?
Roasted garlic can last for about a week when stored in an airtight container in the refrigerator. If you want to extend its shelf life, consider freezing it. Simply squeeze the roasted cloves into a silicone ice cube tray, add olive oil, and freeze. This way, you can pop out a cube whenever you need that delicious flavor boost in your dishes!
Can I roast garlic in the microwave?
While roasting garlic in the oven yields the best flavor and texture, you can use the microwave for a quicker option. Wrap individual cloves in a damp paper towel and microwave on high for about 30 seconds, checking until they’re soft. However, keep in mind that the depth of flavor may not be as rich as traditional roasting.
What are the best uses for roasted garlic?
Roasted garlic is incredibly versatile! You can spread it on warm bread, mix it into mashed potatoes, blend it into soups, or even stir it into pasta dishes. It adds a sweet and mellow garlic flavor that enhances everything from dips to dressings. Feeling adventurous? Try adding roasted garlic to your next pizza or mixing it with sour cream for a delicious baked potato topping.
For more culinary inspiration, check out this garlic-centric recipe collection that celebrates this wonderful ingredient!
Conclusion on Roasted Garlic
Roasted garlic is truly a flavorful addition to your dinner table. Its sweet, mellow taste transforms dishes, making them irresistible. Whether spread on warm bread or mixed into your favorite recipes, this culinary gem elevates any meal. Give it a try; your taste buds will thank you!
A Flavorful Addition to Your Dinner Table
Adding roasted garlic to your meals can elevate them in ways you might not expect. The flavor is rich and inviting, lending a warmth and depth that's perfect for many dishes. Here are a few creative ways to integrate this ingredient into your weekly menu:
- Spread on Bread: A classic! Roasted garlic makes a perfect spread for crusty French bread or even turkey bacon sandwiches.
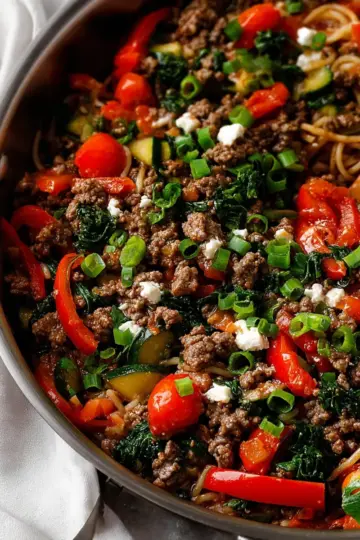
- Enhance Pasta Dishes: Mash roasted garlic into your pasta sauces or mixes with Parmesan for a quick, flavorful topping.
- Baked Potatoes Delight: Combine roasted garlic with sour cream for a delicious mash to liven up your baked potatoes.
- Savory Dips: Blend it into dips for chips or vegetables, adding a delightful twist to your appetizers.
Roasted garlic's versatility is endless! Try incorporating it into your next dish and see how this simple ingredient transforms your culinary experience. For more recipe ideas, check out this fantastic resource, where you can discover new ways to use garlic and other flavorful ingredients in your cooking adventures.
Roasted Garlic
Equipment
- oven
- Baking pan
- muffin tin
- Knife
- Aluminum foil
Ingredients
- 1 head Whole head of garlic
- 2 teaspoons Extra virgin olive oil
Instructions
- Preheat your oven to 400°F (205°C): A toaster oven works great for this.
- Peel and discard the papery outer layers of the whole garlic bulb. Leave intact the skins of the individual cloves of garlic.
- Using a sharp knife, cut ¼ to a ½ inch from the top of cloves. This exposes the individual cloves of garlic.
- Put garlic in baking pan or muffin tin: Place the garlic heads in a baking pan, cut side up. (A muffin pan works great for this, as it keeps the garlic bulbs from rolling around.)
- Drizzle with olive oil: Drizzle a couple teaspoons of olive oil over each exposed head, using your fingers to rub the olive oil over all the cut, exposed garlic cloves.
- Cover the bulb with aluminum foil.
- Bake: Bake at 400°F (205°C) for 30-40 minutes, or until the cloves are lightly browned and feel soft when pressed.
- Cool and remove roasted garlic cloves from their skins: Allow the garlic to cool enough so you can touch it without burning yourself. Use a small knife to cut the skin slightly around each clove. Use a cocktail fork or your fingers to pull or squeeze the roasted garlic cloves out of their skins.

Leave a Reply