
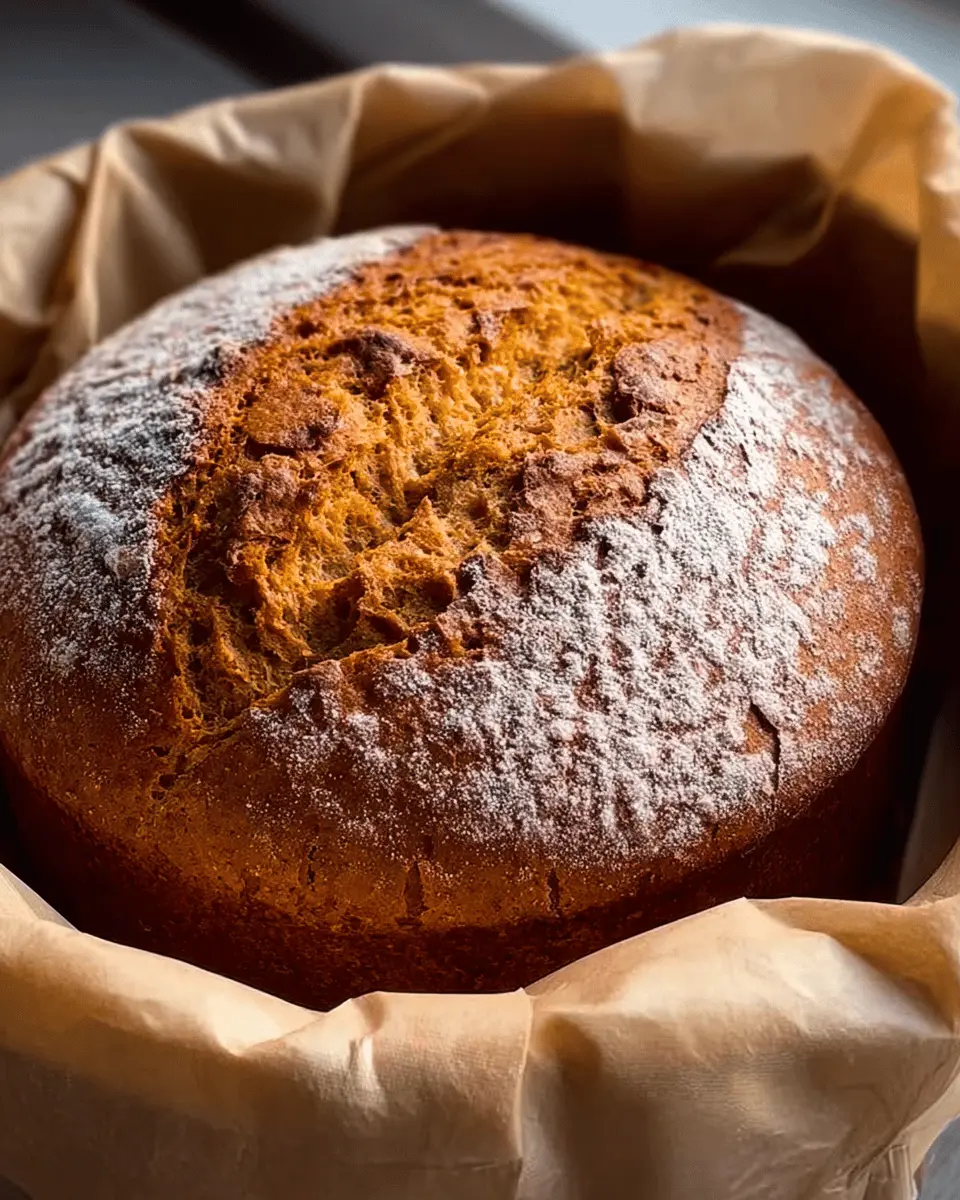
Introduction to Perfect Dutch Oven Pumpkin Bread
Why is Pumpkin Bread a Fall Favorite?
As soon as the leaves start to change, many of us look forward to the warm, inviting scent of pumpkin bread wafting through our homes. But what is it about this delicious treat that makes it a fall staple? Perhaps it’s the blend of cozy spices like cinnamon and nutmeg that miraculously transport us to those early days of autumn. Or maybe it’s the buttery, moist texture that feels like a warm hug on a chilly day.
The act of baking perfect Dutch oven pumpkin bread is more than just a culinary endeavor; it’s a ritual that invites friends and family to gather around the kitchen. Whether you’re spreading cream cheese frosting on a warm slice or enjoying it plain with your morning coffee, pumpkin bread has that dependable charm that can brighten even the briskest October morning.
With pumpkin spice lattes making their seasonal return and festive activities just around the corner, it’s the ideal time to try baking your own loaf. This recipe isn’t just easy; it can be as versatile as your imagination, plus it’s a beloved way to celebrate the flavors of the season. For more about pumpkin and its benefits, check out the Nutritional Benefits of Pumpkin.
So grab your favorite Dutch oven and let’s bring the essence of fall into your kitchen!
Ingredients for Perfect Dutch Oven Pumpkin Bread
Creating a perfect Dutch oven pumpkin bread starts with quality ingredients. Here’s what you’ll need:
- ¾ cup cool water (180 g) – The temperature is key; don’t use warm water to activate the yeast.
- ½ teaspoon active dry yeast – If you love that deeper flavor, consider using only ¼ teaspoon for an overnight rise.
- 1 cup pumpkin puree (225 g) – Pure pumpkin, not pie filling, adds moisture and flavor; check out this guide from Healthline to learn about its nutritional benefits.
- 3 cups bread flour (425 g) – Opt for bread flour for those perfect chewy textures that make your bread irresistible.
- 2 teaspoon fine sea salt – Salt enhances flavor and plays a vital role in the dough development.
Prepare these ingredients ahead of time, and you’ll be ready to craft a loaf that’s not just delicious but also a feast for the eyes. Let’s get baking!
Step-by-step Preparation of Perfect Dutch Oven Pumpkin Bread
Activate the Yeast and Combine Wet Ingredients
To start your journey to the perfect Dutch oven pumpkin bread, pour ¾ cup of cool water into a large bowl. Sprinkle ½ teaspoon of active dry yeast on top and let it rest for a few minutes. This is crucial as it activates the yeast, a process you can read about in more detail on sites like King Arthur Baking. Once you see the yeast bubbling, add in 1 cup of pumpkin puree and whisk everything until it’s smooth and lump-free. Trust me, a well-mixed base makes for a delightful loaf!
Mix and Develop the Dough
Now it’s time to mix in the dry ingredients. Add 3 cups of bread flour and 2 teaspoons of fine sea salt to your wet mixture. Use a rubber spatula initially to combine everything and then switch to your hands for that satisfying kneading feel. The dough will be sticky, which is perfectly fine! Cover the bowl with plastic wrap and let it rise at room temperature for about an hour. Afterward, give the dough a few folds (it’s a bit like giving it a gentle massage), cover it again, and let it rise for an additional 3-4 hours. Pop any large air bubbles you find—that helps with even texture. Once it has puffed up nicely, let it chill in the fridge overnight.
Shape the Dough and Prepare for Final Rise
The next morning, take your chilled dough out and make it into a round ball on a floured surface. Dust it with a touch of flour before placing it on a square of parchment paper. Cover it with a tea towel and leave it at room temperature for 3-4 hours until it puffs up nicely. I promise you, allowing the dough that extra time ensures a fluffy, airy bread that will impress anyone.
Preheat the Oven and Score the Dough
While your dough rises, place a 4 to 6-quart Dutch oven in the oven and preheat it to 450°F (230°C). This step is critical for that lovely crust. After about 10-20 minutes, once your pot is nice and hot, carefully score the surface of your dough with a sharp knife. A simple, confident slash about ½ cm deep will do the trick, allowing for those beautiful oven springs.
Bake the Bread
Now comes the exciting part! Carefully transfer your scored dough into the preheated Dutch oven using the parchment paper. Cover with the lid and bake for 20 minutes. Afterward, remove the lid and bake for another 20-25 minutes until the crust is golden and firm to touch. Your kitchen will smell heavenly!
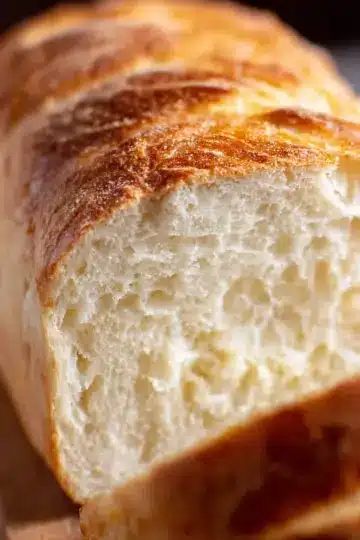
Cool and Serve
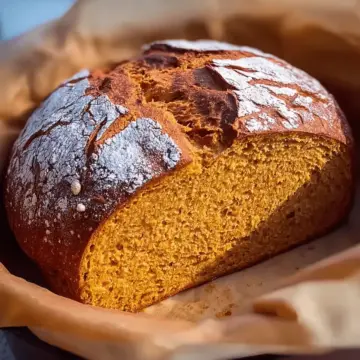
Once out of the oven, let your bread cool on a rack for at least an hour. This resting time not only sets the crumb but allows the flavors to deepen. The anticipation will be worth it as you slice into this golden loaf and serve it warm—perhaps with some turkey bacon or chicken ham on the side!
And there you have it—your own homemade perfect Dutch oven pumpkin bread! Enjoy your baking adventure!
Variations of Perfect Dutch Oven Pumpkin Bread
Vegan Version of Pumpkin Bread
If you're looking for a vegan twist on the classic perfect dutch oven pumpkin bread, you're in luck! Simply substitute the pumpkin puree with a blended mixture of applesauce and extra spices like nutmeg and cinnamon to mimic the flavor profile. To keep it plant-based, make sure to use a vegan-friendly bread flour and stick with water or a plant-based milk for the liquid. This version remains deliciously moist and flavorful, proving that you don’t need dairy or eggs to create a fantastic loaf!
Add-ins for Extra Flavor
Elevate your perfect dutch oven pumpkin bread by incorporating some fun add-ins! Consider mixing in:
- Chopped walnuts or pecans for a delightful crunch.
- Chocolate chips for a sweet surprise.
- Dried cranberries or raisins for a touch of fruity goodness.
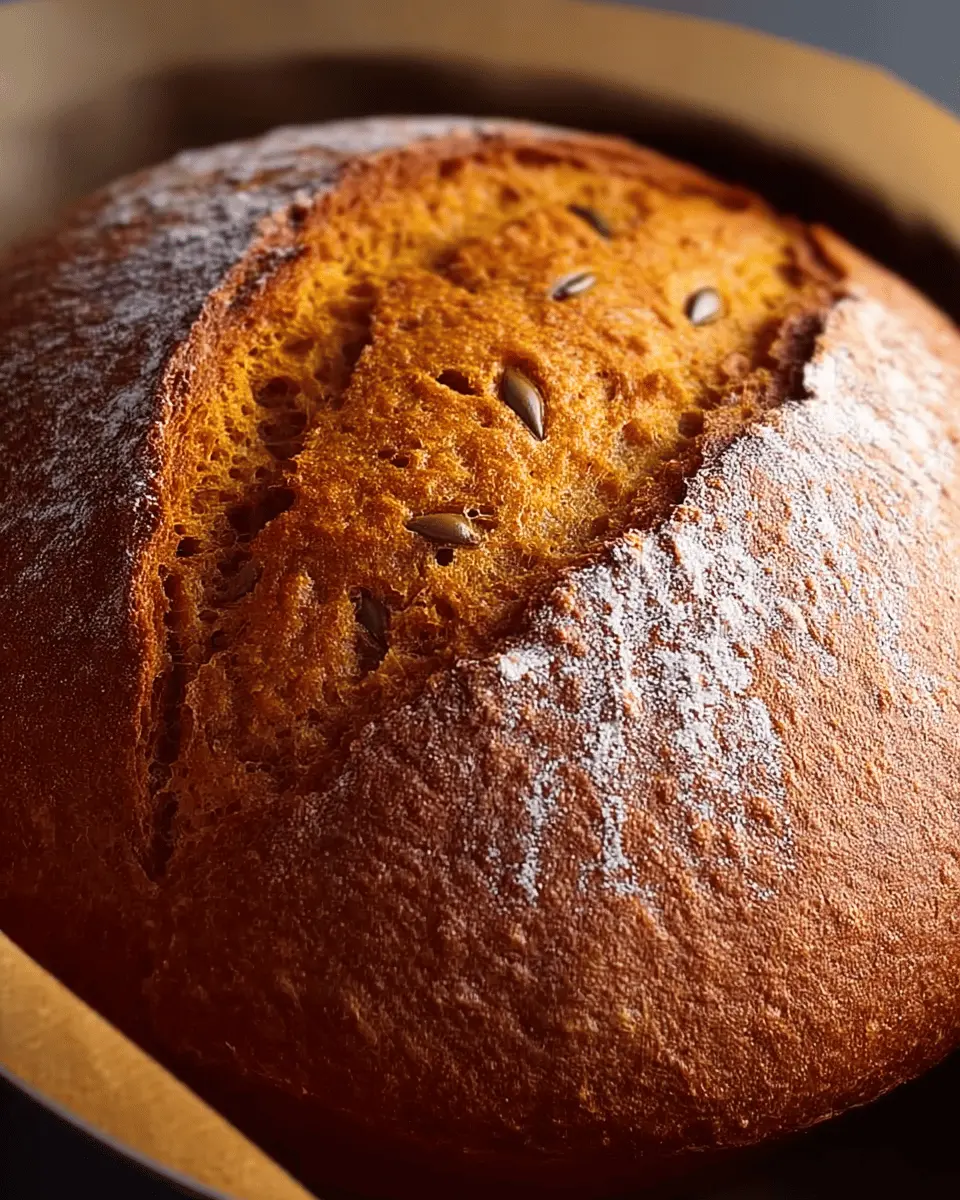
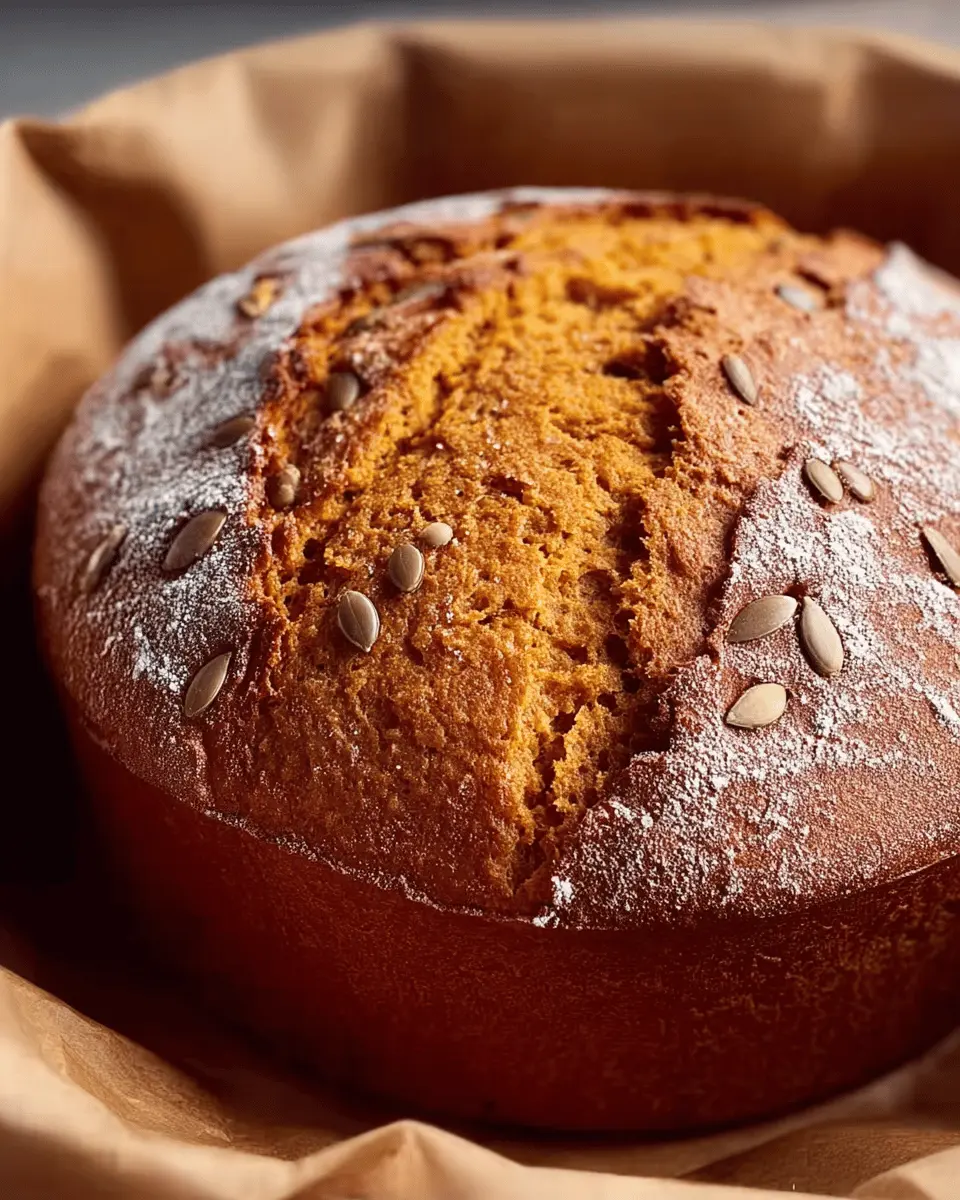
- A sprinkle of pumpkin seeds on top for added texture and visual appeal.
These additions not only enhance the flavor but also give your bread a unique personality. Don’t be shy; experiment and make the recipe your own!
Cooking Tips and Notes for Perfect Dutch Oven Pumpkin Bread
Creating the perfect Dutch oven pumpkin bread is easier than you think! Here are some friendly tips to enhance your baking experience:
-
Yeast Matters: Use fresh active dry yeast for the best rise. If you're short on time, consider the overnight rise option for more flavor and texture.
-
Pumpkin Purée Choices: Prefer homemade pumpkin purée? It’s easy to make! Just roast, blend, and you'll savor a fresher taste.
-
Dough Texture: The dough will be sticky—that’s perfectly normal! Resist the urge to add too much flour when shaping; this keeps your bread moist.
-
Preheat Wisely: Don't skip preheating the Dutch oven! A well-heated pot ensures a crispy crust.
For more insights into bread making, check out The Fresh Loaf or King Arthur Baking. Happy baking!
Serving Suggestions for Perfect Dutch Oven Pumpkin Bread
To truly savor your perfect Dutch oven pumpkin bread, consider a few delightful serving ideas that elevate its charm.
- Spread it Warm: Slather on some cream cheese or maple butter for a sweet touch that pairs wonderfully with the pumpkin flavor.
- Savory Twist: Top with Turkey Bacon or a slice of Chicken Ham for a hearty sandwich that delights at lunch.
- Hearty Breakfast: Serve with scrambled eggs and fresh fruit for a cozy morning meal.
For a cozy night in, pair a slice with herbal tea or hot cider. This combination complements the warm spices beautifully! Looking for more serving ideas? Check out this article for creative pumpkin bread pairings!
Time Breakdown for Perfect Dutch Oven Pumpkin Bread
When you visualize making perfect Dutch oven pumpkin bread, it can feel daunting. Don’t worry! I've broken down each step into manageable time frames so you can plan your baking easily.
Preparation time
About 15 minutes is all you need to activate the yeast and mix the ingredients. This initial step sets the foundation for your delicious loaf!
Rising time
The first rise takes around 4 hours, followed by an overnight chill in the fridge (12 hours). Don’t rush this step; it develops the flavor!
Baking time
Once you’re ready to bake, it takes about 40-45 minutes in the oven. You’ll see your bread transform into a beautiful golden loaf.
Total time
In total, you’re looking at 16-20 hours from start to finish. Patience is key! While some of this is inactive time, it’s well worth it for the flavor and texture of your Dutch oven pumpkin bread masterpiece.
Feel free to check out more tips on yeast activation and rising times on reliable culinary websites like King Arthur Baking or Serious Eats. Happy baking!
Nutritional Facts for Perfect Dutch Oven Pumpkin Bread
Understanding the nutritional profile of your perfect Dutch oven pumpkin bread can help you enjoy it even more! Here’s a quick breakdown to keep you informed as you indulge.
Calories
Each slice contains approximately 120 calories, making it a delightful treat without derailing your health goals.
Carbohydrates
With around 25 grams of carbs per slice, this loaf offers a satisfying source of energy—perfect for those busy afternoons!
Fiber
You'll get about 2 grams of fiber in every slice, contributing to your daily intake and helping maintain digestive health.
For a deeper dive into the health benefits of pumpkin, check out resources from credible sites like the Nutrition Journal or the Harvard T.H. Chan School of Public Health.
FAQs about Perfect Dutch Oven Pumpkin Bread
Can I use fresh pumpkin instead of canned?
Absolutely! If you're feeling adventurous, using fresh pumpkin can add a unique flavor to your perfect Dutch oven pumpkin bread. Just make sure to roast or steam your pumpkin until tender, then purée it for the smooth consistency you need. It might require a bit more effort, but the fresh taste is well worth it!
How can I store leftover pumpkin bread?
To keep your perfect Dutch oven pumpkin bread fresh, store it in an airtight container at room temperature for up to three days. If you have more than you can consume, wrap individual slices tightly in plastic wrap and place them in a zip-top bag in the freezer. It should last for up to three months!
What’s the best way to reheat pumpkin bread?
For the best results, heat your perfect Dutch oven pumpkin bread in the oven. Preheat it to 350°F (175°C), wrap the bread in aluminum foil, and warm it for about 10-15 minutes. This helps maintain moisture and keeps the crust from getting too hard. Alternatively, you can microwave a slice for about 10-15 seconds, just be cautious not to overdo it!
Conclusion on Perfect Dutch Oven Pumpkin Bread
In summary, creating the perfect Dutch oven pumpkin bread is truly rewarding. With a delightful balance of flavors and textures, this recipe captures the essence of fall. Remember to be patient during the rise—great bread takes time! Enjoy your homemade bread warm, or toast slices for breakfast. Happy baking!
Perfect Dutch Oven Pumpkin Bread: Easy Recipe for Autumn Delights
Equipment
- Dutch oven
- Mixing Bowl
- Whisk
- Rubber spatula
- Parchment paper
- tea towel
- sharp paring knife
Ingredients
- 180 g cool water
- ½ teaspoon active dry yeast use ¼ teaspoon for overnight rise
- 225 g pumpkin puree
- 425 g bread flour
- 2 teaspoon fine sea salt
Instructions
Activate the Yeast and Combine Wet Ingredients
- In a large bowl, pour in the cool water and sprinkle the active dry yeast on top. Whisk or stir gently to dissolve the yeast, then let it sit for a few minutes to activate. Next, add the pumpkin puree and whisk until the mixture becomes a smooth, orange liquid without any lumps remaining.
Mix and Develop the Dough
- Add the bread flour and fine sea salt to the pumpkin-yeast mixture in the bowl. Stir everything together using a rubber spatula as much as possible, then switch to your hands to squeeze and fold the dough, ensuring all flour is absorbed and the dough is evenly mixed. Cover the bowl with plastic wrap and leave it at room temperature for one hour.
- After an hour, wet your fingers and perform a series of dough folds: lift the dough from one side and fold it over itself several times, stopping when the dough tightens and resists folding. Cover again and let rise until it increases in volume by about a third, for another 3-4 hours.
- Pop any large air bubbles you see to keep the bread’s texture even. Finally, transfer the bowl to the fridge to chill and rest for about 12 hours, or overnight.
Shape the Dough and Prepare for Final Rise
- The next morning, take the chilled dough from the fridge and gently transfer it to a floured work surface. Using floured hands, shape the dough into a tight, round ball by tucking the edges underneath and using the sides of your hands to round it out.
- Place the shaped dough onto a small square of parchment paper and dust the top lightly with flour. Cover the dough with a tea towel and let it rise at room temperature for 3-4 hours, until it looks puffy and slightly expanded.
Preheat Oven and Score the Dough
- Place a 4-6 quart Dutch oven in your oven and preheat to 450°F (230°C). Once the oven is hot, let the Dutch oven continue heating inside for another 10 to 20 minutes to ensure it’s thoroughly preheated.
- Meanwhile, use a sharp paring knife to score the top of your risen dough with a shallow slash about ½ cm deep.
Bake the Bread
- Carefully remove the preheated Dutch oven from the oven. Lifting by the parchment paper, transfer the scored dough into the pot, cover with the lid, and bake on the center rack for 20 minutes.
- Then, remove the lid and continue baking for another 20-25 minutes, until the bread is deeply golden and the crust feels firm to the touch.
Cool and Serve
- Take the baked bread out of the Dutch oven and let it cool on a rack for at least an hour before slicing. This resting time allows the crumb to set and the flavors to fully develop.


Leave a Reply