
Introduction to Mini Cheesecakes
Mini cheesecakes have quickly become a favorite among young professionals, blending flavor, convenience, and a touch of elegance. Whether you're hosting a dinner party or enjoying a quiet night in, these delightful miniature desserts pack all the creamy goodness of a traditional cheesecake into a bite-sized treat.
Why Mini Cheesecakes Are the Perfect Treat for Young Professionals
As busy professionals, we often struggle to find the time to indulge in elaborate desserts. Enter mini cheesecakes! Their individual serving sizes make them perfect for sharing (or not—no judgment here!). Plus, you can prepare them in advance and pop them into the fridge, ready for a sweet escape after a long workday.
Not to mention, they’re incredibly versatile. You can easily customize these mini treats with various toppings—try fresh fruits, chocolate drizzles, or a dollop of whipped cream. The possibilities are endless!
Mini cheesecakes also offer a sense of nostalgia, evoking memories of family gatherings and celebrations. They bring a sophisticated flair to everyday life, serving as the perfect balance between indulgence and practicality.
If you want to elevate your dessert game without the hassle, these delightful mini cheesecakes are just what you need. Ready to dive into the recipe? Let’s get started!
Ingredients for Mini Cheesecakes
When diving into the delightful world of mini cheesecakes, having the right ingredients makes all the difference. Below, we break down the essentials you’ll need for the crust and the creamy filling.
The essential ingredients for the crust
The crust is the sturdy base that supports your mini cheesecakes, adding a perfect crunch. You’ll need:
- Graham cracker crumbs: 1 cup (120g) which gives that nostalgic flavor.
- Granulated sugar: 2 tablespoons (25g) to enhance sweetness.
- Unsalted butter: 3 tablespoons (43g), melted to bind everything together.
These ingredients will create a crumbly yet firm base that contrasts beautifully with the smooth filling.
The key components of the creamy filling
Now onto the heart of the cheesecake! Here are the critical ingredients for your luscious, creamy filling:
- Full-fat cream cheese: 16 ounces (452g) for that rich texture.
- Granulated sugar: ½ cup (100g) to balance the tanginess.
- Sour cream: ¼ cup (60g) for a burst of creaminess.
- Vanilla extract: 1 teaspoon to enhance the flavor.
- Lemon juice: 1 teaspoon to add a zesty note.
- Eggs: 2 large, ensuring the filling sets beautifully.
These ingredients combine to create a velvety filling that will have everyone asking for seconds! For more baking inspiration, explore sources like King Arthur Baking or Joy of Baking.
Preparing Mini Cheesecakes
Making mini cheesecakes is just as delightful as eating them! Following these steps will guide you smoothly from start to finish, ensuring your mini treats turn out luscious and creamy, while also impressing your friends or guests.
Gather Your Ingredients
First things first! For the crust, you’ll need:
- 1 cup (120g) graham cracker crumbs (about 8 full sheets)
- 2 Tablespoons (25g) granulated sugar
- 3 Tablespoons (43g) unsalted butter, melted
For the creamy filling, you’ll require:
- 16 ounces (452g) full-fat cream cheese, softened to room temperature
- ½ cup (100g) granulated sugar
- ¼ cup (60g) full-fat sour cream, at room temperature
- 1 teaspoon pure vanilla extract
- 1 teaspoon freshly squeezed lemon juice
- 2 large eggs, at room temperature
This combination of ingredients ensures a cheesecake that is both delightfully sweet and perfectly balanced.
Create the Graham Cracker Crust
Now let's move on to the crust! In a medium bowl, mix together the graham cracker crumbs, granulated sugar, and melted butter until the mixture resembles wet sand. This is the key to achieving that classic base. Use a heaping tablespoon of the mixture to fill each cupcake liner and press it down firmly. A well-pressed crust will hold its shape when baked. Pop the pan in the oven for about six minutes to set the crust, creating that deliciously crunchy foundation for your mini cheesecakes.
Blend the Creamy Cheesecake Filling
While the crust is baking, it’s time to whip up that cream cheese filling! Using a stand mixer or a handheld mixer fitted with a paddle attachment, beat the softened cream cheese and granulated sugar together at medium-high speed for about two minutes until it’s silky smooth. Next, mix in the sour cream, vanilla extract, and lemon juice until fully incorporated. Here comes the crucial part: add the eggs one at a time, mixing just until combined after each addition. Too much mixing could lead to cracks during baking, so be gentle!
Fill the Muffin Pan with Crust and Filling
Once the crusts are ready, fill each liner to the top with the cheesecake batter. Don’t worry if the crust is warm; it will help meld the flavors as they bake together! This is also a great moment to be playful with flavors. Feel free to add chocolate chips or berries to the batter for a twist.
Bake the Mini Cheesecakes to Perfection
Finally, it’s time for the oven! Bake your mini cheesecakes at 350°F (177°C) for around 20 minutes. You’ll know they’re ready when the edges are set, but the centers still have a slight jiggle when you tap the pan. If you’re aiming for an ultra-smooth surface, consider using a water bath; it might sound fancy, but it’s straightforward and adds a bit of steam to the baking process.
Let your mini cheesecakes cool at room temperature before transferring them to the refrigerator to chill. They'll need at least two hours to set up, but they can stay longer if you want to prepare ahead—if you can resist the temptation!
Variations on Mini Cheesecakes
Creating mini cheesecakes opens the door for a plethora of delicious variations! Let’s explore two delightful twists that can elevate your cheesecakes and impress your friends.
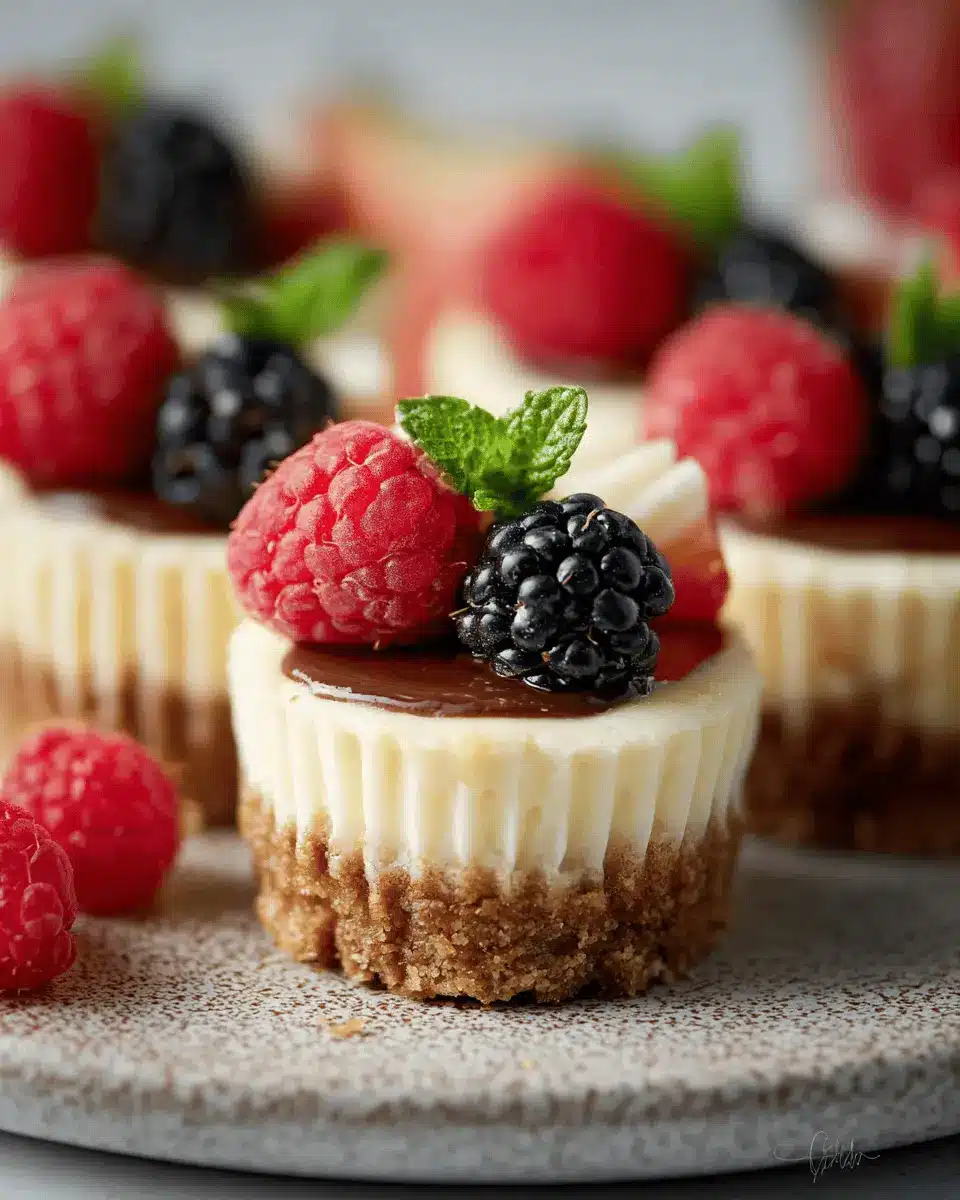
Fruit-topped Mini Cheesecakes
A classic choice is to top your mini cheesecakes with your favorite fruits. Think vibrant strawberries, blueberries, or even mango slices. Just add a layer of fruit compote or fresh fruit on top after chilling for a refreshing burst of flavor—perfect for brightening up any gathering! You can also drizzle them with a homemade raspberry or strawberry sauce for an extra touch. For more fruity ideas, consider checking out this fruit compote recipe.
Chocolate Swirl Mini Cheesecakes
For chocolate lovers, mini cheesecakes can be transformed into a sweet indulgence by swirling in melted chocolate. Simply melt some dark or milk chocolate and fold it gently into half of the cheesecake batter before filling your liners. After baking, you’ll have beautiful, marbled cheesecakes that satisfy a chocolate craving. Top with chocolate shavings or a dollop of whipped cream for a stunning presentation. Want to brush up on chocolate melting techniques? Explore this helpful guide on melting chocolate.
These variations are just the beginning! Get creative and mix in other flavors like caramel, pumpkin, or even matcha for personalized delights. Enjoy baking!
Baking notes for Mini Cheesecakes
Tips for achieving the perfect texture
To create mini cheesecakes with a creamy, velvety texture, make sure all your ingredients are at room temperature, especially the cream cheese. Mixing at medium speed helps avoid incorporating too much air, which can lead to cracks. If you decide to use a water bath, it helps keep the cheesecakes moist as they bake, giving you that smooth finish.
Common mistakes to avoid
One common pitfall is over-mixing the filling once the eggs are added—just mix until combined! Also, keep an eye on the baking time; you want the edges set and the center slightly jiggly. Lastly, don’t rush the cooling process; a gradual cool prevents sinking. For more tips on baking cheesecakes, check out this guide.
Serving Suggestions for Mini Cheesecakes
Garnishes that Elevate Your Mini Cheesecakes
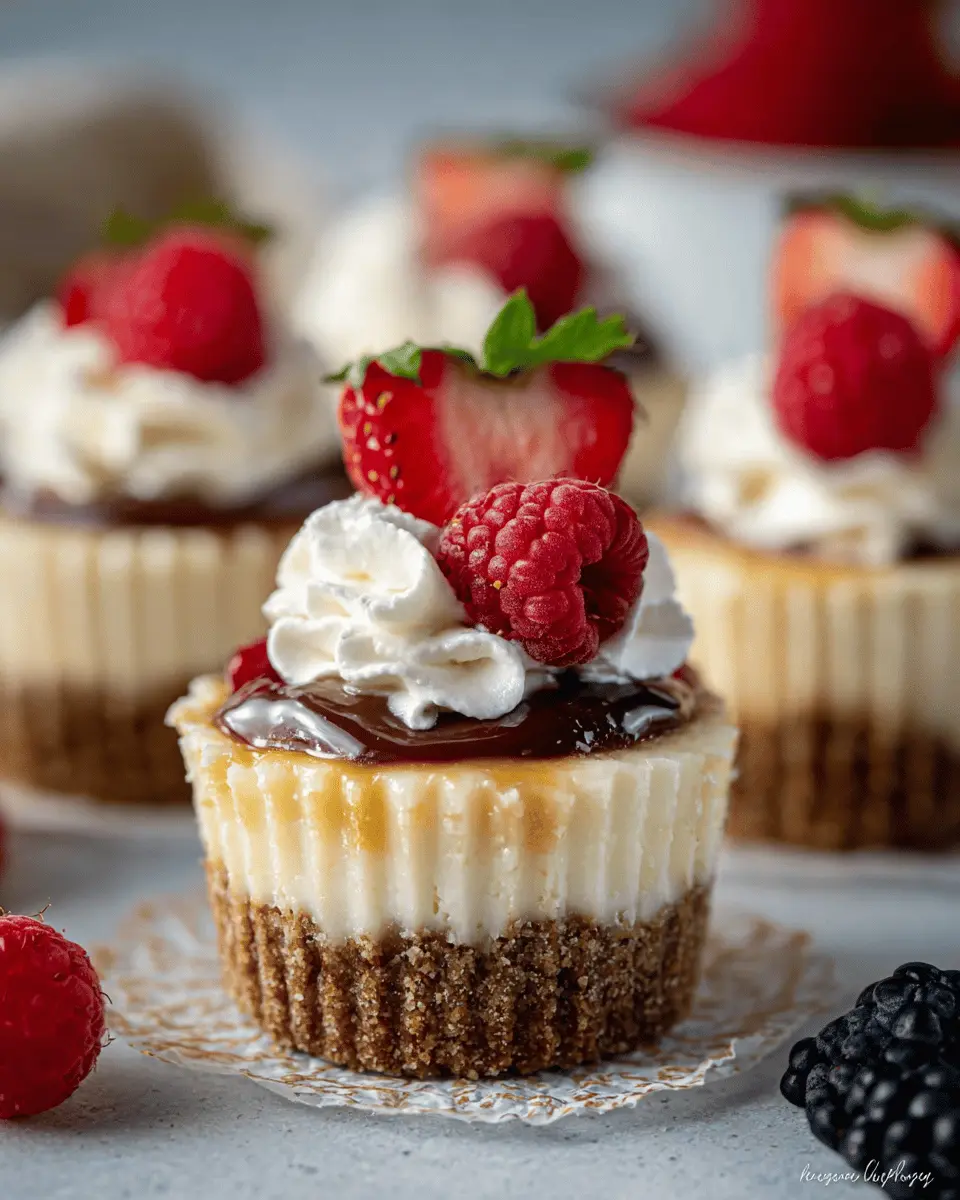
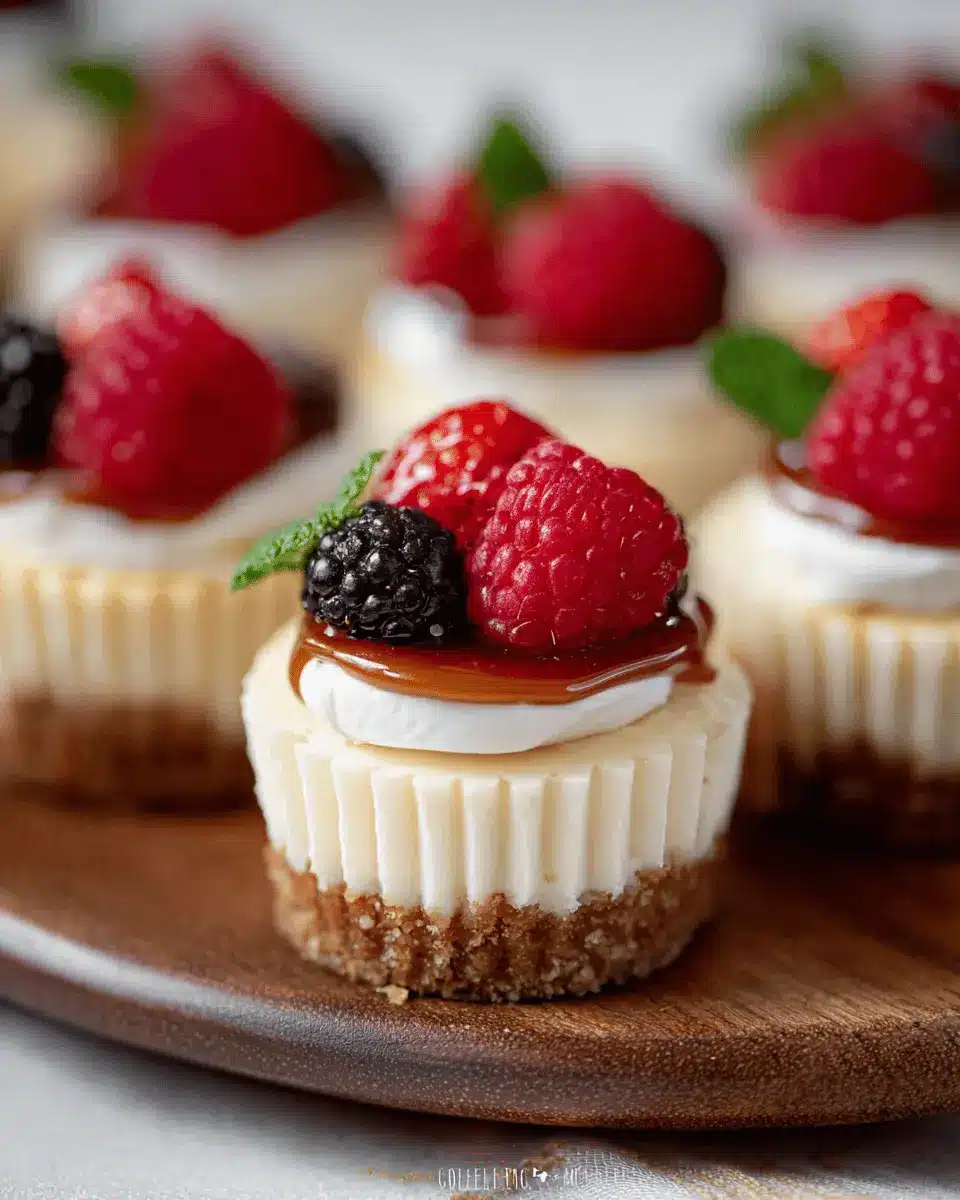
Elevate your mini cheesecakes with a variety of delightful toppings. Consider adding:
- Fresh berries (strawberries, blueberries, or raspberries)
- A drizzle of chocolate or caramel sauce for extra indulgence
- Crushed nuts or sprinkles for a delightful crunch
- Flavorful whipped cream—pipe it beautifully or spread it on generously
These vibrant garnishes not only enhance the visual appeal but also offer exciting taste combinations that impress your guests.
The Best Occasions to Serve Mini Cheesecakes
Mini cheesecakes are versatile and perfect for any gathering! Whether it's a birthday, holiday party, or a casual get-together with friends, these treats fit seamlessly. They are also an excellent choice for potlucks or dessert tables, allowing everyone to indulge without the commitment of a full slice. Plus, you can customize them for seasonal celebrations, like pumpkin spice for autumn or berry blast for summer. Who wouldn't love a personal-sized dessert that’s both adorable and delicious?
Time Details for Mini Cheesecakes
Preparation Time
Getting everything ready for your mini cheesecakes takes about 15 minutes. You’ll be mixing up the crust and filling, making it a quick and enjoyable process!
Baking Time
Once your cheesecakes are assembled, they need to bake for approximately 20 minutes. You’ll want to keep an eye on them to ensure the edges are set while the center remains just slightly jiggly.
Cooling and Chilling Time
After baking, let the cheesecakes cool for about 45 minutes at room temperature. Then, they should chill in the fridge for at least 2 hours, or if you’re in a hurry, you can pop them in the freezer for an hour. This chilling time is crucial for achieving that perfect creamy texture!
Nutritional Information for Mini Cheesecakes
Calories per cheesecake
Each delightful mini cheesecake contains approximately 280 calories. This makes them indulgent yet manageable for a sweet treat!
Sugar content per serving
You’ll find around 18 grams of sugar in each cheesecake, which comes from both the crust and the filling. Be mindful of this if you’re watching your sugar intake.
Best practices for a healthier mini cheesecake
Looking to lighten up your mini cheesecakes? Consider these tips:
- Substitute half of the cream cheese with Greek yogurt for added protein and fewer calories.
- Use a low-sugar graham cracker for the crust.
- Try natural sweeteners like honey or maple syrup as alternatives.
By following these suggestions, you can indulge guilt-free in these delicious mini cheesecakes! For more helpful tips on healthy baking, check out resources like Healthline for great insights.
FAQs about Mini Cheesecakes
How do I prevent my mini cheesecakes from cracking?
Cracking can be a common issue with cheesecakes, but there are a few simple tricks to keep your mini cheesecakes smooth. First, make sure to beat your cream cheese thoroughly to remove any lumps. Avoid over-mixing once you add the eggs, as this can incorporate too much air. Lastly, consider using a water bath during baking, which helps maintain moisture and gentle heat in your oven.
Can I make mini cheesecakes in advance?
Absolutely! Mini cheesecakes are perfect for prep ahead of time. You can bake them up to 24 hours in advance and simply refrigerate. If you're looking to freeze them, they can stay fresh for up to two months! Just make sure to wrap them tightly in plastic wrap or an airtight container.
What can I use as a substitute for sour cream?
If you're out of sour cream, don't worry! You can use plain Greek yogurt as a substitute, which provides a similar tangy flavor. Alternatively, a mix of cream cheese and a splash of lemon juice can also do the trick—just remember to maintain the same volume for best results.
Conclusion on Mini Cheesecakes
Baking mini cheesecakes at home brings joy and satisfaction like no other. Not only are these delightful treats easy to make, but they also allow you to customize flavors and toppings. Gather your friends and family to share the love of these mini cheesecakes; they'll certainly appreciate the effort!
The Joy of Baking and Enjoying Mini Cheesecakes at Home
There's something truly magical about the process of baking. The warm, inviting aroma that fills your kitchen, the thrill of mixing ingredients, and the anticipation of pulling those mini cheesecakes from the oven create an experience that is both enjoyable and rewarding.
Making these little delights can also serve as a stress reliever after a long week. Imagine inviting friends over, sharing laughter, and indulging in creamy, decadent mini treats straight from your oven. For flavor inspiration, visit sources like Sally's Baking Addiction or BBC Good Food for topping ideas that will impress your guests.
So why not gather your ingredients and embark on this delightful baking journey? The reward is not just in the taste; it's in the joy of creating something special that everyone can savor. Happy baking!
Mini Cheesecakes
Equipment
- Muffin Pan
- Mixing Bowl
- handheld mixer
- Roasting pan
Ingredients
Crust
- 1 cup graham cracker crumbs (about 8 full sheet graham crackers)
- 2 Tablespoons granulated sugar
- 3 Tablespoons unsalted butter melted
Filling
- 16 ounces cream cheese full-fat, softened to room temperature
- ½ cup granulated sugar
- ¼ cup sour cream full-fat, at room temperature
- 1 teaspoon vanilla extract pure
- 1 teaspoon freshly squeezed lemon juice
- 2 large eggs at room temperature
Instructions
Preparation
- Preheat oven to 350°F (177°C). Line a standard muffin pan with cupcake liners.
- Combine all of the crust ingredients in a medium bowl. Mixture will be sandy. Firmly press a heaping Tablespoon of crust mixture into each liner. Bake the crusts for 6 minutes.
- Using a handheld or stand mixer fitted with a paddle or whisk attachment, beat the cream cheese and granulated sugar together on medium-high speed in a large bowl until the mixture is completely smooth and creamy, about 2 minutes. Add the sour cream, lemon juice, and vanilla extract, and beat until fully combined. With the mixer running on medium speed, add the eggs 1 at a time, beating just until combined before adding the next. Do not over-mix. Divide the batter among the liners, filling each all the way to the top.
- Boil a pot of water. Place a large metal baking or roasting pan on the bottom oven rack of the preheated oven. Pour boiling water into pan, about 1 inch deep. Immediately place the cheesecakes on the center rack. Close oven to trap the steam inside.
- Bake until the edges are set and the centers slightly jiggle when you tap the pan, about 20 minutes.
- Set the pan on a cooling rack and allow cheesecakes to cool at room temperature for 45 minutes, then transfer to the refrigerator and chill for at least 2 hours and up to 24 hours. If chilling in the refrigerator for longer than 2 hours, loosely cover the cheesecakes.
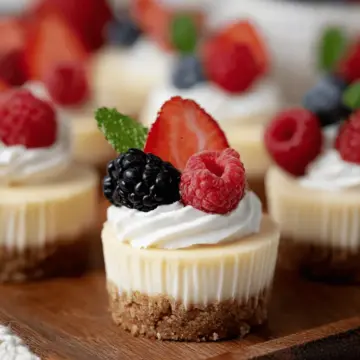
- Top the cheesecakes with whipped cream and garnish with berries, mint, and/or other toppings.
- Cover and store leftover cheesecakes in the refrigerator for up to 5 days.
Leave a Reply