
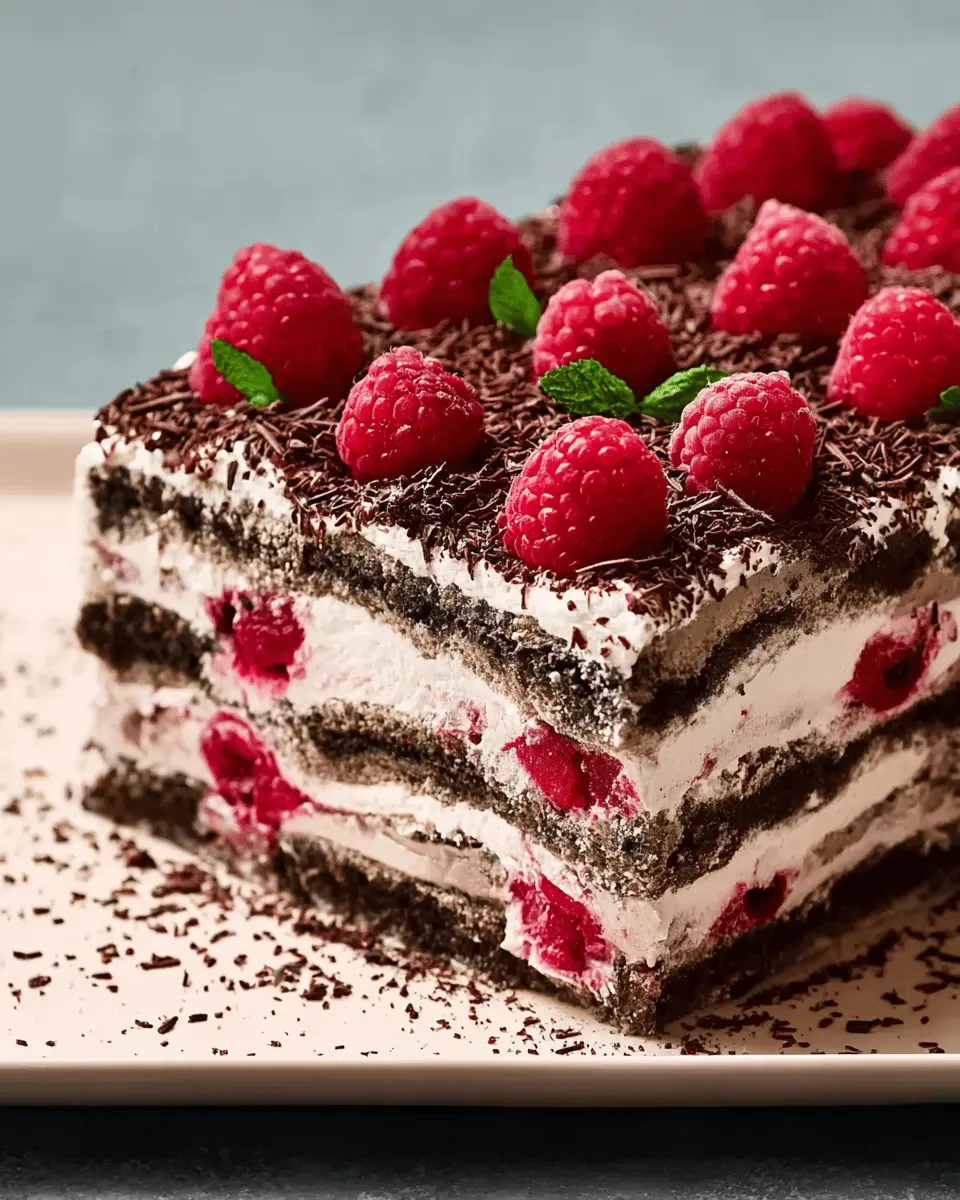
Introduction to Chocolate-Raspberry Icebox Cake
When the summer heat kicks in, no one wants to fire up the oven for dessert. This is where the Chocolate-Raspberry Icebox Cake comes to the rescue! With its layers of creamy vanilla ice cream, tangy raspberry sorbet, and crunchy chocolate wafer cookies, it's a delight that will cool you down while satisfying your sweet tooth.
Why are icebox cakes the perfect summer dessert?
Icebox cakes are a game-changer for summertime gatherings. They require just minimal prep and then chill in the freezer, allowing you to enjoy the fun with friends rather than sweating over a hot stove. Plus, they're easily customizable, so you can swap ingredients based on what's in season or your personal favorites.
Take it from experts: desserts like this work not just because they are delicious, but because they are visually stunning. The vibrant colors and textural contrast between the soft ice cream and crunchy cookies create a feast for both your eyes and taste buds. Whether you're hosting a backyard barbecue or simply indulging at home, this Chocolate-Raspberry Icebox Cake delivers deliciousness without the stress. Ready to dive into the recipe? Let’s get started!
Ingredients for Chocolate-Raspberry Icebox Cake
Creating a Chocolate-Raspberry Icebox Cake is simple and rewarding, especially with the right ingredients on hand. Here’s a breakdown of what you’ll need to make this delightful summertime dessert.
Essential Ingredients for the Base
- Vanilla Ice Cream: Two pints of softened vanilla ice cream give the cake a creamy, sweet base.
- Raspberry Sorbet: One pint of softened raspberry sorbet adds a refreshing tartness that perfectly complements the sweetness.
- Chocolate Wafer Cookies: About 2 ½ cups of crushed chocolate wafer cookies create the cake’s delectable crunchy layers.
- Fresh Raspberries: Use two cups for layering and more for garnish, giving bursts of flavor and vibrant color.
Toppings and Garnishes to Consider
To elevate your Chocolate-Raspberry Icebox Cake, consider these delicious finishing touches:
- Whipped Cream: Whip one cup of heavy cream with powdered sugar to create a luscious topping.
- Extra Fresh Raspberries: Scatter them over the top for that perfect pop of color and flavor.
- Chocolate Shavings: For an elegant touch, sprinkle dark chocolate shavings or curls over the whipped cream.
With these simple yet scrumptious ingredients, you're on your way to impressing friends and family with a stunning dessert that requires no baking! Ready to make your cake? Check out the full recipe for all the details.
Preparing Chocolate-Raspberry Icebox Cake
Creating a decadent Chocolate-Raspberry Icebox Cake is a delightful project that yields a stunning dessert with minimal effort. Let’s walk through each step together to ensure your cake turns out perfectly.
Gather and prepare your ingredients
Before diving into the process, it’s important to have everything on hand. Here’s what you’ll need:
- Cooking spray
- 2 pints of softened vanilla ice cream
- 1 pint of softened raspberry sorbet
- 1 (9-ounce) package of chocolate wafer cookies, crushed (about 2 ½ cups)
- 2 cups of fresh raspberries, plus more for garnish
- 1 cup of heavy cream
- 3 tablespoons of powdered sugar
Give yourself about 10 minutes to gather and prep. The key to a smooth assembly is having your ice cream soften at room temperature until it’s easy to mix. Trust me, it makes a significant difference!
Create the ice cream and sorbet mixture
In a large bowl, gently fold the softened vanilla ice cream and raspberry sorbet together. The goal here is to have the sorbet just streaked through the ice cream—imagine a gorgeous, marbled look without completely blending the two. This step not only creates a beautiful presentation but also allows the flavor combinations to shine in each bite.
Layer the cake components
Now onto the fun part: assembling your Chocolate-Raspberry Icebox Cake. Start by coating a 9 x 5-inch loaf pan with cooking spray. Line the pan with parchment paper, creating overhangs for easy removal later.
- Sprinkle ½ cup of the crushed cookies into the bottom of the prepared loaf pan.
- Spoon 1 ½ cups of the ice cream mixture over the cookies, creating a luscious base.
- Scatter ½ cup of fresh raspberries on top, gently pressing them into the mixture.
Repeat these layers two more times. For the final layer, add the remaining ½ cup of crushed cookies, which will give a lovely texture on top when you serve.
Freeze the cake
Once layered, wrap your loaf pan tightly with plastic wrap. This step is essential to ensure no unpleasant freezer odors infiltrate your masterpiece. Freeze the cake for at least 4 hours or up to 24 hours. The longer you let it freeze, the firmer and better it will hold together, but if you can’t wait, a quick freeze will still work wonders!
Whip the cream and add final touches
After the freezing time, remove your cake from the freezer. Let it stand at room temperature for about 5 minutes. This will slightly soften the edges, making it easier to remove from the pan.
While the cake rests, whip up the cream. In a medium bowl, combine the heavy cream and powdered sugar, whisking until stiff peaks form. This will give your cake that airy top layer that complements the rich flavors beautifully.
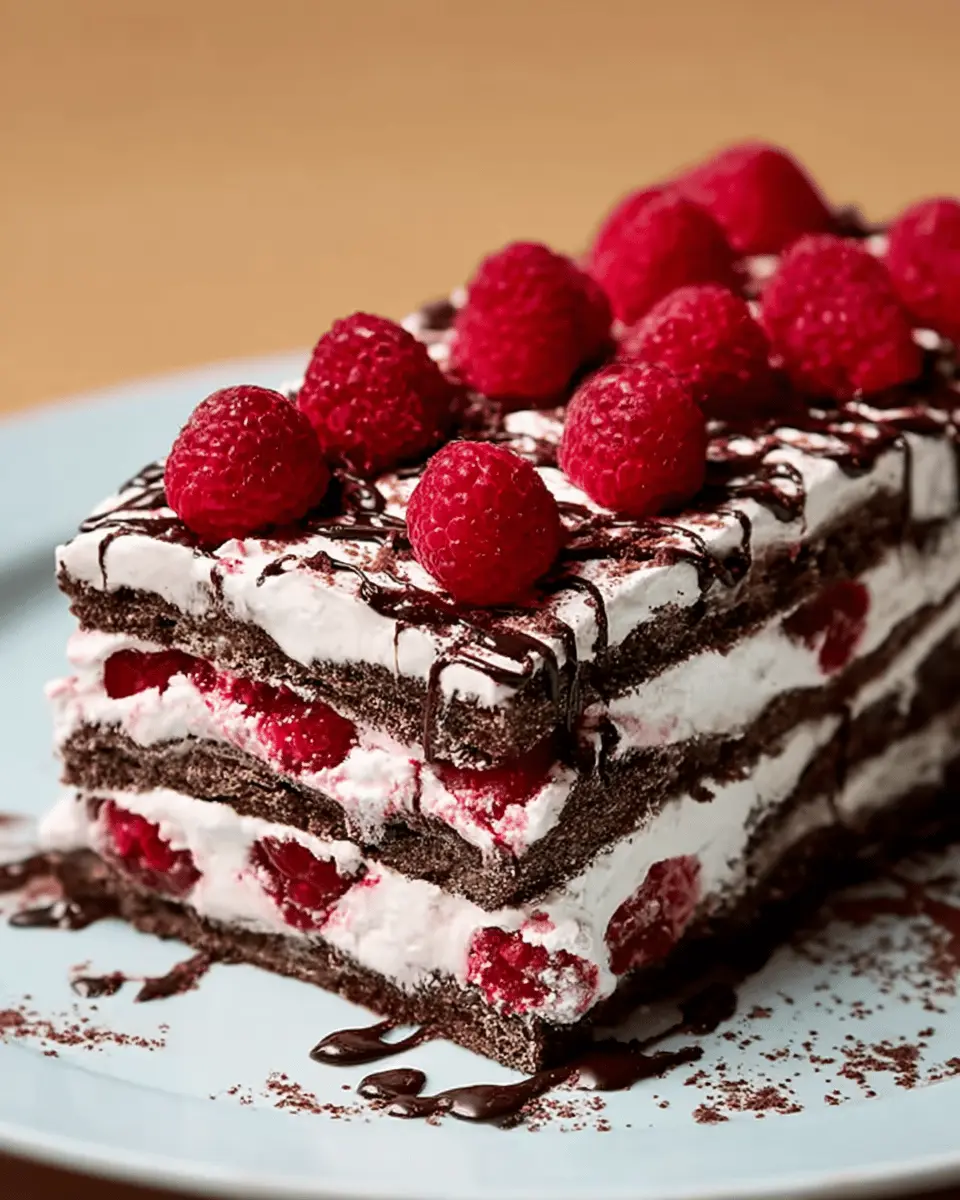
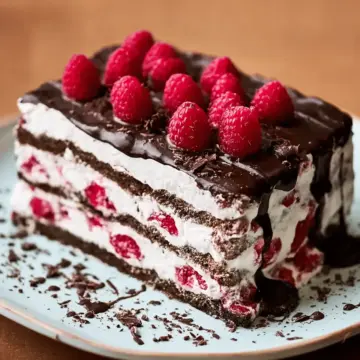
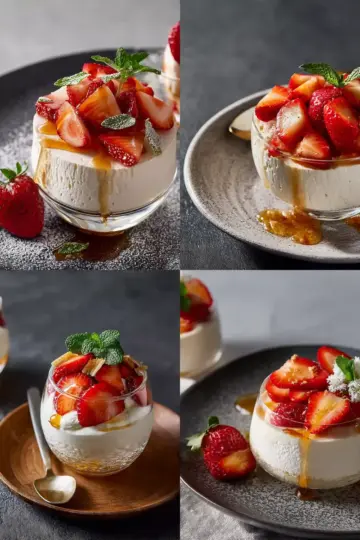
Now, use the parchment paper overhang to lift the cake out of the pan, inverting it onto a plate or platter. Smooth the whipped cream over the top and garnish with fresh raspberries. Every slice promises a delightful experience of creamy, sweet, and tart flavors that will wow your guests!
Enjoy this refreshingly simple yet elegant dessert, and share your experience with friends or family. They will undoubtedly appreciate the love and effort behind this delightful Chocolate-Raspberry Icebox Cake!
Variations on Chocolate-Raspberry Icebox Cake
Different Flavor Combos Using Ice Cream and Sorbet
Feel adventurous? Try swapping in different flavors for a twist on your Chocolate-Raspberry Icebox Cake. For example, mint chocolate chip ice cream and lime sorbet create an unexpected but delightful pairing that's refreshing. Or, consider strawberry ice cream with mango sorbet for a tropical touch. Each combination brings its unique flair, allowing you to tailor the cake to any taste preference.
Alternatives for Toppings and Garnishes
While fresh raspberries are a classic finishing touch, you can elevate your dessert experience by experimenting with toppings.
- Crushed nuts (like almonds or walnuts) add a crunchy texture.
- Chocolate shavings or drizzle lend a rich, elegant touch.
- Alternatively, a sprinkle of cocoa powder or shredded coconut can enhance the visual appeal.
These additions will not only make your Chocolate-Raspberry Icebox Cake a feast for the eyes but also tantalize the taste buds with each bite.
Cooking tips and notes for Chocolate-Raspberry Icebox Cake
Tips for achieving the perfect layering
To create stunning layers in your Chocolate-Raspberry Icebox Cake, ensure your ice cream and sorbet are softened for easy spreading. Start by evenly layering the crushed chocolate cookies, followed by generous portions of the ice cream mixture and fresh raspberries. A little press down helps the layers adhere nicely. If you want to impress, consider using a mix of dark and milk chocolate cookies for added flavor depth!
Recommendations for storing leftovers
If you have any delicious leftovers, simply wrap the icebox cake tightly in plastic wrap and store it in the freezer. It can last up to three weeks! When you're ready to enjoy another slice, allow it to thaw for about 10 minutes at room temperature before serving. This ensures each slice maintains its creamy texture. For tips on preserving desserts, check out the Food Network.

Serving suggestions for Chocolate-Raspberry Icebox Cake
Creative ways to serve and present the cake
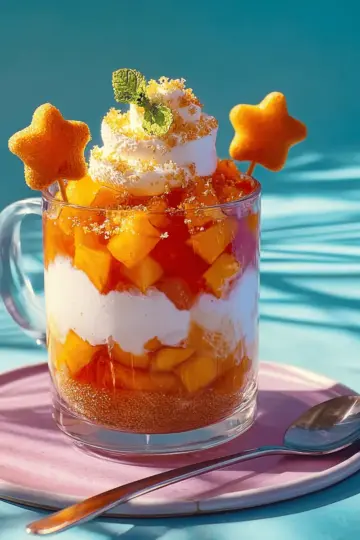
When it comes to serving your Chocolate-Raspberry Icebox Cake, presentation can elevate it to a whole new level. Try slicing the cake into elegant pieces and serving them on white plates to emphasize the vibrant pink and dark chocolate layers. Drizzle with chocolate or raspberry sauce for a touch of artistic flair. You can even add a sprinkle of crushed chocolate wafers on top for extra crunch. For a fun twist, serve individual portions in clear glass cups, layering them with whipped cream and fresh raspberries.
Pairings that complement the dessert
To perfectly complement the Chocolate-Raspberry Icebox Cake, consider serving it alongside a refreshing mint-infused tea or a fruity herbal iced tea. The herbal notes will help balance the richness of the cake. For coffee lovers, a rich espresso or a creamy latte provides the perfect contrast. If you’re feeling adventurous, add a scoop of lemon sorbet on the side for a zesty touch that brightens the dessert.
Time Breakdown for Chocolate-Raspberry Icebox Cake
Preparation Time
You’ll need about 15 minutes to prepare this delightful Chocolate-Raspberry Icebox Cake. Just a quick mix of ingredients and some layering is all it takes to get this treat ready for the freezer.
Freezing Time
Once assembled, the cake requires at least 4 hours in the freezer to set properly. This is the perfect time to unwind or whip up a quick dinner while the cake works its magic.
Total Time
From start to finish, you’re looking at a total time commitment of 4 hours and 15 minutes. Trust us, this smooth and fruity delight is worth every second!
Ready to dive in and create a dessert that’s both stunning and scrumptious? Learn how to layer it perfectly here!
Nutritional Facts for Chocolate-Raspberry Icebox Cake
Calories per serving
Each serving of Chocolate-Raspberry Icebox Cake contains approximately 350 calories, making it a delightful yet indulgent treat. Perfect for special occasions, it offers a balance of flavors without overwhelming your daily intake.
Sugar content
With about 30 grams of sugar per serving, this cake includes natural sweetness from raspberries and the soft textures of ice cream. While delicious, be sure to enjoy it in moderation, particularly if you're watching your sugar levels. For healthier options, consider using alternatives like honey or agave syrup.
Dairy and fat content
This creamy dessert packs around 20 grams of fat per serving, primarily from the vanilla ice cream and heavy cream. While this adds to the rich and satisfying experience, opting for lower-fat ice cream can help reduce fat content without sacrificing too much flavor. For a vegan alternative, try coconut cream and plant-based ice creams as substitutes.
Choosing to indulge in a slice of Chocolate-Raspberry Icebox Cake can be a small, rewarding part of your day. Just remember, it’s all about balance! For more nutrition tips, you might enjoy exploring resources from the American Heart Association on smart eating habits.
FAQs about Chocolate-Raspberry Icebox Cake
Can I make this cake in advance?
Absolutely! The Chocolate-Raspberry Icebox Cake is perfect for making ahead of time. You can freeze it for up to three weeks. Just ensure you add the whipped cream topping right before serving for that fresh, fluffy texture.
How do I store leftovers?
If you have any leftovers (which might be a challenge with this delicious cake), simply wrap it tightly in plastic wrap and return it to the freezer. It will maintain its delightful flavor and texture for up to a week. You can slice it as needed, making it a ready-to-go treat!
What can I substitute if I don’t have certain ingredients?
If you find yourself short on ingredients, don’t worry! You can swap vanilla ice cream with any of your favorite flavors, like chocolate or strawberry. For those cookies, look for similar chocolate wafer cookies at your local store, or even try crushed graham crackers for a different twist. Get creative and enjoy the process!
Conclusion on Chocolate-Raspberry Icebox Cake
The Chocolate-Raspberry Icebox Cake is a delightful treat that requires minimal effort yet delivers maximum flavor. With creamy layers and a crunchy crust, it’s perfect for any gathering. Serve it up on warm days or special occasions, and watch it become an instant favorite! Enjoy this easy, no-bake dessert for a refreshing finish.
Chocolate-Raspberry Icebox Cake: The Indulgent No-Bake Treat
Equipment
- 9- x 5-inch loaf pan
- Mixing Bowl
- Whisk
- Plastic Wrap
- Parchment paper
Ingredients
- 1 spray Cooking spray
- 2 pints vanilla ice cream softened
- 1 pint raspberry sorbet softened
- 1 package chocolate wafer cookies 9-ounce, crushed (about 2 ½ cups)
- 2 cups fresh raspberries about 9 ounces, plus more for garnish
- 1 cup heavy cream
- 3 tablespoons powdered sugar
Instructions
- Lightly coat a 9- x 5-inch loaf pan with cooking spray. Line with parchment paper, making sure all sides are fully covered and leaving a 2-inch overhang on all sides.
- Fold softened ice cream and sorbet together in a large bowl until sorbet is just streaked through ice cream but not quite swirled, two to three folds.
- Sprinkle ½ cup crushed cookies into bottom of prepared loaf pan. Spread 1 ½ cups ice cream mixture over crushed cookies. Scatter ½ cup fresh raspberries over top, gently pressing into ice cream mixture. Repeat layers 3 times, ending with remaining ½ cup crushed cookies.
- Wrap loaf pan tightly with plastic wrap and freeze until cake is firm, at least 4 hours or up to 24 hours.
- Remove ice cream cake from freezer; unwrap and let stand at room temperature 5 minutes. Meanwhile, whisk together cream and powdered sugar in a medium bowl until stiff peaks form, about 2 minutes.
- Lift ice cream cake out of loaf pan using parchment paper overhang as handles and invert onto a large plate or platter. Dollop whipped cream over top of cake. Garnish with additional fresh raspberries. Slice and serve.

Leave a Reply