
Introduction to Cannoli
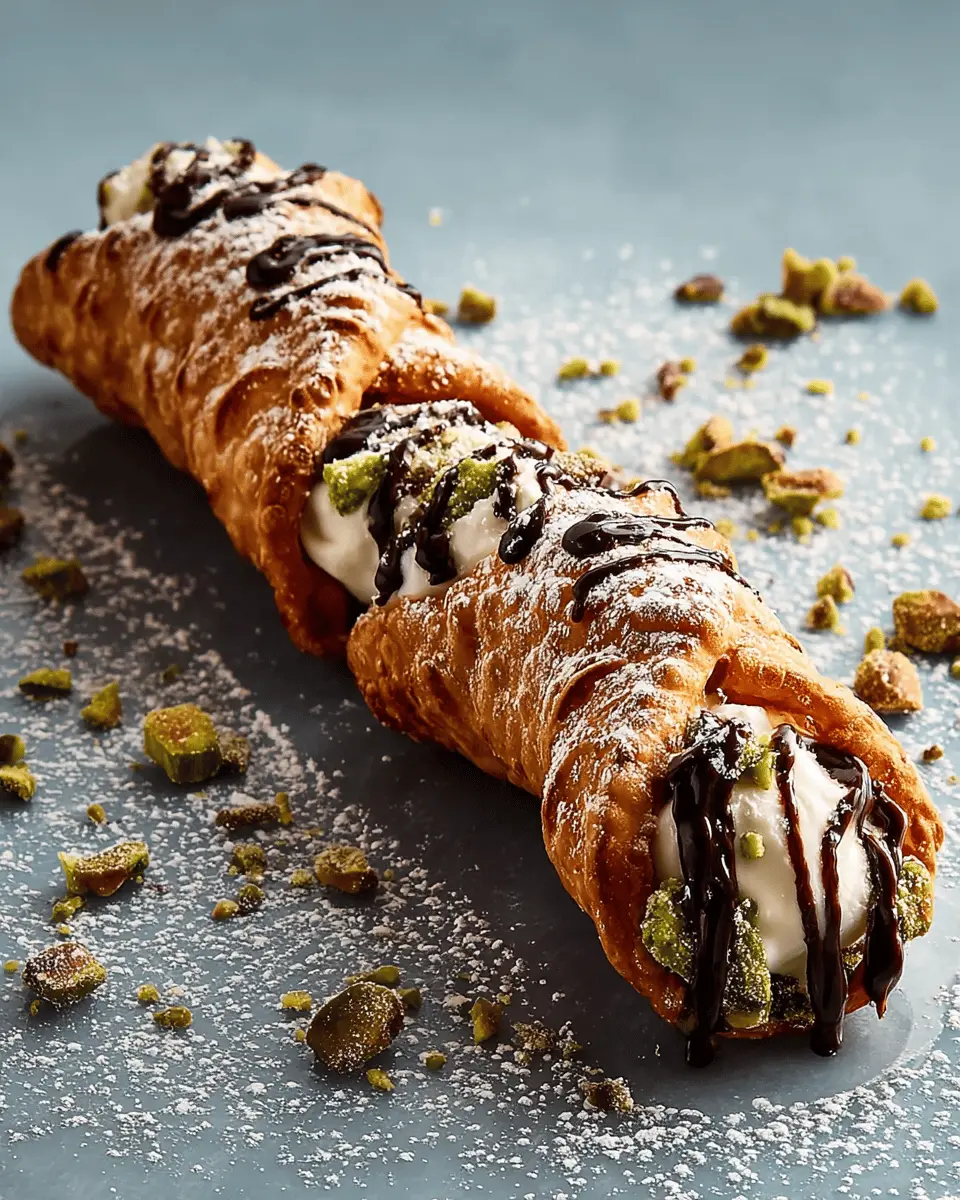
Cannoli are not just any dessert; they are a culinary celebration that brings people together. Originating from Sicily, these delightful treats have a unique history and charm that has captured the hearts of dessert lovers everywhere. The rich, crispy shells are filled with a luscious mixture of ricotta and mascarpone, often enhanced with a hint of citrus zest. This combination creates a flavor experience that's both refreshing and indulgent.
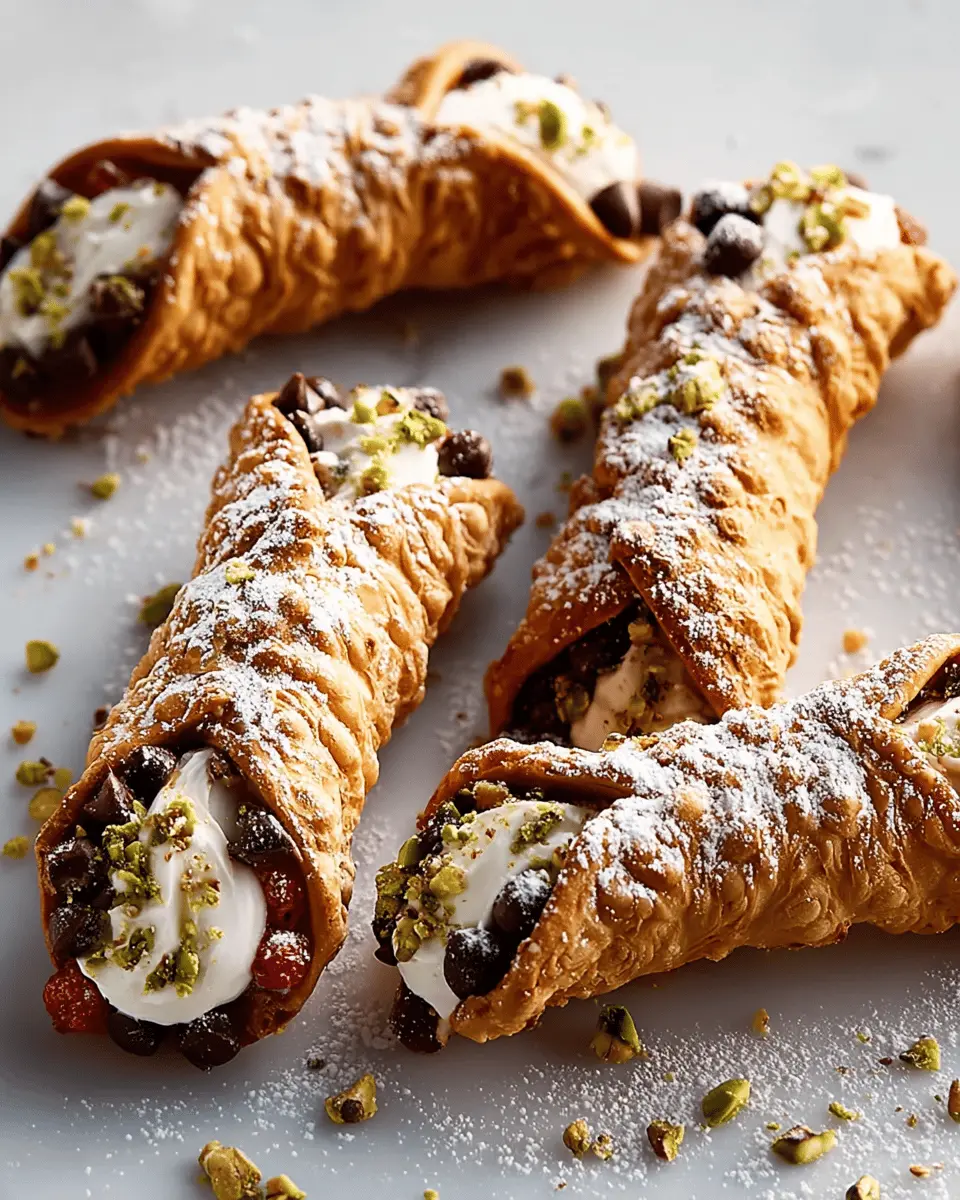
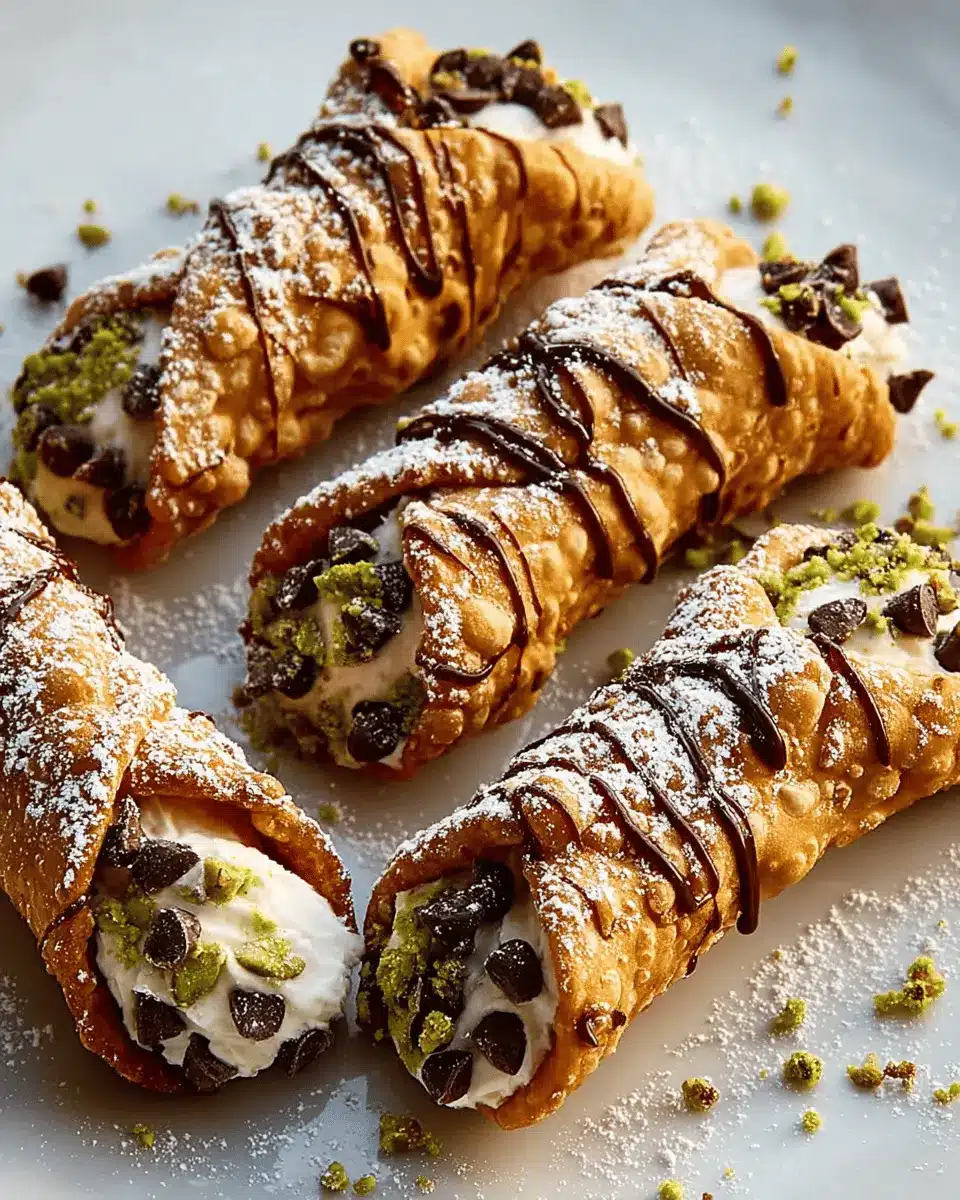
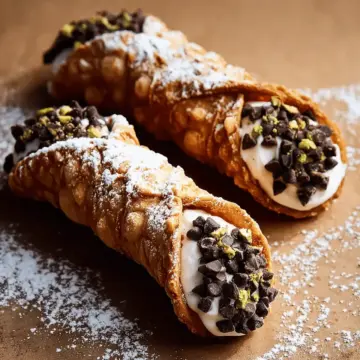
What makes cannoli a beloved dessert? It’s all about the balance. The crispy exterior provides a satisfying crunch, while the creamy filling melts in your mouth. Each bite is a harmonious blend of texture and flavor, making cannoli a favorite at both casual gatherings and sophisticated dinner parties. The addition of toppings like chopped chocolate or pistachios adds a delightful crunch and aesthetic appeal.
If you're intrigued by the art of cannoli-making, you'll be pleased to know that the process can be both fun and rewarding. It’s a perfect way to impress your friends and family while diving into a bit of Italian tradition. So, roll up your sleeves and get ready to create your own batch of these irresistible delights! For more insights into Italian desserts, check out Eat This, Not That.
Ingredients for Cannoli
Creating the perfect cannoli starts with gathering a few essential ingredients. Let's break it down into two main sections: the dough and the filling.
Dough Ingredients
The dough creates that iconic, crisp shell that holds the delightful filling. Here's what you'll need:
- All-purpose flour: 1 ½ cups (about 6 ⅓ ounces)
- Cold unsalted butter: 3 tablespoons, cubed
- Kosher salt: ¾ teaspoon
- Ground cinnamon: ⅛ teaspoon
- Cold water: 4 tablespoons
- Marsala (or other non-alcoholic substitute): 3 tablespoons
- Beaten egg white: 1 large
- Refined coconut oil (or lard): for frying
- Cooking spray: for greasing
Filling Ingredients
Now, let's whip up that creamy filling that makes every bite unforgettable. You'll love this combination:
- Whole-milk ricotta cheese: 8 ¾ ounces, drained (1 cup)
- Mascarpone cheese: 1 (8-ounce) container
- Powdered sugar: ¾ cup (about 3 ounces)
- Fresh orange zest: 1 ½ teaspoons (from 1 orange)
- Bittersweet chocolate bar: ½ (4 ounces), chopped (or use 70% cacao)
- Chopped salted roasted pistachios: ¼ cup
Gather these ingredients, and you’ll be well on your way to crafting mouthwatering cannoli that will impress your friends—and make your kitchen smell divine! If you're curious for more tips on selecting quality ingredients, check out Serious Eats for expert insights.
Preparing Cannoli
Creating your own cannoli at home is a delightful culinary adventure! With the right steps, you can produce these crispy, cream-filled treats that will impress any guest. Let's dive into the process to ensure your cannoli turn out spectacular.
Step 1: Prepare the Dough
Begin by making your cannoli dough. In a food processor, combine 1 ½ cups of all-purpose flour, 3 tablespoons of cold unsalted butter, ¾ teaspoon of kosher salt, and a dash of cinnamon. Pulse until the mixture resembles coarse crumbs. Next, add 4 tablespoons of cold water and 3 tablespoons of Marsala, processing until it forms a soft, tacky ball. Let it rest in a lightly greased bowl at room temperature for an hour—this relaxes the gluten, making your dough easier to roll out later.
Step 2: Roll and Cut the Dough
Once your dough has rested, transfer it to a heavily floured work surface. Roll the dough to about 1/16-inch thick in a circular shape (around 14 inches). Using a round cutter, cut out as many 4-inch rounds as you can. Don’t worry about irregularities; that adds character! Gather and reroll the scraps up to three times. You should yield about 14 to 16 rounds.
Step 3: Heat the Oil
In a large Dutch oven, heat refined coconut oil over medium-high heat until it reaches 360°F. This oil is ideal for frying as it maintains the crispness of your cannoli.
Step 4: Fry the Cannoli Shells
Before frying, lightly coat your cannoli molds with cooking spray. Wrap each dough round around a mold, sealing the edges with a dab of beaten egg white. Gently lower the molds into the hot oil, frying them for 2 to 3 minutes or until they are golden brown and blistered. Using tongs, carefully tap each mold to release the shells onto a paper towel-lined baking sheet. Allow them to cool completely—resist the temptation to fill them too soon!
Step 5: Prepare the Filling
For the cannoli filling, beat together 8 ¾ ounces of drained ricotta and 1 8-ounce container of mascarpone in a stand mixer until thick. Add ¾ cup of powdered sugar and 1 ½ teaspoons of fresh orange zest, mixing until everything is thoroughly combined.
Step 6: Fill the Cannoli Shells
Now, grab your piping bag (or a ziplock bag with the corner snipped) and fill each cannoli shell with the delicious mixture. For an added touch, dip the ends of your filled shells in chopped chocolate or pistachios, enhancing their flavor and presentation. Serve your cannoli immediately for the best experience, or store the shells in an airtight container to maintain their crispiness.
Creating homemade cannoli may take some time, but the result is truly rewarding. Not only are you indulging in a traditional Italian dessert, but you’re also honing your kitchen skills. For more culinary adventures, check out these tips on mastering baking techniques!
Variations on Cannoli
Chocolate-Filled Cannoli
If you’re a chocolate lover, these cannoli will be your new favorite treat! Simply fold in some chopped chocolate or even chocolate hazelnut spread to your ricotta-mascarpone filling. For an extra chocolatey twist, drizzle melted chocolate on top before serving. You can also try filling the shells with a rich chocolate mousse for a decadent dessert that’s sure to impress.
Fruit-Infused Cannoli
Want to add a burst of freshness to your cannoli? Incorporate finely chopped seasonal fruits into your filling, such as strawberries, pistachios, or even peaches. This adds a lovely sweetness and complements the creamy texture beautifully. Consider a hint of lemon or lime zest to enhance the fruity flavors. These variations will not only brighten your dish but also offer a delightful surprise for your guests.
For more creative inspiration, check out what chefs say about innovative desserts in Gourmet Magazine here.
Cooking Tips and Notes for Cannoli
Tips for Achieving Crispy Shells
To make sure your cannoli shells stay delectably crispy, consider these tips:
- Fry at the Right Temperature: Ensure your oil is heated to around 360°F for optimal frying. This helps achieve that golden-brown crunch. Use an oil thermometer for accuracy.
- Choose the Right Oil: Opt for refined coconut oil or lard, as they maintain crispness much longer than standard vegetable oils.
- Don’t Overcrowd the Pan: Fry a few shells at a time to keep the temperature consistent and achieve an even cook.
Best Practices for Filling Cannoli
Filling your cannoli perfectly is key to enjoying this delightful treat:
- Use a Piping Bag: This allows for a clean, precise fill without making a mess. A ziplock bag with a snipped corner works well too!
- Fill Right Before Serving: To maintain the crispness of the shells, fill them just as they're about to be enjoyed. This ensures every bite is a delightful crunch.
- Add Toppings: Before serving, dip the ends in chopped chocolate or pistachios for added flavor and eye-catching presentation.
By following these tips, your cannoli will not only look stunning but taste divine! For more inspiring ideas on Italian desserts, check out Serious Eats for authentic recipes.
Serving Suggestions for Cannoli
Perfect Beverage Pairings
To elevate your cannoli experience, consider pairing these delightful treats with complementary beverages. A creamy cappuccino offers a satisfying balance, while a refreshing herbal tea can cleanse the palate. If you prefer something sparkling, a club soda with a hint of lemon will provide a nice contrast to the sweet and rich filling. Don't forget about milk! A chilled glass of whole milk enhances the flavors beautifully.
Creative Presentation Ideas
Presentation is key when serving cannoli. Here are a few simple ideas to impress your guests:
- Platter Display: Arrange the cannoli on a decorative platter, dusting them with powdered sugar for that extra touch.
- Garnish with Fresh Fruit: Add some berries or citrus slices to your plate for a colorful pop that enhances the overall look.
- Mini Cannoli: For a fun twist, prepare smaller versions of cannoli for a dessert sampling platter, allowing everyone to experience these delightful bites.
These small touches can turn your cannoli into a true centerpiece! For more serving ideas, check out Food52 or Serious Eats.
Time Breakdown for Cannoli
Preparation Time
For these delightful cannoli, you'll need about 30 minutes to prep your ingredients and dough. This includes mixing, resting, and rolling out the dough, getting everything ready for filling!
Cooking Time
Once you’ve shaped the cannoli, the frying takes approximately 30 minutes. Patience is key as you fry the shells to a perfect golden brown.
Total Time
By the time you're finished, the total time for this cannoli adventure is around 1 hour and 30 minutes. You’ll want to enjoy every bite, knowing you crafted these delicious treats from scratch!
Looking for more insights? Check out this guide on Italian desserts to elevate your baking game!
Nutritional Facts for Cannoli
When indulging in delicious cannoli, understanding their nutritional profile can help you enjoy them mindfully. Here’s a quick overview:
Calories
Each cannoli contains approximately 250-350 calories, depending on the filling and portion size. So, if you're sharing (or not!), keep this in mind!
Sugar Content
The sweet ricotta and mascarpone filling contributes about 15-20 grams of sugar per cannoli. If you're watching your sugar intake, consider enjoying these as an occasional treat.
Protein
Each delightful cannoli offers around 5-7 grams of protein, primarily from the creamy cheese filling. A tasty way to satisfy your sweet tooth while adding some protein to your dessert repertoire!
For more information on balanced eating, check out resources from the American Heart Association or the Nutrition.gov for guidelines on enjoying sweets mindfully.
FAQs about Cannoli
What's the origin of cannoli?
Cannoli hail from Sicily, Italy, where they’ve been a beloved dessert for centuries. Traditionally, they were created to celebrate special occasions like Carnevale. The name "cannoli" refers to the cylindrical shape of the pastry, which is filled with creamy goodness. If you're curious about the history of this delightful dessert, sites like Italy Magazine provide an in-depth look at its Sicilian roots.
How long do cannoli last?
Freshly filled cannoli are best enjoyed right away, as the crisp shells can become soggy over time. However, if you keep the shells and filling separate, the shells can last for up to a week in an airtight container. Just remember, once filled, it’s best to eat them within a day or two for optimum texture.
Can I make cannoli shells in advance?
Absolutely! You can make the cannoli shells up to a week ahead. After cooking, allow them to cool completely and store them in a refrigerator-friendly airtight container. This allows you to prepare them in advance, making it easier to whip up a batch when you're ready to enjoy or serve your delicious cannoli. If you’re looking to make them even earlier, consider freezing the shells—just ensure they're well wrapped!
For further reading, check out these tips on storing pastries from Bon Appétit (source).
Conclusion on Cannoli
In conclusion, making homemade cannoli is a rewarding experience that combines culinary skill with the joy of sharing delicious treats. With their flaky shells and creamy fillings, these classic Italian desserts are sure to impress. So gather your friends, enjoy the process, and savor every bite!
Cannoli: Easy Homemade Delight with a Creamy Twist
Equipment
- food processor
- stand mixer
- cannoli forms
- large Dutch oven
- baking sheet
- piping bag
Ingredients
Dough
- 1.5 cups all-purpose flour (about 6 ⅓ ounces), plus more for work surface and dough
- 3 tablespoons cold unsalted butter cubed
- 0.75 teaspoon kosher salt
- 0.125 teaspoon ground cinnamon
- 4 tablespoons cold water
- 3 tablespoons Marsala
- 1 large egg white beaten
- 4 jars refined coconut oil (four 14-ounce jars) or lard
- cooking spray
Filling
- 8.75 ounces whole-milk ricotta cheese drained (1 cup)
- 1 (8-ounce) container mascarpone cheese
- 0.75 cup powdered sugar (about 3 ounces)
- 1.5 teaspoons fresh orange zest (from 1 orange)
- 0.5 (4 ounces) (70% cacao) bittersweet chocolate bar chopped (⅓ cup)
- 0.25 cup finely chopped salted roasted pistachios
Instructions
Prepare the Dough
- Pulse flour, butter, salt, and cinnamon in a food processor until butter is completely incorporated into flour, about 10 pulses. Add water and Marsala, and process until dough forms a soft, tacky ball, about 2 minutes. Transfer to a lightly greased medium bowl; cover and let stand at room temperature for 1 hour or in refrigerator for up to 24 hours.
- Remove dough from bowl, and place on a heavily floured work surface. Sprinkle dough generously with flour, and roll to 1/16-inch thickness, about a 14 inch circle. Brush excess flour from surface of dough, and brush evenly with egg white (do not discard leftover egg white). Fold dough in half and dust with additional flour; roll to 1/16-inch thickness. Cut out as many 4-inch rounds as you can from dough. Reroll scraps up to 3 more times (14 to 16 rounds total).
- Heat coconut oil in a large Dutch oven over medium-high until a thermometer registers 360°F. Lightly coat cannoli forms with cooking spray. Wrap dough rounds around greased forms, and dab dough with remaining egg white where rounds overlap; seal dough, being careful not to get egg white on cannoli forms. Line a large baking sheet using paper towels.
- Working in 4 batches, slowly lower prepared cannoli forms into hot oil, and cook until blistered and browned, 2 to 3 minutes. Transfer cooked cannoli shells to prepared baking sheet. While cannoli shells are still hot, hold each cannoli shell using tongs, and tap tapered end of cannoli form on a work surface until cannoli shell slides free. Remove form, and let cool before wrapping with additional dough. Let shells cool until room temperature, about 30 minutes. Use immediately, or store in an airtight container for up to 1 week.
Prepare the Filling
- Beat ricotta and mascarpone with a stand mixer fitted with a whisk attachment on high speed until thickened, 2 to 3 minutes. Add powdered sugar and orange zest, and beat on high speed until thickened, about 1 minute and 30 seconds. Transfer to a piping bag or ziplock plastic bag; snip off end, and pipe a heaping 2-tablespoons filling into each cannoli shell. Dip each exposed end of shells into either chopped chocolate or chopped pistachios. Serve immediately.
Leave a Reply