
Introduction to Artisan Pizza Dough
Making your own artisan pizza dough isn't just about creating something delicious; it's an exciting culinary adventure that lets you take control of your ingredients and flavors. Did you know that when you craft your dough from scratch, you can adjust the hydration levels to achieve that perfectly crispy, chewy, bubbly crust? Store-bought versions often come with preservatives and additives that can compromise flavor and texture. Embracing the art of dough-making opens doors to healthier, fresher options, tailored to your taste.
Plus, it can be incredibly therapeutic! Kneading dough is not only a skill but also a fantastic way to unwind after a busy day. Whether you're prepping for a weeknight dinner or hosting a weekend gathering with friends, homemade dough adds a personal touch that elevates any occasion.
If you're looking for inspiration, take a glance at Serious Eats, which offers great insights on dough-making techniques and hydration ratios. It can help you understand how to achieve the legendary crust you've always wanted. So why not roll up your sleeves and dive into the world of artisan pizza dough? Your palate will thank you!
Ingredients for Artisan Pizza Dough
Crafting the ultimate artisan pizza dough begins with the right ingredients. A few key components work harmoniously to create that sought-after crispy, chewy, and bubbly crust.
Essential Ingredients for the Perfect Crust
-
All-Purpose Flour: 500g (3 ¾ cups plus 2 tbsp) – This is the backbone of your dough. Look for a quality flour that has a good protein content. Higher protein flours will give you that beloved chewiness while maintaining structure.
-
Warm Water: 375g (1 ½ cups plus 2 tbsp) – Use slightly warm water to activate the yeast effectively. It should feel warm to the touch but not hot.
-
Active Dry Yeast: 1g (¼ tsp) – Fresh yeast is essential for a proper rise. Make sure to store it correctly for optimal performance.
-
Fine Salt: 10g (1 ½ tsp) – Salt enhances flavor and controls yeast fermentation, which prevents the dough from over-rising.
For a deeper dive into the magic of each ingredient, check out resources from King Arthur Baking Company and Serious Eats. You’ll find that understanding these elements is the first step toward pizza perfection!
Step-by-Step Preparation of Artisan Pizza Dough
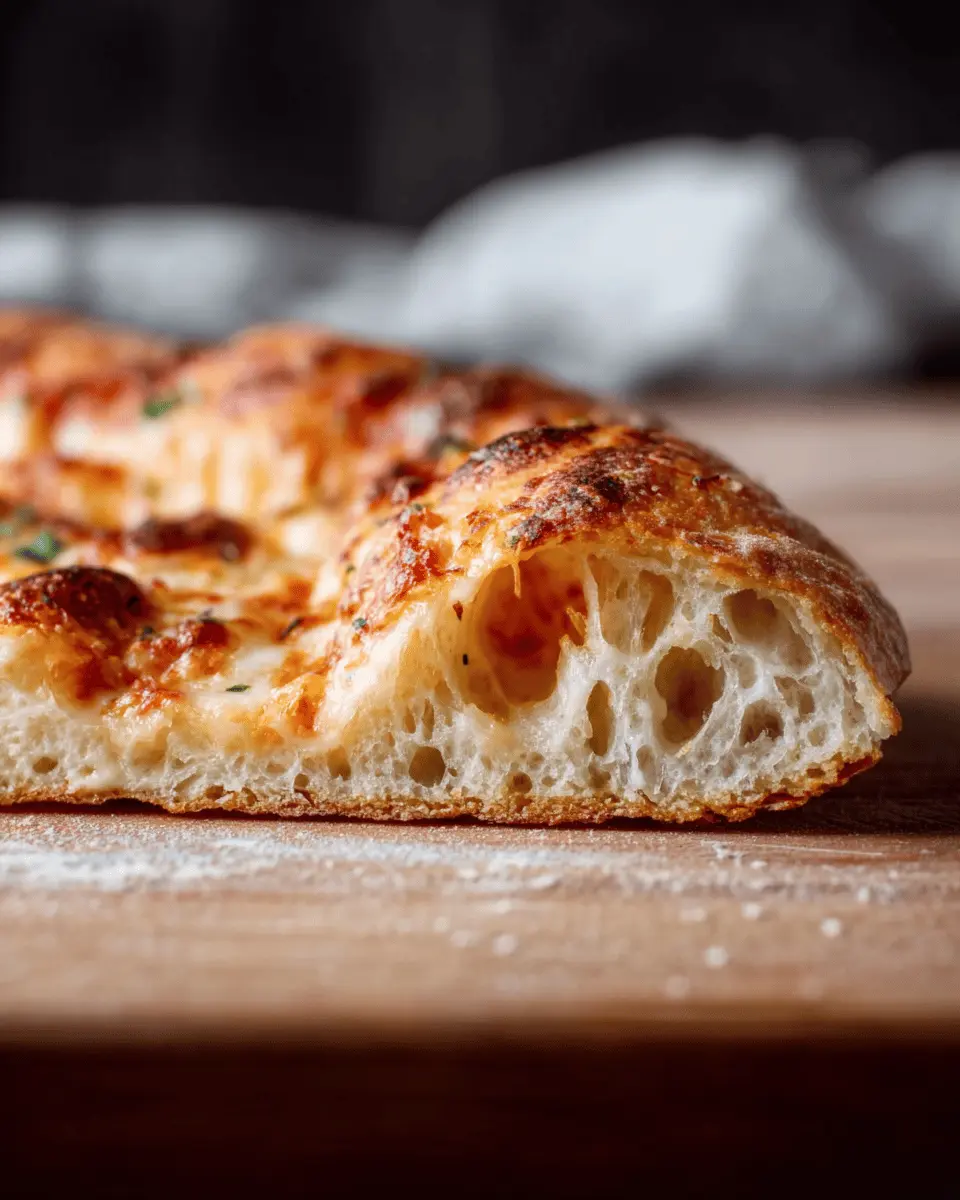
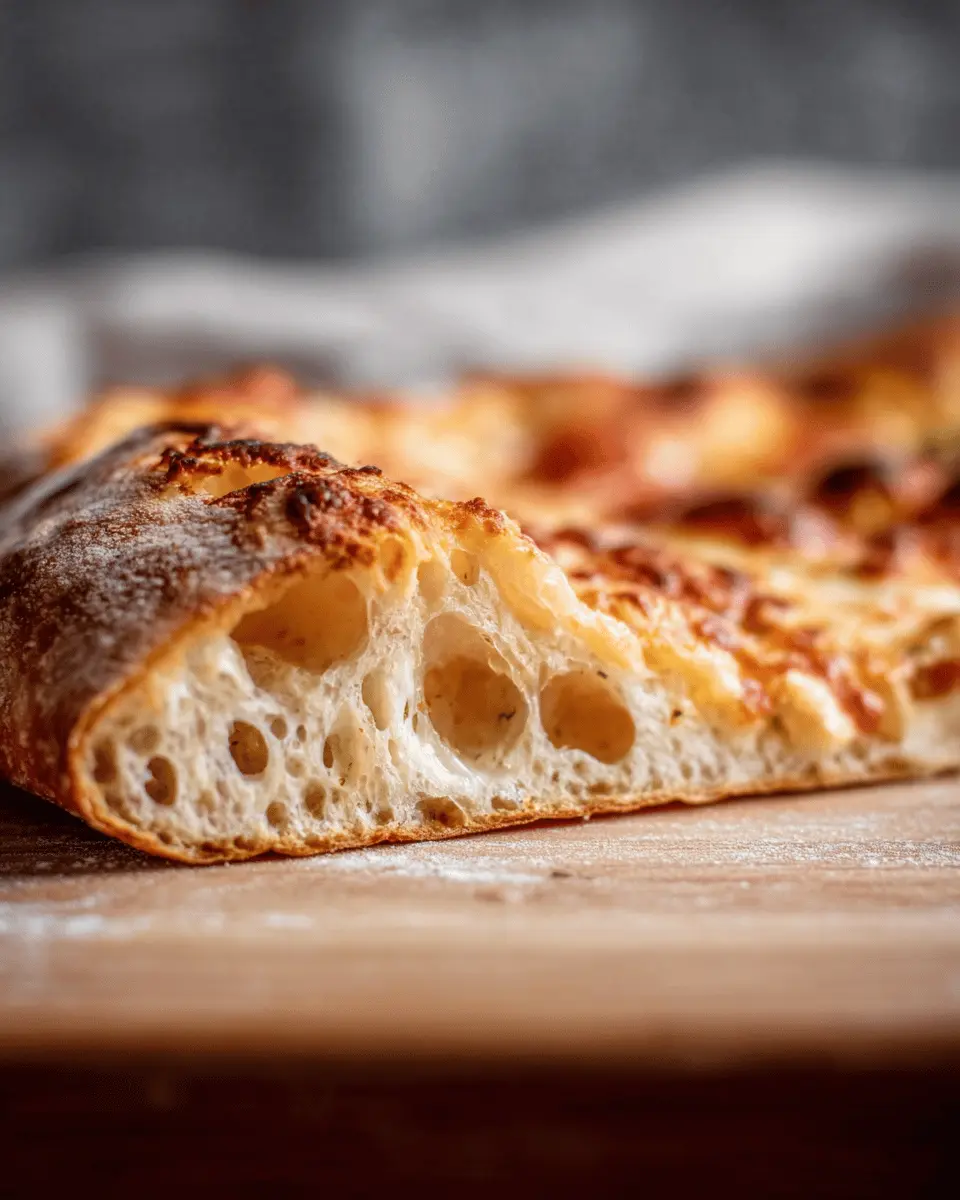
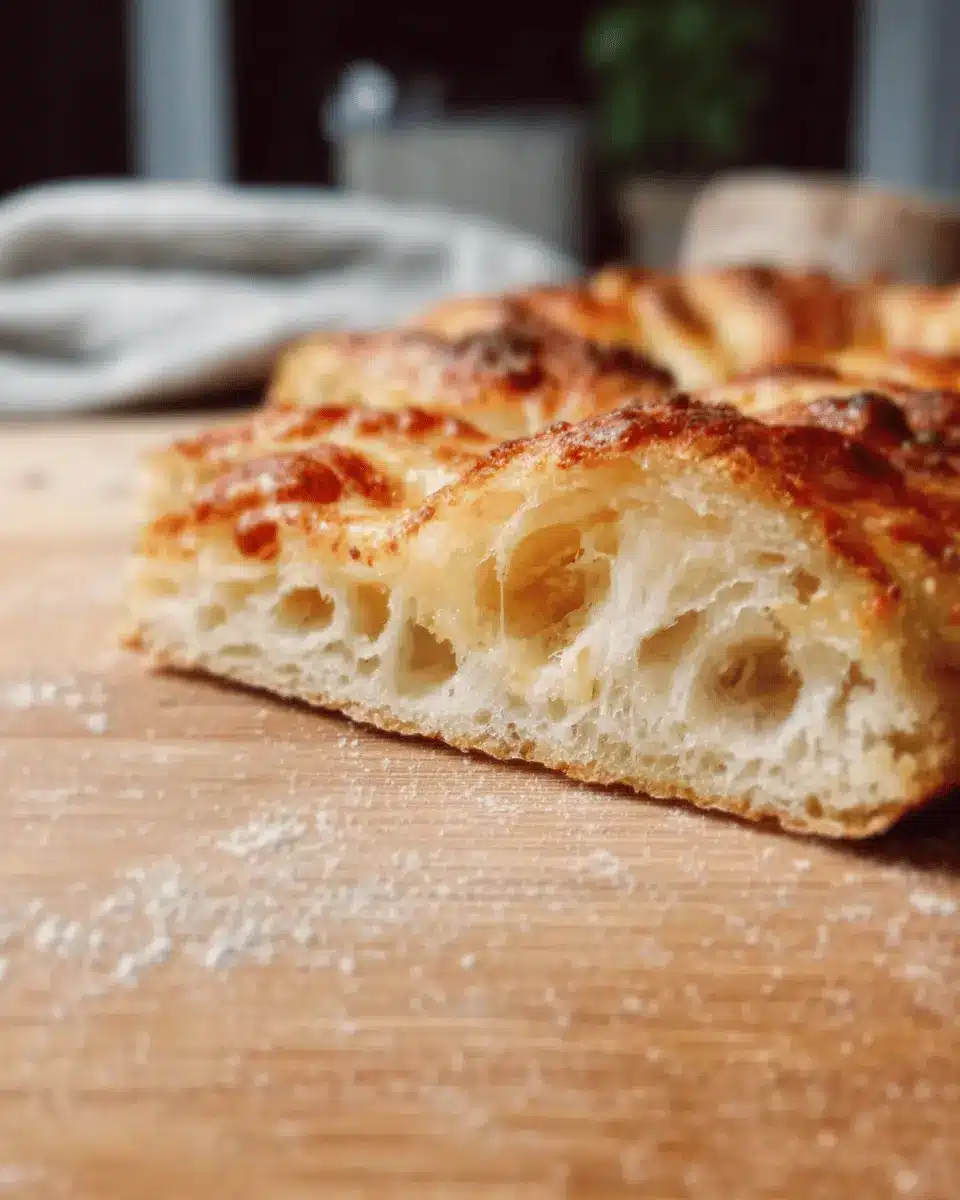
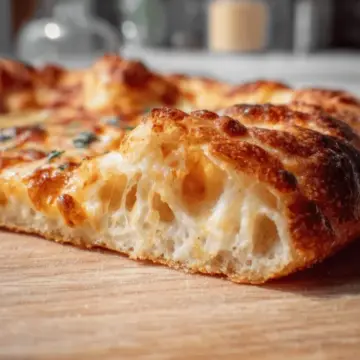
Creating artisan pizza dough is a rewarding process that results in a crisp, chewy, and bubbly crust. Let’s walk through each step to ensure your homemade dough elevates your pizza-making game.
Mix and Rest the Dough
Start with 500g of all-purpose flour and combine it with 375g of warm water in a large bowl—holding back just 1 tablespoon of the water. Mix them until just combined. This initial resting phase, lasting about 20 minutes, allows the flour to absorb the moisture, creating a perfect base for your dough. During this time, sprinkle 1g of active dry yeast over the remaining warm water, allowing it to dissolve.
Fold and Develop Gluten
After the dough has rested, it’s time to add flavor and strength. Sprinkle 10g of fine salt over the surface and introduce the yeast mixture. Use a wet hand to fold the dough over itself, starting from the edges and working toward the center. Repeat this gentle folding until the salt and yeast are well integrated. After a few minutes, you’ll have a shaggy dough. Your dough now needs some time to relax; cover the bowl and let it sit for about an hour, allowing the gluten to begin developing.
Shape the Dough Balls
Once the dough has risen, turn it out onto a floured surface and cut it in half. With one piece at a time, stretch it slightly before folding it over, creating a loose ball. Then, turn the ball seam-side down and gently drag it towards you to create tension, rotating as you go. This technique is key in achieving that perfect crust texture. Once shaped, transfer the dough to a greased plate and repeat with the remaining piece.
Allow to Rise
Your dough balls are looking good! Now they need a warm, cozy spot to rise. Lightly oil the tops, cover them, and let them rest at room temperature for about an hour. During this time, the gluten continues to develop, contributing to that desired chewy bite. If you're not making pizza right away, you can refrigerate the dough balls for up to two days. Just make sure they're tightly wrapped!
Preheat for the Ultimate Bake
Now for the grand finale! Preheat your oven to 500°F (or as high as it will go). If you’re using a pizza stone or steel, place it on the middle rack at least 45 minutes before baking. This step ensures your crust gets that professional-level crispiness. While the oven preheats, you can prepare your toppings and sauce—think fresh basil, spicy chicken ham, or even turkey bacon for a flavorful twist.
Making artisan pizza dough from scratch is indeed a labor of love, but the outcome is incredibly satisfying. For more tips on enhancing your pizza game, check out Serious Eats on Pizza Techniques to broaden your culinary horizon. Enjoy your pizza-making adventure!
Variations on Artisan Pizza Dough
Whole Wheat Artisan Pizza Dough
For a wholesome twist, you can substitute half of the all-purpose flour with whole wheat flour. This adds a nuttier flavor and boosts the fiber content, making your artisan pizza dough not just delicious but also more nutritious. Keep in mind that whole wheat flour absorbs more water, so you may need to adjust the water in your recipe slightly for the perfect texture.
Gluten-Free Artisan Pizza Dough
Craving artisan pizza but avoiding gluten? Don’t fret! Swap out regular flour for a gluten-free flour blend to create a delectable gluten-free artisan pizza dough. Brands like Bob's Red Mill or King Arthur Flour have excellent blends that provide great texture. Be sure to add a teaspoon of xanthan gum for the best structure. This variation ensures that everyone can enjoy a crispy and chewy slice of heaven!
For more tips and variations, check out resources from Serious Eats or King Arthur Baking.
Cooking Tips and Notes for Artisan Pizza Dough
Ensuring the Right Texture and Rise
Creating the perfect artisan pizza dough hinges on understanding how texture and rise work together. Here are a few tips to get it just right:
- Use quality ingredients: Fresh, high-protein flour is essential for that chewy texture. Consider brands known for their quality, such as King Arthur or Bob's Red Mill.
- Hydration matters: The water temperature should be warm, but not hot! Around 100°F is ideal. This helps yeast activate without killing it (for a deeper dive, check out this article from the American Test Kitchen).
- Be patient: Allow the dough to rise until it has doubled—this can take 5-6 hours. It’s worth it for that light and airy crust.
By following these simple steps, you'll set the stage for a truly artisanal pizza experience!
Serving Suggestions for Artisan Pizza
Pairing your artisan pizza with delicious sides can elevate your meal to an unforgettable experience. Consider fresh, vibrant salads that balance the richness of your pizza; a simple arugula salad with a lemon vinaigrette complements that crispy, chewy crust perfectly.
For a heartier side, try garlic knots or roasted vegetables like zucchini and bell peppers to provide a colorful, tasty contrast. And don't forget a selection of dipping sauces, such as herbed olive oil or a tangy ranch dressing.
For a refreshing drink, serve sparkling water with fresh citrus slices. These delightful additions will enhance your pizza night, making it a fun and flavorful gathering!
Time Breakdown for Artisan Pizza Dough
Preparation Time
The initial prep for your artisan pizza dough takes about 20 minutes. You’ll be mixing your ingredients, letting them rest, and starting the magic of fermentation. A little patience goes a long way!
Rising Time
The rising stage is crucial, lasting approximately 5 to 6 hours. This time allows the gluten to develop, resulting in that perfect airy texture. The longer you let it rise, the better your crust!
Baking Time
Once your dough is ready, it takes about 5 minutes to bake in a preheated oven at 500°F. If you’re using a cast iron pan, expect a bake time of 15 to 20 minutes. Your artisan pizza dough will come out golden and blistered, absolutely divine!
For more insights on pizza dough preparation and baking techniques, check out Serious Eats or America’s Test Kitchen. The right tips can make all the difference!
Nutritional Facts for Artisan Pizza Dough
When indulging in a delicious artisan pizza dough, it's good to be mindful of its nutritional profile. Here's a quick overview of its essential components:
- Calories: Approximately 600 calories for the entire dough recipe.
- Carbohydrates: Roughly 125 grams, making it a great source of energy.
- Protein: About 15 grams, contributing to the nutritional value of your pizza.
This tasty dough sets the stage for a wholesome culinary experience, perfect for hosting friends or savoring a cozy night in. For more detailed insights on dough preparation, check out resources like Nutrition.gov or the USDA Food Composition Database.
FAQs about Artisan Pizza Dough
How do I store leftover pizza dough?
Leftover artisan pizza dough can easily be stored in the refrigerator or freezer. If you plan to use it within a couple of days, wrap it tightly in plastic wrap or place it in an airtight container and refrigerate. For longer storage, consider freezing it. Just shape the dough into balls, wrap them well, and place them in a freezer-safe bag. When you're ready to use, let the dough thaw in the fridge overnight before bringing it to room temperature.
What’s the best flour for artisan pizza dough?
When making artisan pizza dough, you want a flour that has a higher protein content. All-purpose flour works great, but for a chewier texture, consider using bread flour or a '00' flour if you can find it. These flours help develop gluten, resulting in that perfect crispy, chewy crust we all love.
Can I freeze artisan pizza dough?
Absolutely! Freezing your artisan pizza dough is a great way to save time for future pizza nights. Just make sure it is well-wrapped to prevent freezer burn. You can freeze the dough before or after the first rise, then thaw it in the fridge overnight when you’re ready to use it. For more tips on pizza-making, check out this resource for expert advice!
Conclusion on Artisan Pizza Dough
In conclusion, mastering artisan pizza dough creates the foundation for a delicious homemade pizza experience. With its crispy, chewy, and bubbly crust, you'll elevate your pizza nights. So grab your ingredients and start experimenting—your friends and family will thank you for it! Happy baking!
For more helpful tips on crafting the perfect pizza, check out resources like Serious Eats and King Arthur Baking.
artisan pizza dough- crispy, chewy, bubbly crust
Equipment
- large bowl
- Pizza Peel
- baking stone or steel
- cast iron pan
Ingredients
- 500 g all-purpose flour
- 375 g warm water divided
- 1 g active dry yeast
- 10 g fine salt
Instructions
- Mix flour and all but 1 tablespoon of the water in a large bowl until just combined, then cover and set aside for 20 minutes to rest. Sprinkle yeast over remaining warm water and set aside to dissolve.
- Sprinkle salt over the surface of the dough. Stir yeast mixture and pour over dough. Fold the dough: lightly wet your hand, reach under the dough, and stretch a section of it over the top. Repeat until the center of the dough is covered. Then, using your thumb and fingers as pincers, squeeze and pinch off 5- 6 chunks of dough. Wet your hand to minimize sticking. Fold the dough over itself a few times. Repeat pinching and folding until the yeast and salt are fully mixed and a shaggy dough is formed. Cover the bowl and let rest about an hour.
- Fold the dough one time to develop the gluten: lightly wet your hand, reach underneath the dough and stretch up a section of the dough, then fold it over the center. Rotate the bowl and fold four to five more times, or until the dough has tightened into a ball. Take the entire ball of dough and invert it into a clean, lightly greased bowl, so the seam is down and the top is smooth. Cover and let rise until doubled in volume, 5- 6 hours.
- Turn the dough out onto a floured work surface and cut in half. Working with one piece of dough at a time, shape into a ball as follows. Stretch out a quarter of the dough just until you feel resistance, then fold it back over the center. Repeat stretching and folding the remaining three edges until the center is covered and a loose ball is formed. Turn the ball over so the seam is down and place it on an un-floured area. Cup your hands around the dough and gently pull it towards you, dragging the bottom along the counter to create a bit of tension. Rotate the ball 90 degrees and drag it a few inches towards you again. Repeat rotating and gently dragging until the top of the dough tightens up and the ball is round.
- Transfer to a greased plate and repeat with remaining dough. Lightly oil the tops, cover and let rest at room temperature for about an hour. Preheat oven at this time. If not using right away, cover tightly with plastic wrap and refrigerate until ready (for up to 2 days).
- Place pizza steel, stone, or inverted baking sheet on the middle rack of the oven and preheat to 500°F (or as high as it will go). Let oven heat up for at least 45 minutes. Generously flour a pizza peel and set aside. Alternatively, lightly grease a cast iron pan with olive oil and set aside.
- Place one dough ball on a floured surface and flatten the middle into a large disk, leaving a thick 1-inch lip. Pick up the disk and use gravity to gently shape the dough into a 12-inch circle. Lay on prepared pizza peel and adjust shape into a circle. Jiggle the peel to make sure the dough isn’t sticking, and add more flour if it is. Alternatively, shape the dough to the size of your prepared cast iron pan, then place it inside.
- Add sauce and toppings to pizza dough, leaving the 1-inch perimeter empty. Slide pizza onto the hot steel and bake for 5 minutes. Turn on the broiler and broil for 2- 4 minutes, or until cheese is melted and crust is golden and blistered. If using the cast iron pan, bake for 15- 20 minutes and broil for the last few minutes to get spots of char. Repeat with remaining pizza dough and toppings.


Leave a Reply