
Introduction to Homemade Garlic Knots
When juggling a busy professional life, you might wonder where the time for cooking comes from. Enter homemade garlic knots, a delicious solution that not only satisfies your cravings but can also become a delightful weekend project. These little bites of heaven are surprisingly simple to make and require minimal prep time, making them a perfect addition to any meal or snack reserve.
Imagine reaching for these warm, buttery knots after a long day—simple yet gourmet! They can be paired with soups, enjoyed with marinara sauce, or even served as an impressive appetizer at your next gathering.
Making homemade garlic knots can also be quite rewarding. The aroma of freshly baked bread infused with garlic will fill your kitchen, bringing a smile to your face (and maybe even a few friends!) Research shows that cooking can reduce stress and boost your mood, making it a therapeutic break from your hectic schedule.
What's more, cooking at home is generally healthier and more budget-friendly than ordering out. With just a handful of ingredients—many of which you might already have—these knots are not only delicious but also a smart addition to your meal planning routine. So, let’s get started and transform your weekends with these irresistible homemade garlic knots!
Ingredients for Homemade Garlic Knots
Creating the perfect homemade garlic knots begins with assembling the right ingredients. Let's break it down to ensure your knots are irresistibly delicious!
Essential ingredients for making dough
To craft a soft and flavorful dough, you'll need:
- Warm water (1 and ⅓ cups): This helps activate the yeast.
- Instant yeast (2 and ¼ teaspoons): A reliable leavening agent for that fluffy texture.
- Granulated sugar (1 tablespoon): This nourishes the yeast and adds a hint of sweetness.
- Olive oil or melted butter (3 tablespoons): For richness and flavor.
- Salt (1 teaspoon): Balances flavors and strengthens the dough.
- Garlic powder (½ teaspoon): Provides a subtle garlic flavor right in the dough.
- All-purpose flour (3 and ½ cups): This forms the backbone of your knots.
Fresh ingredients lead to better flavor, so consider using high-quality flour. For more on measuring techniques, check out Sally's Baking Addiction.
Topping ingredients for that extra flavor
Once your dough is ready, it’s all about the topping! Here's what you'll need for that irresistible garlic butter coating:
- Unsalted butter (5 tablespoons): Melted, to coat your knots in indulgence.
- Minced garlic (3 cloves or ½ teaspoon of garlic powder): The star ingredient that elevates the flavor.
- Italian seasoning (1 teaspoon): A sprinkle of this classic mix adds depth.
- Salt (¼ teaspoon): Just enough to enhance the flavors.
- Optional: Grated Parmesan (¼ cup) and fresh parsley (2 tablespoons) for finishing touches after baking.
With these ingredients, you’ll create homemade garlic knots that are both flavorful and fun to make!
Step-by-step Preparation for Homemade Garlic Knots
Are you ready to dive into the delicious world of homemade garlic knots? These soft, buttery bites are perfect for sharing (or not!) and make any meal feel like a special occasion. Let’s break down the preparation process step-by-step to ensure your garlic knots turn out magnificent.
Activate the yeast
Begin your journey by activating the yeast! In a bowl or the bowl of your stand mixer, mix together 1 and ⅓ cups of warm water (100–110°F), 2 and ¼ teaspoons of instant yeast, and 1 tablespoon of granulated sugar. This combo creates a bubbly starter after resting for about 5 minutes. If you're using active dry yeast, you might see different activation times, so check out my Baking with Yeast Guide for more insight!
Combine ingredients and form the dough
After your yeast mixture is bubbly, add 3 tablespoons of olive oil, 1 teaspoon of salt, and ½ teaspoon of garlic powder. Gradually mix in 3 and ½ cups of all-purpose flour until it begins to form a soft dough. If you’d rather do this by hand, a trusty wooden spoon or spatula will work just fine too!
Knead the dough for the perfect texture
Now for the fun part—kneading! If you’re using a mixer, let it run for about 5 minutes on medium speed. Alternatively, you can knead by hand on a floured surface. The goal here is to create a slightly tacky, soft dough. Don’t worry if you need to sprinkle a bit more flour occasionally; just avoid excessive amounts. To test if it’s ready, poke it—if it bounces back slowly, you’ve nailed it!
Allow the dough to rise
Transfer your kneaded dough to a lightly greased bowl, turning it to coat all sides in oil. Cover the bowl with foil or a clean towel and let it rise in a warm spot for 1–2 hours, until it’s doubled in size. Want a little trick? Preheat your oven to 150°F, then turn it off and let your dough rise inside for that cozy environment.
Shape the knots
Once the dough has risen, it’s time to shape your knots. Punch the dough down, then roll it into a uniform log and slice it into 16 pieces. Roll each piece into a rope about 8 inches long and tie them into knots — it’s like a fun little puzzle!
Rest the shaped knots
Cover your shaped knots lightly with a towel. Let them rest for 30–45 minutes, which will make them super soft and pillowy!
Preheat the oven
Around the end of the resting time, preheat your oven to 400°F (204°C), so it’s nice and hot for those gorgeous knots.
Prepare the garlic topping
While your knots are getting cozy, whip up the garlic topping! Simply mix 5 tablespoons of melted butter, 3 minced garlic cloves, 1 teaspoon of Italian seasoning, and ¼ teaspoon of salt in a small bowl, setting aside a bit for later.
Bake to golden perfection
Place your knots in the preheated oven and bake for 20-23 minutes, or until they are beautifully golden. The aroma will fill your kitchen – it’s pure bliss!
Brush with garlic butter
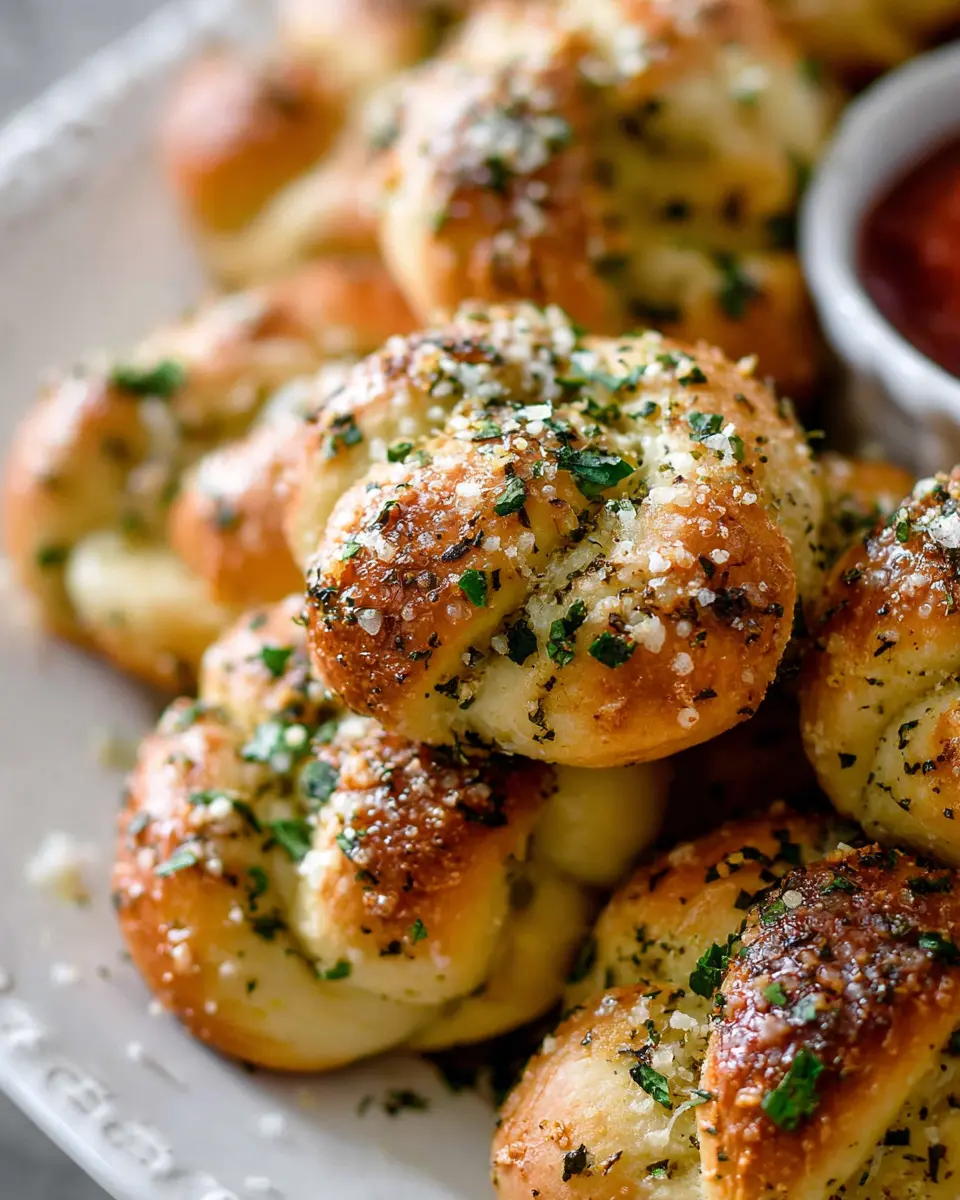
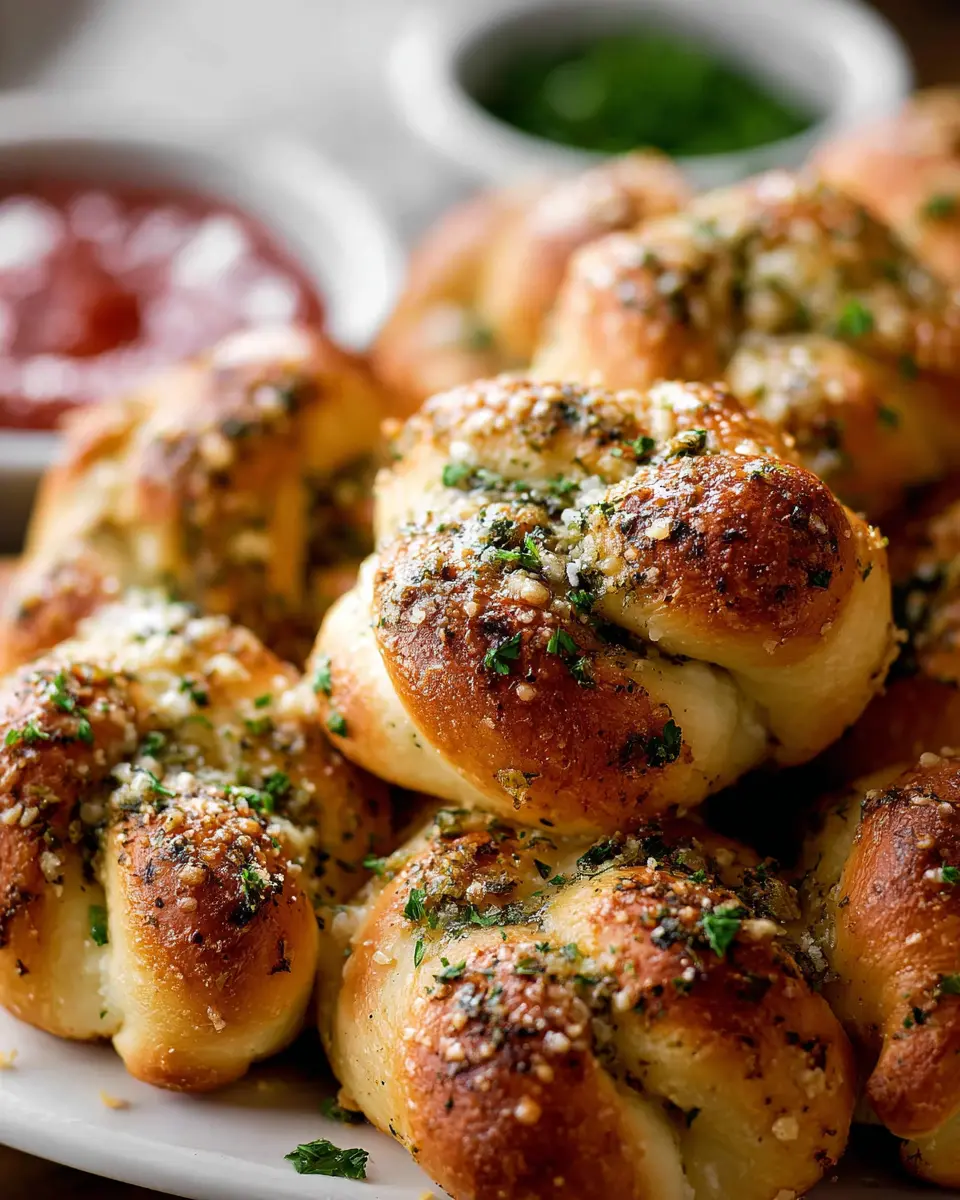
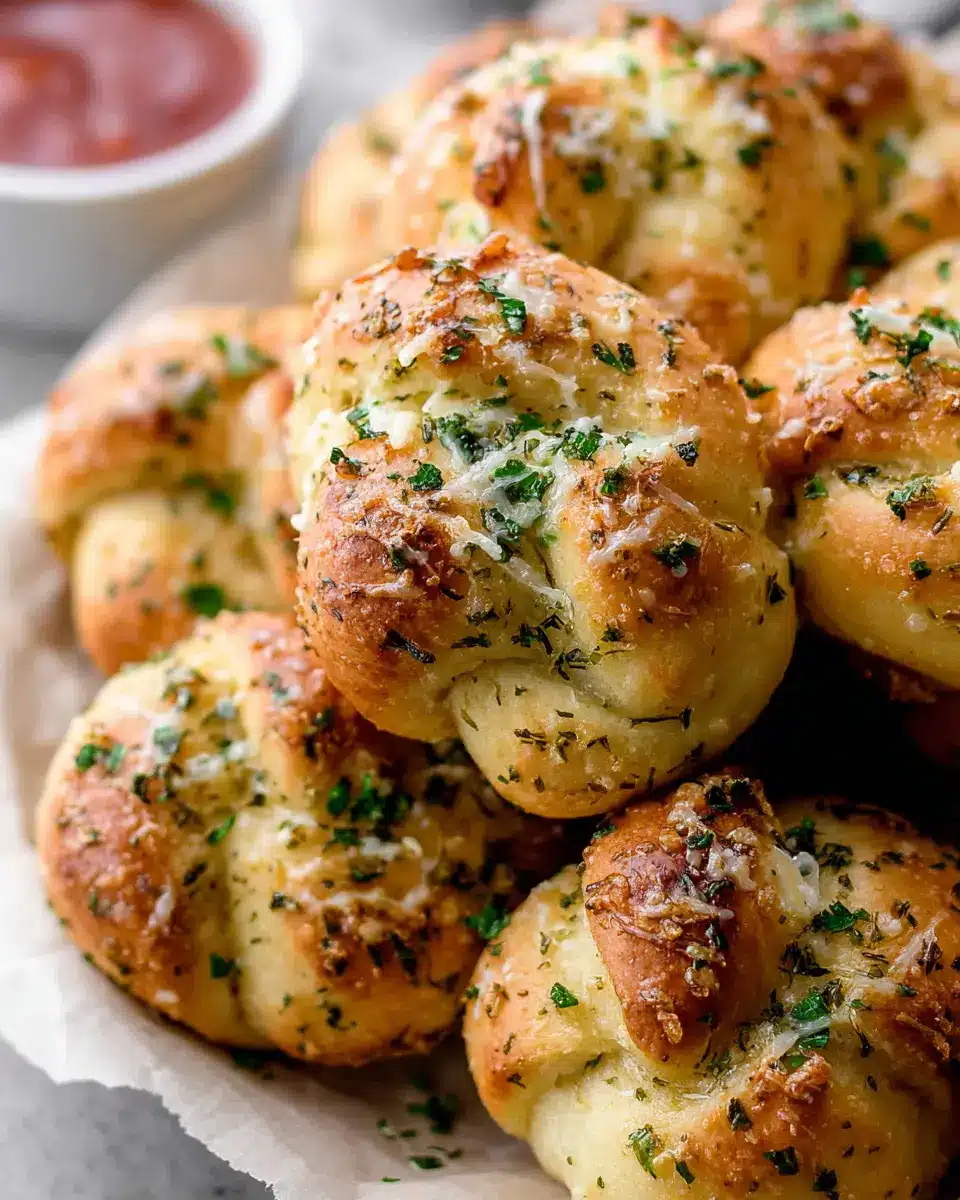
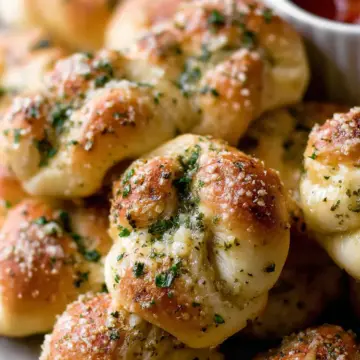
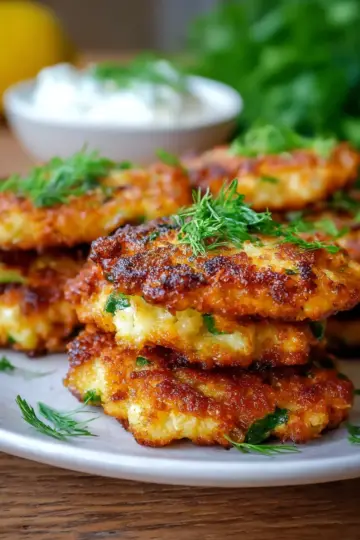
Once out of the oven, brush the warm knots with the remaining garlic butter. For an extra touch, sprinkle some grated Parmesan or chopped fresh parsley on top.
There you have it—your homemade garlic knots are now ready to be devoured! Enjoy them on their own or with a side of marinara sauce for that perfect dip. Happy baking!
Variations on Homemade Garlic Knots
Adding cheese to the dough
For a delightful twist on your homemade garlic knots, consider incorporating cheese into the dough itself! Grate about half a cup of mozzarella or parmesan cheese and fold it into your dough after the first rise. This will add a rich, cheesy flavor that's bound to impress your guests. A little stretch and pull when baking will give you those beautiful gooey pockets of cheesy goodness!
Spice it up with jalapeños
If you love a bit of heat, why not spice up your homemade garlic knots by adding chopped jalapeños? Simply mix in about a quarter cup of finely diced jalapeños into the dough during preparation. Not only will this version add a kick, but the freshness of the jalapeños will play off the garlic beautifully. Pair them with a cooling ranch dipping sauce for the perfect balance!
For more creative ideas, check out Serious Eats for other delicious variations on classic bread recipes.
Cooking Tips and Notes for Homemade Garlic Knots
Importance of Using the Right Type of Yeast
Using the right yeast is crucial for achieving those perfectly fluffy homemade garlic knots. For this recipe, I recommend Platinum Yeast from Red Star, which is an instant yeast that works wonders. It doesn’t require proofing and gives the dough a lovely rise. If you go with active dry yeast instead, just remember that the rise may take a bit longer. For more tips on yeast varieties, check this guide.
Adjustments for High-Altitude Baking
If you're baking at a high altitude, small adjustments can make a big difference. Lower the baking temperature by 25°F (about 15°C) and consider adding a bit more flour to the dough to counteract excess rising. This will help ensure your garlic knots don’t deflate. If you're new to high-altitude baking, resources like King Arthur Baking offer excellent advice tailored to different altitudes.
Remember, practice makes perfect, so don’t be discouraged if it takes a few tries to get those garlic knots just right!
Serving Suggestions for Homemade Garlic Knots
Pairing with Marinara Sauce
One of the simplest and most delightful ways to enjoy your homemade garlic knots is by serving them with a side of rich marinara sauce. This classic pairing provides a delightful contrast to the buttery, garlicky flavor of the knots. Whether you opt for store-bought or make your own, marinara adds a fresh, zesty touch. Consider spicing it up with red pepper flakes for some added heat!
Serving Alongside Main Dishes
Homemade garlic knots are incredibly versatile and can elevate any meal. Serve them alongside:
- Pasta dishes like spaghetti or fettuccine for a comforting Italian feast
- Hearty soups, such as minestrone or tomato basil, for a perfect dipping option
- Grilled chicken or steak to soak up all those delicious juices
No matter what you choose, these knots will become a beloved staple in your meal lineup!
Time Breakdown for Homemade Garlic Knots
Preparation time
Getting started on your homemade garlic knots takes about 15 minutes. This includes gathering your ingredients and mixing your dough—it's quicker than you might expect!
Cooking time
Once you've shaped your knots, they need about 20-23 minutes in the oven. In that time, you can tidy up the kitchen or prepare your favorite dipping sauce.
Total time
From start to finish, you're looking at roughly 2 hours and 10 minutes. That includes resting and rising times, letting those knots become deliciously fluffy.
Ready to dive in? These knots are seriously worth the wait!
Nutritional Facts for Homemade Garlic Knots
When you indulge in homemade garlic knots, it's good to know what you're enjoying. Each serving typically contains:
-
Calories per serving: Around 150 calories, perfect for a tasty snack without too much guilt.
-
Protein content: Each knot gives you about 3 grams of protein, a nice boost for your day.
-
Sodium levels: With roughly 200 mg of sodium per serving, they strike a balance between flavor and health.
For more detailed nutritional information, consider checking out resources like the USDA FoodData Central or nutrition tracking apps to tailor your serving sizes based on your dietary needs.
FAQ about Homemade Garlic Knots
How do I store leftover garlic knots?
To keep your homemade garlic knots fresh, store any leftovers in an airtight container at room temperature for up to 2 days. For longer storage, you can refrigerate them for up to a week. For a tasty treat later, freeze your baked garlic knots for up to three months. Simply thaw them at room temperature, then reheat in the microwave or oven for a delightful snack!
Can I make these knots in advance?
Absolutely! You can prepare your homemade garlic knots ahead of time. Shape the knots and freeze them before baking them. Just be sure to follow the instructions for thawing and allowing them to rise before baking. This way, you can have fresh garlic knots ready to pop in the oven whenever the craving strikes.
What to do if my dough doesn’t rise?
If your dough isn’t rising, don’t panic! First, check the temperature of your water; it should be warm but not too hot. If your yeast isn’t active, you may need to start again with fresh yeast. Make sure to place the dough in a warm, draft-free area to aid the rising process. If all else fails, consider consulting resources like King Arthur Baking, which has excellent tips for troubleshooting yeast doughs.
Conclusion on Homemade Garlic Knots
Making homemade garlic knots is a delightful culinary adventure every young professional should experience. Not only do they fill your kitchen with mouthwatering aromas, but they also allow you to impress friends and satisfy late-night snack cravings. With simple ingredients and a few extra moments, you have a comforting treat ready to enjoy.
Why Every Young Professional Should Try Making These at Home
As a busy young professional, your time is valuable, and cooking at home can feel like just another chore. However, creating your homemade garlic knots encourages more enjoyable meal experiences amidst a hectic schedule.
- Time Well Spent: The process, while taking a bit of time, offers immense satisfaction. Kneading dough is surprisingly therapeutic!
- Skill Development: You’ll sharpen your cooking skills, which can lead to a greater confidence in the kitchen. Who knows, this might be the trick that sparks a lifelong passion for baking?
- Budget-Friendly: Making your own snacks and treats is often more economical than buying pre-packaged versions, allowing for more enjoyable splurges elsewhere.
Why not pair these knots with a homemade marinara or a smooth, herbed dip? The culinary possibilities are endless and easy to explore!
For a step-by-step guide, you may find resources like Serious Eats invaluable, giving tips from food science experts. Now is the time to roll up your sleeves and let the indulgence begin!
Homemade Garlic Knots
Equipment
- stand mixer
- Dough Hook
- Mixing Bowl
- baking sheets
- Parchment paper
- Pizza Cutter
- pastry brush
Ingredients
Homemade Dough
- 1 cups warm water (between 100–110°F, 38–43°C)
- 2.25 teaspoons instant yeast (1 standard packet)
- 1 tablespoon granulated sugar
- 3 tablespoons olive oil or melted butter
- 1 teaspoon salt
- 0.5 teaspoon garlic powder
- 3.5 cups all-purpose flour (about 450g)
Topping
- 5 tablespoons unsalted butter melted
- 3 garlic cloves minced
- 1 teaspoon Italian seasoning
- 0.25 teaspoon salt
- 0.25 cup grated Parmesan cheese optional after baking
- 2 tablespoons chopped fresh parsley optional after baking
Instructions
Preparation
- Whisk the warm water, yeast, and granulated sugar together in the bowl of your stand mixer. Cover and allow to rest for 5 minutes.
- Add the olive oil (or butter), salt, garlic powder, and half of the flour. Beat for 15 seconds, then add the remaining flour. Beat on low speed for 2 minutes.
- Knead the dough for 5 minutes until soft and slightly tacky. If too sticky, sprinkle with flour.
- Lightly grease a large bowl and place the dough in it, covering to rise at room temperature for 1–2 hours.
- Punch down the dough, shape into a log, and cut into 16 strips. Roll each strip into 8-inch ropes and tie into knots.
- Let the shaped knots rest for 30-45 minutes until slightly puffed.
- Preheat the oven to 400°F (204°C).
- Stir the melted butter, garlic, Italian seasoning, and salt together. Brush on the knots before baking.
- Bake for 20-23 minutes until golden brown. Brush with remaining garlic butter and sprinkle with cheese and parsley if desired.
- Serve plain or with marinara sauce for dipping.
- Store leftover knots at room temperature for up to 2 days or in the refrigerator for up to 1 week.


Leave a Reply