
Introduction to Homemade Apple Cider Vinegar
Apple cider vinegar is more than just a tangy addition to your salads; it's a versatile ingredient that has gained popularity for its potential health benefits, such as aiding digestion and supporting weight management. Learning how to make homemade apple cider vinegar empowers you to create a fresh, organic product right in your kitchen, tailored to your taste preferences.
Making apple cider vinegar at home can also be a fun and rewarding project, allowing you to reduce food waste by using apple scraps or leftover diced apples. Plus, creating your own vinegar can save you money in the long run, especially if you enjoy incorporating it into your daily routine.
According to a study published by the Journal of Functional Foods, vinegar consumption may help control blood sugar levels and improve overall metabolic health. By making it yourself, you can avoid the preservatives and additives often found in store-bought versions, ensuring a pure and high-quality product.
So, why not try your hand at this simple fermentation process? You’ll discover a newfound appreciation for this humble kitchen staple. Ready to dive in? Let’s explore the step-by-step process of creating your own homemade apple cider vinegar!
For more tips and insights, check out the ACV benefits from Healthline.

Ingredients for Homemade Apple Cider Vinegar
Apples: Fresh or Scraps?
When it comes to making your own apple cider vinegar, the choice of apples can be quite flexible. You can use fresh apples, preferably organic varieties, for the best flavor. However, if you're looking to reduce waste, using apple scraps—like cores and peels—works wonderfully too. This not only saves money but also turns what would otherwise be waste into something delicious. You simply need enough to fill half of your chosen fermentation vessel, which could be a quart jar or a larger crock. Consider checking out local farmer’s markets for the freshest apples.
Sugar: The Fermentation Catalyst
Don't underestimate the importance of sugar in this process! Sugar acts as a fermentation catalyst, helping the natural yeasts in the air transform your apple mixture into vinegar. For optimal results, aim for one tablespoon of sugar per cup of filtered water, or one cup for every gallon of water. This addition fuels the fermentation process, ensuring a tangy, flavorful result.
Water: Filtering the Greatness
Using filtered water makes a significant difference in the quality of your finished product. It ensures any impurities or chlorine present in tap water do not interfere with the fermentation process. Simply pour lukewarm filtered water over your apples in the fermenting vessel until it's almost full, then remember to note the amount—this will help you accurately measure the sugar later. Want to dive deeper into the science of fermentation? Check out resources from the American Society of Brewing Chemists for expert insights.
Now that you’ve gathered your ingredients, you're one step closer to learning how to make homemade apple cider vinegar! Happy fermenting!
Step-by-step Preparation of Homemade Apple Cider Vinegar
Crafting your own apple cider vinegar at home is both satisfying and pleasantly simple. Let’s walk you through the process step by step, ensuring you know exactly how to make homemade apple cider vinegar from scratch.
Gather and Prepare Your Apples
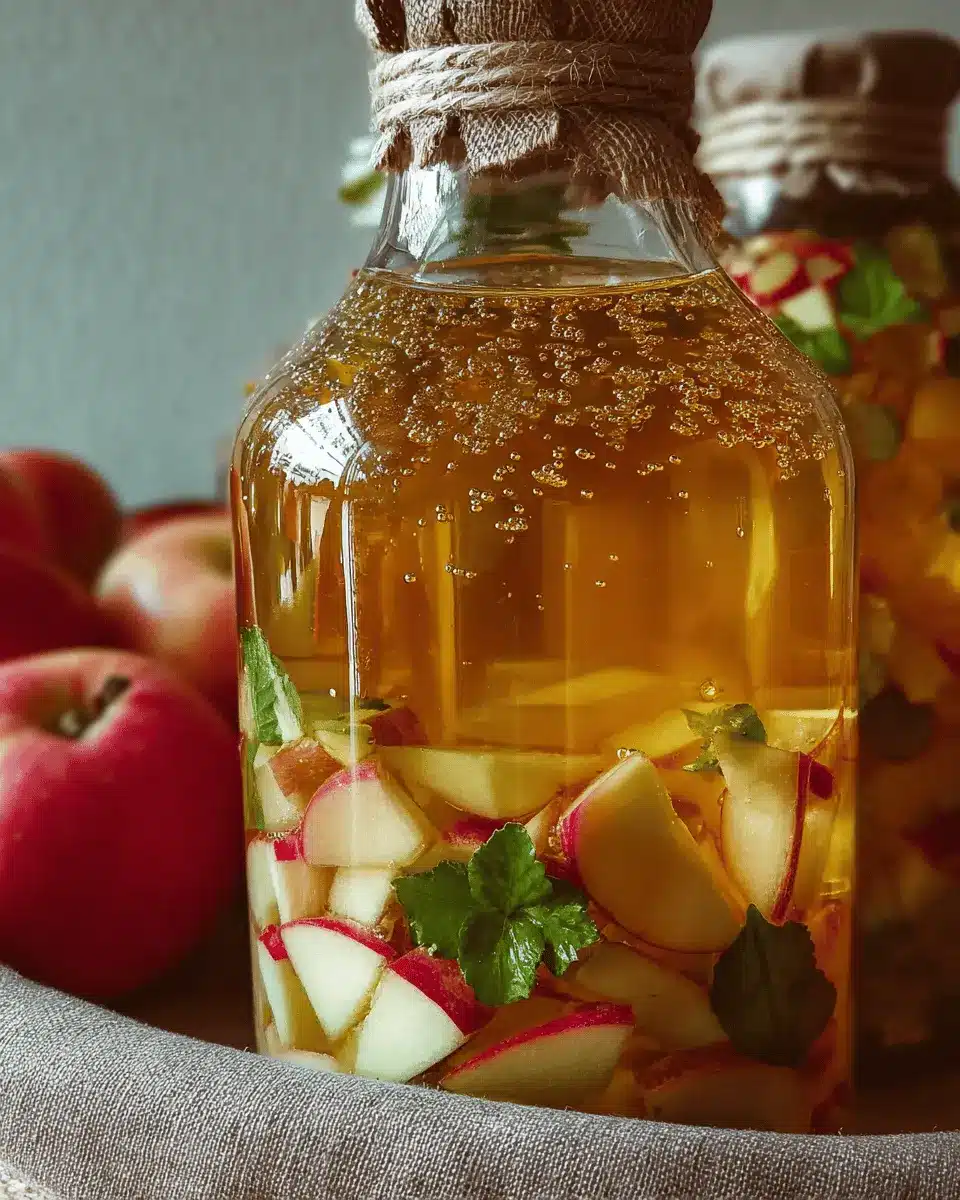
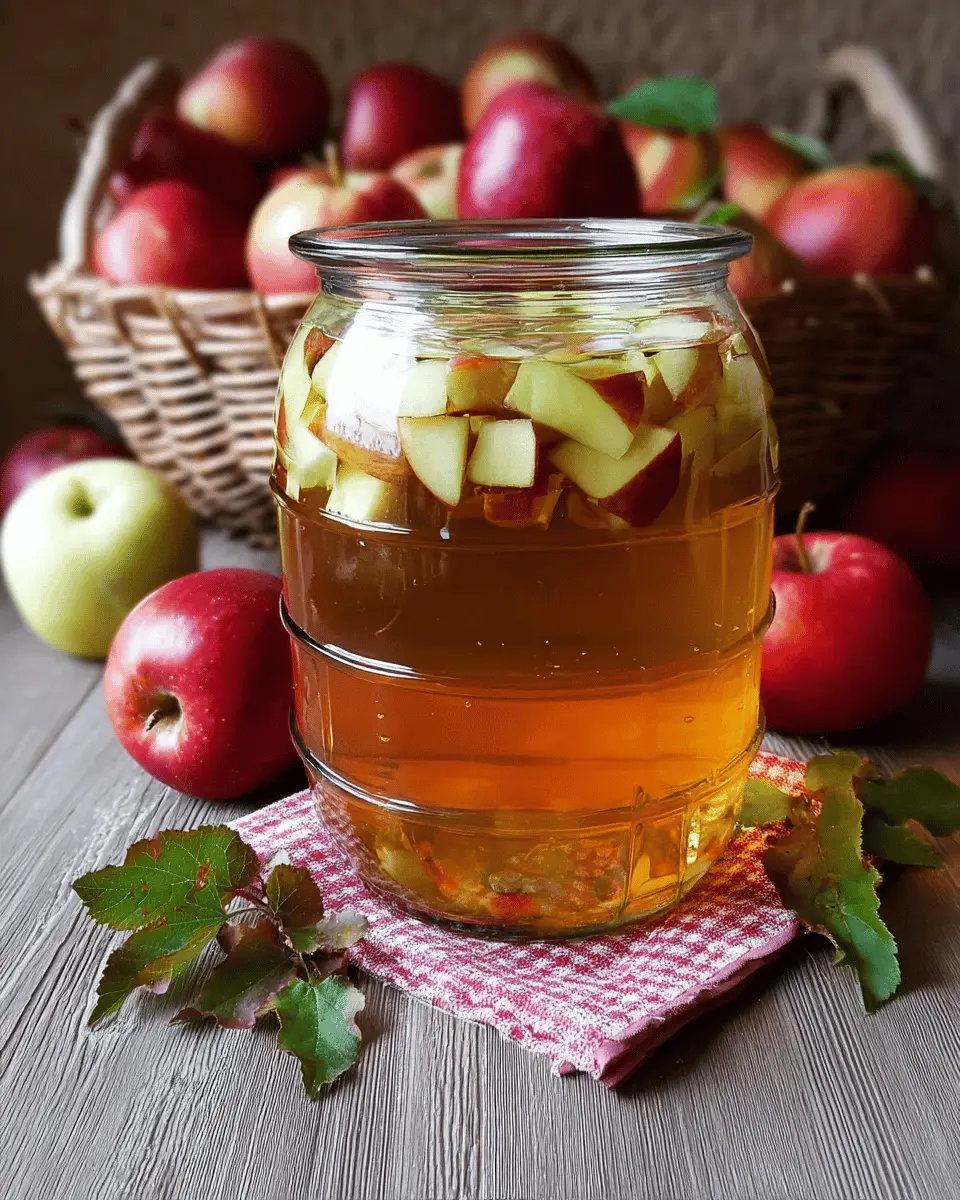
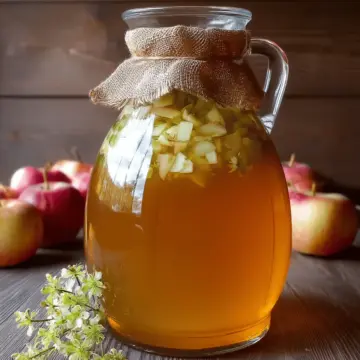
Begin by selecting the right apples. You can use diced apple chunks or even the scraps left over from cooking, like cores and skins. Aim to fill your chosen fermenting vessel halfway. This could be a quart jar, half-gallon jar, or a one-gallon crock—whatever suits you best! If you happen to have extra apples, save them in your freezer for future batches.
Combine Apples and Water in the Fermenting Vessel
Once your apples are ready, pour lukewarm filtered water over them. The water should almost fill the container, so be sure to measure how much you’re adding. This is crucial for later steps, particularly when mixing in sugar!
Mix in the Sugar Properly
The sugar is essential as it acts as food for the fermentation process. You should add 1 tablespoon of sugar per cup of water or 1 cup of sugar per gallon of water. Stir the mixture well until all the sugar is dissolved, creating a sweet concoction that your apples will love!
Optional Inoculation with Store-Bought Vinegar
For an added boost in fermentation, you can include a splash of organic apple cider vinegar (like those available at the store) to your mix. This helps introduce beneficial bacteria to kickstart the process!
Cover and Store Your Mixture
After mixing thoroughly, cover the container with a breathable material—like cheesecloth or a clean kitchen towel. This allows your mixture to breathe while keeping dust and bugs at bay. Store it in a dark spot that's around 70 to 75 degrees Fahrenheit for optimal fermentation.
Stir Daily and Monitor for Mold
Every day, stir your concoction to encourage even fermentation and prevent mold from forming. If you notice any mold on the surface, simply skim it off. This step is vital for ensuring your vinegar develops a lovely, balanced flavor.
Strain and Transfer the Liquid After Two Weeks
After two weeks, it’s time to strain your mixture. Use a fine-mesh sieve or cheesecloth to separate the liquid from the apple bits. Be sure to compost the spent fruit—your garden will thank you! Pour the liquid into a new container, and cover it again, as it's not quite finished yet.
Continue Fermentation to Achieve Desired Tartness
Now, it’s time for the final fermentation phase. Store the strained vinegar in a dark location and let it sit for another 4 to 8 weeks. Taste it periodically to check if it has reached the tartness you desire. Once it meets your palate's criteria, transfer it to bottles and enjoy your homemade apple cider vinegar!
By following these steps and being attentive throughout the process, you'll have your apple cider vinegar ready to elevate your salads, marinades, and maybe even a few health concoctions! Happy fermenting!
Variations on Homemade Apple Cider Vinegar
Creating your own homemade apple cider vinegar is exciting, and there are countless ways to add a personal twist! Here are two delightful variations you can try:
Spiced Apple Cider Vinegar
For a warm, inviting flavor, consider adding spices like cinnamon sticks, cloves, or allspice to your fermenting vessel. These aromatic additions not only enhance the taste but also provide potential health benefits, such as improved digestion. You might enjoy it in salad dressings or as a warming drink when diluted with hot water!
Herbal-Infused Apple Cider Vinegar
If you're a fan of herbs, try infusing your vinegar with fresh rosemary, thyme, or basil. Simply add a handful of your chosen herbs during the fermentation process. This will create a uniquely fragrant vinegar that can elevate marinades, dips, or even homemade beauty products.
Experimenting with flavors makes how to make homemade apple cider vinegar an enjoyable creative project! If you're curious about more ways to enhance your vinegar, check out sites like The Spruce Eats for additional ideas.
Cooking Tips and Notes for Homemade Apple Cider Vinegar
Best containers for fermentation
When learning how to make homemade apple cider vinegar, choosing the right container is key! A glass jar, like a quart or half-gallon size, works wonderfully as it ensures nothing leaches into your vinegar. If you fancy larger batches, consider a ceramic crock, which also helps maintain a stable temperature during fermentation. Just remember, avoid plastic containers—they can release harmful chemicals into your brew!
How to spot signs of proper fermentation
As your vinegar ferments, you’ll notice some exciting changes! Look for a bubbly appearance and slight foaming on the surface—these are great indicators that fermentation is happening. You might also catch a whiff of that tangy aroma; it’s a sign your apples are transforming. Regularly tasting your vinegar at the one-month mark will help you gauge its development and ensure it reaches that perfectly tart flavor you desire! For more tips, check out this resource on fermentation.
Serving Suggestions for Homemade Apple Cider Vinegar
Use in Salad Dressings
One of the simplest and most delightful ways to enjoy your homemade apple cider vinegar is by incorporating it into salad dressings. A tangy vinaigrette can elevate your greens and make even the most mundane salads shine. Mix 1 part vinegar with 3 parts olive oil, a dash of your favorite mustard, and a sprinkle of herbs for a refreshing taste.
Incorporate into Marinades and Sauces
Want to wow your friends at your next barbecue? Use your apple cider vinegar in marinades for chicken, turkey bacon, or even grilled vegetables. Its acidity will tenderize the meat while infusing fantastic flavor. Start with a 1:2 ratio of vinegar to oil, add garlic and your favorite spices, and let your ingredients soak for a few hours before cooking! You’ll be amazed at the difference in flavor.
For more ideas, check out this resource on making homemade dressings and the benefits of apple cider vinegar for additional inspiration!
Time Breakdown for Homemade Apple Cider Vinegar
Preparation Time
Getting started is quick and easy! Expect to spend about 15-20 minutes peeling, chopping, and mixing your ingredients together.
Fermentation Time
Patience is key with fermentation! You'll need to set aside 2–3 months for the apples to ferment properly into that rich apple cider vinegar.
Total Time Until Ready to Use
In total, it might take anywhere from 6 weeks to 3 months until your homemade apple cider vinegar is ready to enjoy. Once it’s fermented to your taste, bottle it and start savoring your creation!
For more tips on how to make homemade apple cider vinegar, check out resources like Fermentation Fanatics that provide great insights into this delightful process. Remember, the reward is worth the wait!
Nutritional Facts for Homemade Apple Cider Vinegar
Calories per tablespoon
Homemade apple cider vinegar contains approximately three calories per tablespoon. This makes it an excellent low-calorie option for enhancing dishes and dressings without adding significant extra calories to your diet.
Health benefits of apple cider vinegar
Not only is it low in calories, but apple cider vinegar has a myriad of health benefits. It may help with weight management, improve digestion, and can even support blood sugar levels. For a more in-depth exploration of the benefits, check out Healthline’s guide on apple cider vinegar and its effects. Incorporating this natural remedy into your routine could be a simple way to bolster your overall wellness!
Finding out how to make homemade apple cider vinegar is as easy as following our recipe above, so why not give it a try? The potential benefits could be just a few weeks away!
FAQs about Homemade Apple Cider Vinegar
How long does homemade apple cider vinegar last?
Once you’ve mastered how to make homemade apple cider vinegar, you'll be happy to know that it can last over a year when stored properly. Just ensure it doesn't develop visible mold or any off-putting flavors or odors. Keeping it in a cool, dark place or the refrigerator will help maintain its quality.
Can I use any type of apple for vinegar?
Absolutely! While using sweet or tart apples can enhance the flavor, you can mix and match varieties based on what you have. For instance, mixing sweet apples with tart ones can create a complex flavor profile for your vinegar. If you want tips on specific apple types, check out this apples for vinegar guide.
What should I do if my vinegar smells bad?
If your vinegar has an unpleasant smell, it's essential to take action. A strong, foul odor may indicate spoilage. First, ensure that you’re smelling only the surface; give it a quick taste to check for unusual flavors. If it's off-putting, it’s best to discard it. For safety, always trust your instincts when it comes to homemade foods! Want to avoid issues altogether? Learn about common mistakes in cider vinegar-making here.
Conclusion on Homemade Apple Cider Vinegar
Creating your own homemade apple cider vinegar is both rewarding and simple! With just a few ingredients and some patience, you can craft a flavorful, versatile addition to your kitchen. Remember to taste along the way and adjust the fermentation time to suit your palate. Enjoy!
How to Make Homemade Apple Cider Vinegar
Equipment
- quart jar
- half-gallon jar
- 1 gallon crock
Ingredients
Apple Ingredients
- ½ gallon diced apple chunks or apple scraps Fill half of the fermenting vessel
- 1 tablespoon sugar per 1 cup filtered water
- 1 cup sugar per 1 gallon filtered water
Instructions
Fermentation Steps
- Wash and chop the apples into chunks, or gather collected apple scraps and add them to your jar until it's halfway full.
- Pour lukewarm filtered water over the apples until almost full, noting the total amount of water added.
- Stir in sugar in ratios of 1 tablespoon of sugar per cup of water added, or 1 cup of sugar per gallon of water.
- Optional: Add a splash of finished organic apple cider vinegar to inoculate the culture and encourage fermenting.
- Stir combined ingredients until thoroughly mixed, and cover with breathable material.
- Store in a dark location around 70 to 75 degrees F for two weeks to ferment, and stir every day.
- After two weeks, strain and reserve the liquid into a similar sized container and cover again. Compost the spent fruit.
- Move the covered container of liquid to a location to continue long term fermentation, out of the way.
- After one month, sample the vinegar to see if it is finished fermenting and tart to your liking.
- Once it is fermented to your desired flavor, transfer the apple cider vinegar into bottles with lids and store.
- Properly fermented apple cider vinegar should stay good for over a year, without mold or strong unusual flavors.


Leave a Reply