
Introduction to Salt Dough Recipe for Ornaments
Creating ornaments with a salt dough recipe is a wonderfully engaging activity that blends creativity with nostalgia. Whether you're a seasoned crafter or just starting out, salt dough ornaments are accessible for everyone, especially as a fun project to tackle with friends or family. The simple ingredients—flour, salt, and warm water—combine to form a versatile dough that can be shaped into endless designs.
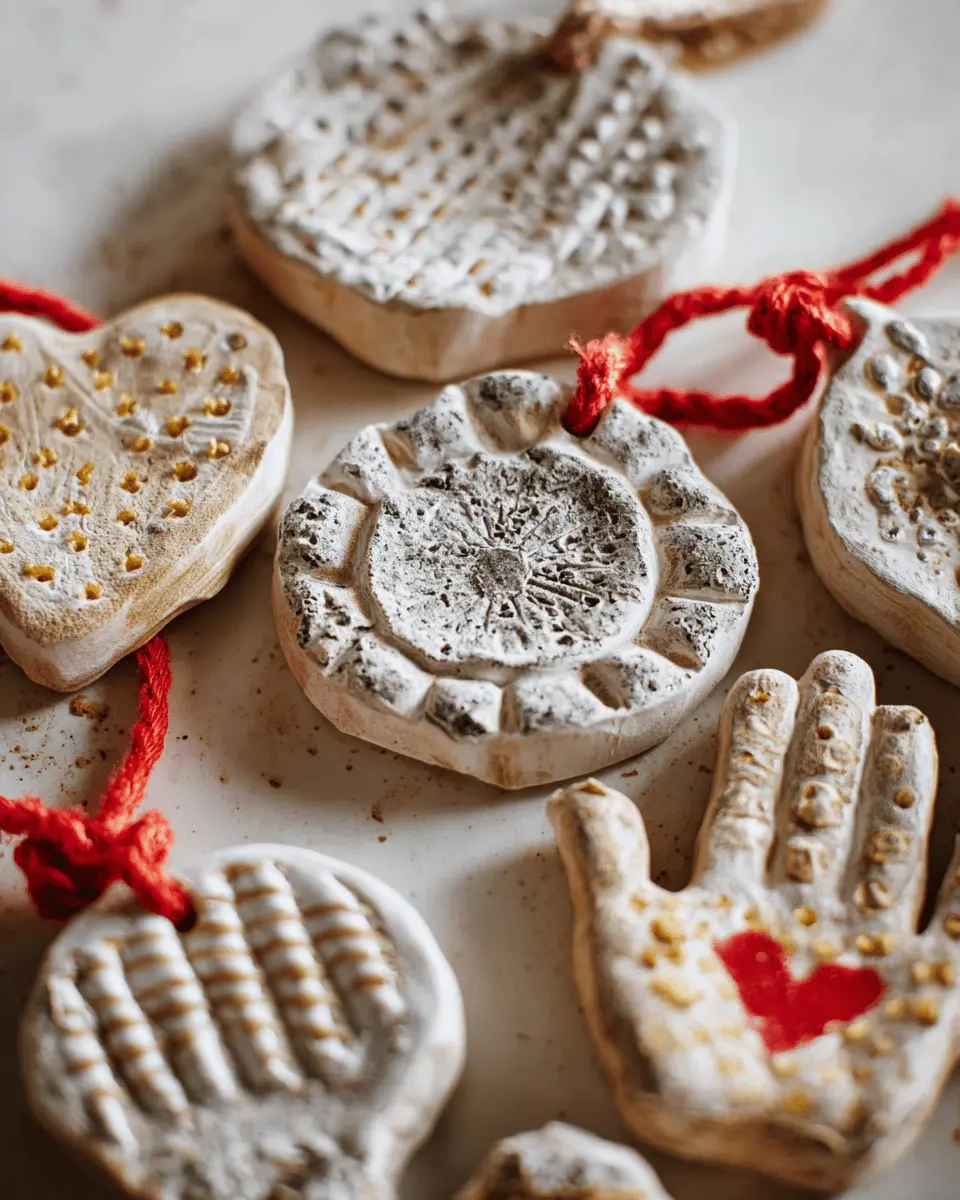
But why choose salt dough in the first place? These homemade ornaments not only capture precious memories but also allow for personalization that store-bought decorations can’t match. Imagine capturing your child’s handprint or designing unique holiday gifts that become cherished keepsakes. You can explore various techniques from painting to glitter, and even baking them to create durable mementos.
Moreover, opportunity abounds for festive decorating, making your creations the talk of the holiday season. This versatile salt dough recipe for ornaments, handprints, and crafting enables you to embrace your artistic side while keeping costs low. Curious about how to make your own? Let’s dive into the ingredients and steps that make this craft a delightful holiday tradition!
For helpful tips and inspiration, check out resources like Crafting an Icon or The Spruce Crafts.
Ingredients for Your Salt Dough Recipe for Ornaments
Creating beautiful ornaments starts with the right ingredients. This Salt Dough Recipe for Ornaments is simple yet effective, perfect for crafting with friends or enjoying a cozy day at home. Here’s what you'll need:
- 4 cups all-purpose flour: This is the base of your dough, providing structure and texture.
- 1 cup table salt: Not only does it add flavor, but the salt helps to preserve your ornaments, ensuring they last for years to come.
- 1 ½ cups warm water: This helps to bring your dough together, making it pliable and easy to work with.
As you gather these ingredients, consider how you might personalize your decorations. Maybe a sprinkle of glitter or a unique color after baking? The sky's the limit! For more crafting tips, check out this article on simple DIY ornaments. Happy crafting!
Step-by-Step Preparation for Salt Dough Ornaments
Creating your own salt dough ornaments can be a delightful craft activity, perfect for enhancing your home's festive spirit. Here’s how to bring your Salt Dough Recipe for Ornaments to life, step by step.
Gather Your Ingredients
To kick off your crafting adventure, you’ll need to get a hold of some simple ingredients. Here’s what you need for your Salt Dough Recipe for Ornaments:
- 4 cups all-purpose flour
- 1 cup table salt
- 1 ½ cups warm water
You likely have most of these ingredients in your kitchen already – bonus! Before you get started, make sure you have a clean workspace and perhaps some fun cookie cutters to expedite the process.
Make the Dough
Once you’ve gathered your ingredients, it’s time to roll up your sleeves. In a large bowl, whisk together the flour and salt. Gradually add the warm water while stirring. You can use a mixing spoon at first, but soon enough, you’ll want to dive in with your hands. Knead the dough for about five minutes until it becomes soft and pliable.
Roll Out the Dough
Now that your dough is ready, it’s rolling time! Take a portion of your dough and place it between two large pieces of parchment paper. This will prevent the dough from sticking to your surface and make clean-up much easier. Roll it out to about ⅛ inch thick. You want it thin enough to cut shapes but thick enough to hold together.
Cut Shapes and Create Holes
Once your dough is rolled out, it’s time to unleash your creativity! Using cookie cutters, cut out your desired shapes. Keep them on the parchment paper as you peel away the excess dough. Remember to poke a hole at the top of each ornament using a straw or toothpick for hanging.
Bake Your Salt Dough Creations
Preheat your oven to 200°F. Transfer the parchment with your cut shapes onto a baking sheet and place it in the oven. Bake until the ornaments are hard, starting to check at the hour mark. Depending on their thickness, they may take up to two hours. Keep an eye on them to avoid any unintentional browning.
Let Your Ornaments Cool
Once baked, remove your ornaments from the oven and let them cool completely on a wire rack. Patience is key here; letting them fully cool will ensure they don’t get damaged while decorating.
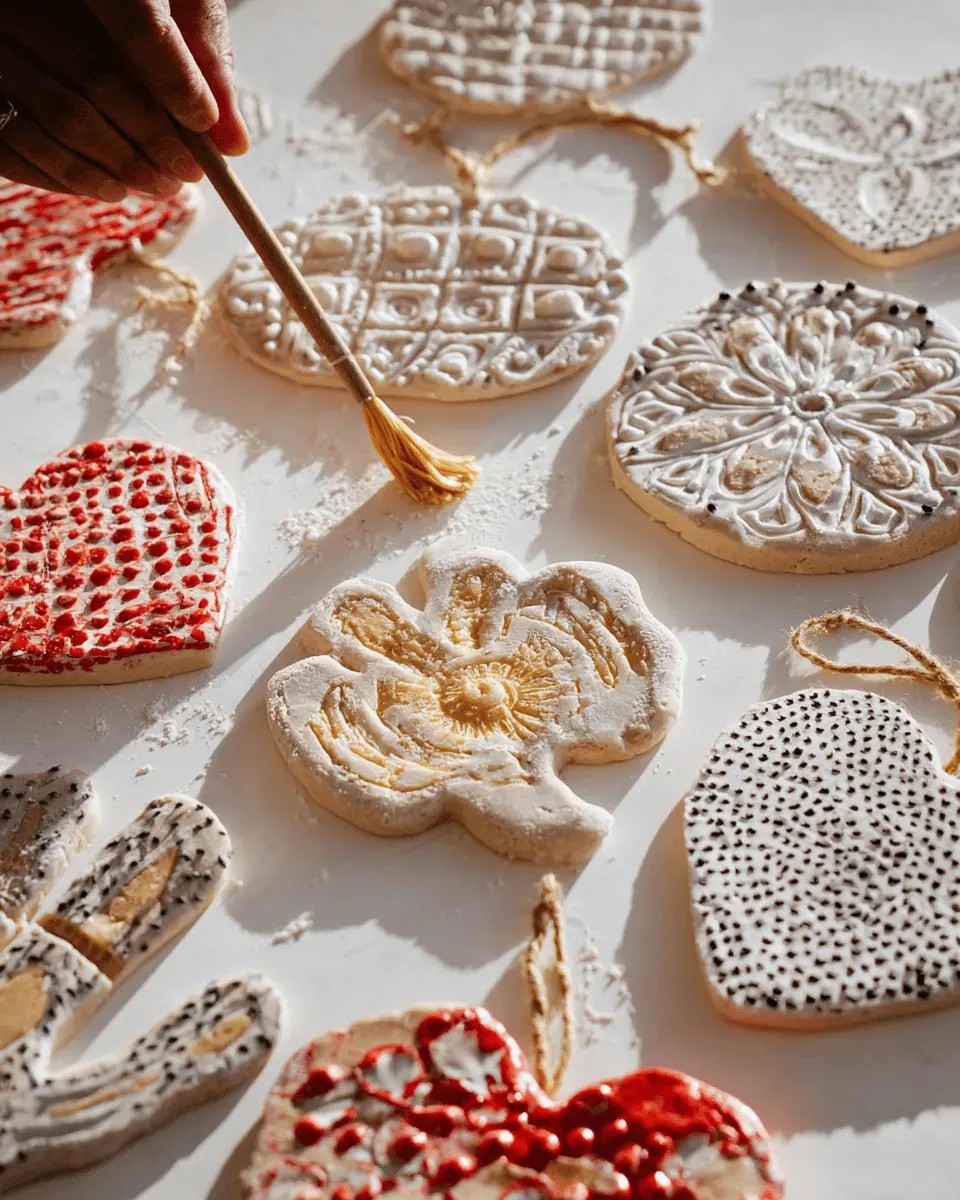
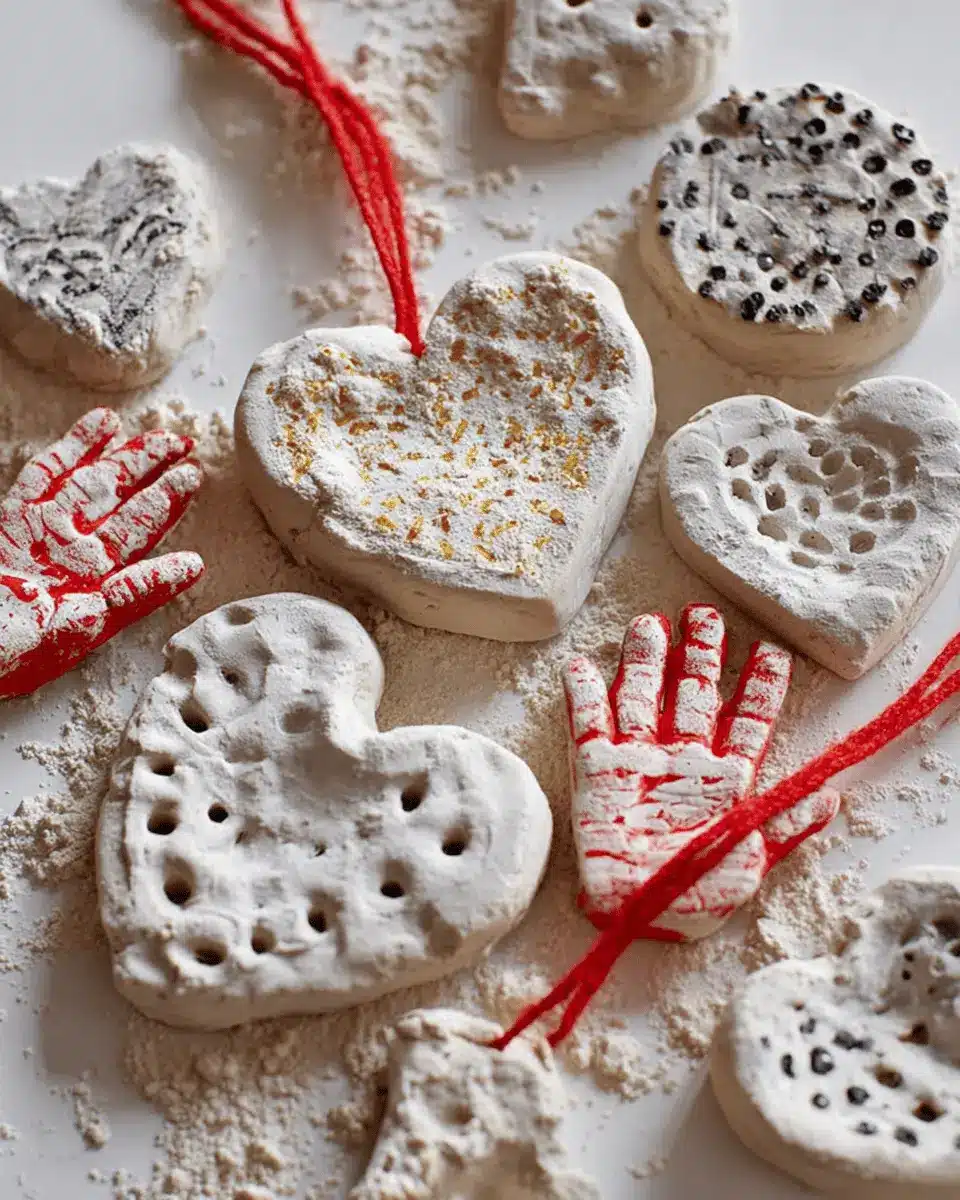
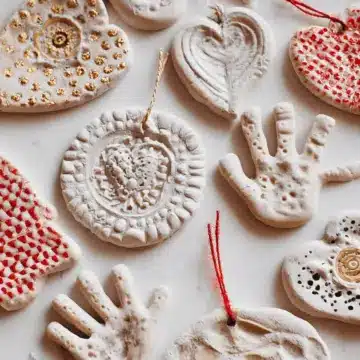
Decorate Your Ornaments
Now for the fun part! Grab your paints, glitter, or markers, and get creative. Whether you want to keep it simple or go all out with decorations, this is your time to shine. To help your ornaments last through the years (I have some that’ve survived 30 winters!), consider spraying them lightly with polyurethane. Finally, thread on a ribbon and hang them on your tree or around your home!
By following these clear steps, you'll not only have a lovely collection of custom ornaments but also create beautiful memories along the way. For more tips and tricks, feel free to check out our other crafting articles!
Variations of Salt Dough Ornaments
Seasonal Designs
Transform your salt dough ornaments into festive decorations with seasonal themes! For winter, create snowflakes or mittens; in spring, think flowers or bunnies. For a crafty twist, try turning them into Thanksgiving turkeys or Halloween pumpkins. This is a fun way to add custom touches to your home or gifts.
Eco-Friendly Decorations
Crafting with salt dough is not only enjoyable but also eco-friendly. Since the ingredients are simple and natural, you can decorate your home sustainably. Use natural dyes or even plant-based paints for decorating, ensuring that your holiday decor is non-toxic and safe for family gatherings.
Personalized Gifts
Looking for a unique gift idea? Use this salt dough recipe for ornaments to create personalized keepsakes. Customize shapes to represent important milestones, like handprints for baby’s first holidays or initials for newlyweds. They make heartfelt presents that loved ones will cherish for years to come. Don't forget to check out this guide for more inspiration!
Cooking Tips and Notes for Salt Dough Ornaments
Best Practices for Baking
Creating salt dough ornaments is all about patience. Bake your ornaments at a low temperature of 200°F to ensure they dry evenly and don’t crack. Check on them starting at the hour mark, and remember: it could take up to two hours. When they’re hard, let them cool completely before decorating. This is the perfect time to imagine what colors and embellishments you want to bring to life!
Storage Tips for Unused Dough
If you find yourself with leftover dough, don’t panic! Simply wrap it tightly in plastic wrap and store it in an airtight container. It can stay fresh in the fridge for about a week, allowing you to craft more ornaments later! For long-term storage, consider freezing it. Just remember to let it thaw before using.
For more on crafting with salt dough, check out this resource for creative ideas!
Serving Suggestions for Salt Dough Ornaments
Creating salt dough ornaments isn't just about the crafting; it's also about how you showcase your creativity afterwards!
Creative display ideas
Hang your ornaments around your home for a personal touch. Try:
- Stringing them along a mantel or window frame.
- Using shadow boxes to create themed displays for holidays.
- Incorporating them into wreaths for a festive flair.
Unique gift wrapping techniques
Your handmade salt dough ornaments make fantastic gifts! Elevate your wrapping by:
- Using eco-friendly materials like burlap or recycled paper.
- Tying the ornament to a gift package with twine for a rustic look.
- Creating a personalized tag that includes your recipe or a fun memory associated with the ornament.
For more creative ideas, consider checking platforms like Pinterest for innovative decorating and gifting tips!
Time Breakdown for Salt Dough Ornaments
Preparation time
Creating your salt dough is a breeze and takes about 15 minutes. Gather your ingredients and mix until everything is well combined.
Baking time
Once you shape your ornaments, bake them at a low temperature for about 1 to 2 hours. It’s crucial to keep an eye on them to avoid over-baking.
Total time
All in all, expect the entire process to take around 2 to 3 hours, giving you ample time to unleash your creativity and make your festive decorations truly one-of-a-kind!
For more tips, check out resources like Instructables or Pinterest for inspiration on decorating your salt dough ornaments. Happy crafting!
Nutritional Facts of Salt Dough
When crafting with the Salt Dough Recipe for Ornaments, it's essential to understand that this mixture is not intended for consumption. Here's a brief look at the ingredients breakdown and some safety notes to keep in mind.
Ingredients Breakdown
- Flour: Provides structure for your dough.
- Salt: Acts as a preservative but can be harmful if ingested in large amounts.
- Water: Binds the ingredients together, creating a malleable texture.
Safety Notes
Even though this salt dough is non-toxic, it shouldn’t be eaten. If children are involved in the crafting process, please supervise closely and remind them that this is for art, not snacking. Always wash hands after crafting to avoid any ingestion of salt or flour. Curious minds can read more about safe crafting for kids here.
This recipe is perfect for creating lasting memories with your loved ones!
FAQs about Salt Dough Recipe for Ornaments
Can I use different types of flour?
Absolutely! While the classic salt dough recipe for ornaments calls for all-purpose flour, you can experiment with alternatives. Whole wheat flour adds a rustic touch, and rice flour can make the dough gluten-free. Keep in mind that textures and colors may vary, so your ornaments can have a unique flair!
How long do salt dough ornaments last?
If stored properly, salt dough ornaments can last many years—I've got some from over three decades ago that still look fantastic! To prolong their life, store them in a cool, dry place, ideally in a box or container to protect them from moisture.
What should I do if my dough is too dry?
If your dough feels crumbly, add a small amount of warm water, a teaspoon at a time, and knead until it reaches a smooth consistency. Too wet? Just sprinkle in a bit of flour. The goal is a soft, pliable dough that’s perfect for crafting those cherished ornaments!
For more tips, check out this guide on crafting with salt dough. Happy crafting!
Conclusion on Salt Dough Recipe for Ornaments
Creating ornaments using the salt dough recipe for ornaments brings a personal touch to your holiday décor. This fun and easy craft allows for family bonding and creativity. Remember to store your dough properly, and don’t hesitate to explore various decoration techniques. Happy crafting! For more tips, check out this guide to holiday crafting.
Salt Dough Recipe for Ornaments, Handprints, and Crafting
Equipment
- large bowl
- Rolling Pin
- baking sheet
- Parchment paper
- cookie cutters
- Straw or toothpick
Ingredients
Dry Ingredients
- 4 cups all-purpose flour
- 1 cup table salt
Wet Ingredients
- 1.5 cups warm water
Instructions
To Make Dough
- In a large bowl, whisk together the flour and salt. Slowly stream in the water while stirring until it comes together. Finish mixing together with hands. Knead until dough is soft, about five minutes.
To Bake Ornaments
- Preheat oven to 200°F. Place half of the dough between two large pieces of parchment paper. Roll out until ⅛" thick. Remove the top sheet of parchment.
- Using cookie cutters, cut shapes (leaving them on the parchment). Peel away the excess dough. Transfer the parchment with shapes to a baking sheet.
- Using a straw or toothpick, poke a hole for ribbon or an ornament hanger. Bake in the preheated oven until hard, starting to check at the hour mark. It could take as much as two hours.
- Once cooled, decorate using glitter and paint. To make sure the ornaments last a long time, spray with a light coat of polyurethane spray. Thread on a ribbon and hang on tree.


Leave a Reply